
This post may contain affiliate links. Please read our disclosure policy.
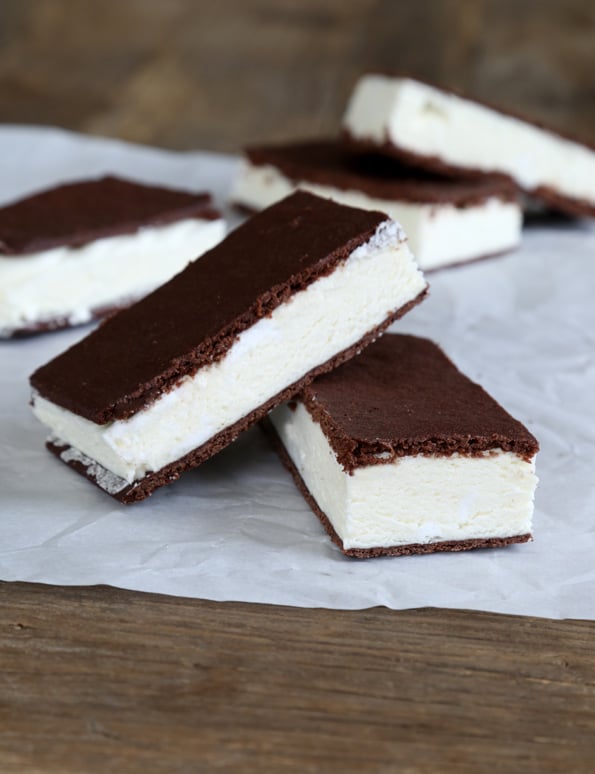
Classic gluten free ice cream sandwiches are made the easy way by baking big slabs of soft chocolate wafer cookies that are filled with soft homemade or store-bought gf ice cream. Who needs the ice cream truck?

Table of Contents
- What makes this gluten free ice cream sandwich recipe special
- Gluten free ice cream sandwich wafer ingredients
- How to make gluten free ice cream sandwiches
- Gluten free ice cream sandwich variations & substitution suggestions
- FAQs
- How to store gluten-free ice cream sandwiches
- Classic Gluten Free Ice Cream Sandwiches Recipe
What makes this gluten free ice cream sandwich recipe special
You can always take two gluten free cookies of any kind, add some ice cream in between, and eat them like an ice cream sandwich. In fact, that works really well with two of our thin and chewy chocolate chip cookies.
But I really wanted my gluten free son to have a classic gluten free ice cream sandwich, like you get from the ice cream truck. I have fond memories of summer camp as a kid, and when ice cream sandwiches were the afternoon snack, we lost our minds. This is that sort of ice cream sandwich, and here's what great about this recipe:
- Sturdy, chewy chocolate wafers: The wafers in this recipe are soft, yet sturdy enough to hold up to the ice cream for an extended period of time and chewy, so they don't crack when you bite them.
- Versatile: You can use any flavor of ice cream that you like, and even add mix-ins to the ice cream, too. You can use homemade ice cream, since it starts out soft and easy to spread, but you can also let store-bought ice cream soften a bit, and then refreeze it between the chocolate wafer sheets.
- Quick to make: With only a few ingredients, and just a bowl and a spoon, these gluten free ice cream sandwiches come together in no time.
- Minimal fuss: We bake the wafer cookies in sheets to save time and make life easier. When you're ready, just slice the whole 8-inch square slab into 8 equal rectangles.

Gluten free ice cream sandwich wafer ingredients
There are 3 parts to making this recipe: making the chocolate wafers, making the ice cream filling (or buying it and letting it soften), and then filling the wafers with the ice cream. Here are the ingredients you'll need to make the chocolate wafers for these ice cream sandwiches:
- Gluten free flour: I used Better Batter here, which also contains xanthan gum. It's balanced perfectly to make chewy wafers that are still tender and never every gritty. If you're using a gluten free flour blend like Nicole's Best that doesn't contain xanthan gum, you'll need to add 1/2 teaspoon of xanthan gum to the 7/8 cup or 123 grams of your gluten free multipurpose flour blend.
- Cocoa powder: This is the only source of chocolate flavor in these wafer cookies, so I like to use something rich, like Dutch-processed cocoa powder. I like Rodelle brand. There's a touch of baking soda, though, in the recipe which will neutralize any acid of natural cocoa powder that's been removed in Dutch-process, so natural will work.
- Salt: I always bake with kosher salt, or lightly flaked sea salt, since it's harder to overmeasure, especially when you're using a tiny amount like 1/8 teaspoon. Salt helps brighten the flavor of these wafers.
- Granulated sugar: brings tenderness and sweetness, and helps ensure that the wafers aren't too soft.
- Light brown sugar: adds sweetness, and also a bit of richness and depth from the molasses in it.
- Unsalted butter: adds tenderness, moisture, and richness to your wafers. Be sure you let it cool first until it's no longer hot to the touch after you melt it, or the cookie dough will feel greasy as you work with it.
- Egg: The egg helps bind the wafers together and gives them a little rise in baking.
- Vanilla extract: adds depth of flavor to the chocolate wafers.
How to make gluten free ice cream sandwiches
Let's talk about how to make the chocolate wafers in large sheets that form the top and bottom of these ice cream sandwiches. Rather than making individual chocolate wafers and sandwiching them with ice cream, we make a sheet of chocolate wafers, fill it and top it with another sheet of chocolate wafers, and then slice into individual sandwiches.
And when you make your own ice cream for these ice cream sandwiches, you don't freeze the ice cream until it's between the two cookie layers!
Making the chocolate wafer cookie dough

- Whisk together the dry ingredients (gluten free flour blend (with xanthan gum), cocoa powder, baking soda, salt granulated sugar, brown sugar) in a large mixing bowl.
- Add the wet ingredients (melted butter, egg, vanilla) and mix to combine.
- The dough will be smooth and soft, and should be pliable.
- Be sure that your butter has cooled after you melt it, or the wafer dough may feel greasy.
Shaping the chocolate wafer dough

- Divide the cookie wafer dough into 2 equal pieces and work with one at a time.
- Place a sheet of parchment paper on a flat surface, and place one piece of dough on top. Cover the dough with a second piece of parchment, and use a rolling pin to roll the dough into a shape that’s about 1/4-inch thick and about 8-inches square.
- Remove the top parchment, and use a knife, pastry sheet, or pizza cutter to trim the rough edges and create a square that’s about 7 1/2 inches all around.
- With the square still on the parchment, fold the parchment in on all 4 sides so it covers the edges of the dough.
- Lower the square, still on the paper, gently into an 8-inch pan and press it down gently into the bottom of the pan. Fold the sides of the paper back onto the sides of the pan to expose the square of cookie dough.
- Repeat with the other piece of dough and second pan. If you only have one pan, shape and bake one at a time, and then let the pan cool before finishing with the second half of the dough.
- Place the baking pans (or baking pan) in a 325°F and bake just until the chocolate wafers are set in the center. Since the dough is dark in color, you won’t see it brown but the center won’t be shiny any more.
- Remove the pans from the oven and allow the wafers to cool completely before removing them.
- Lift the wafer sheet out carefully by holding all 4 sides of the parchment at once.
Finishing the ice cream sandwiches

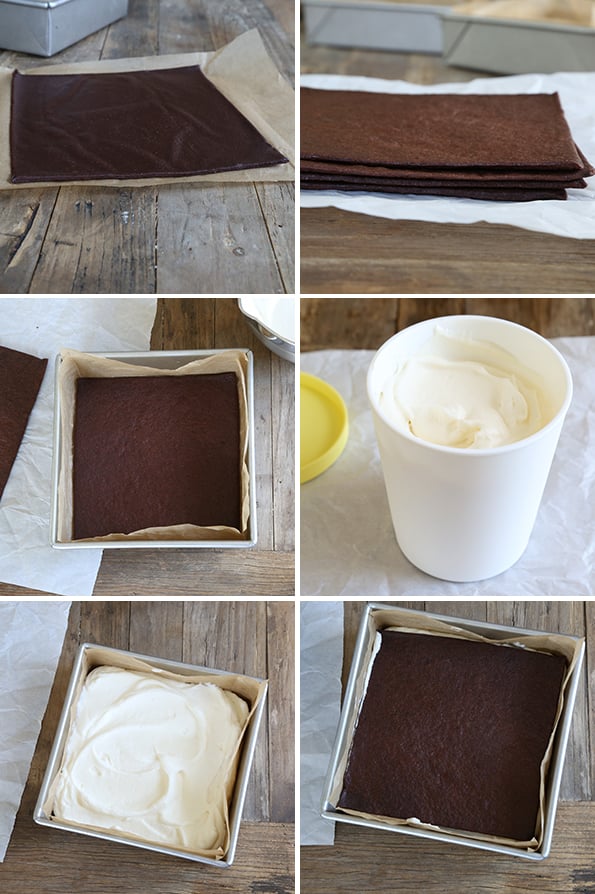
- Once the wafer cookies are cool, turn one one of the two cookie squares upside down. Place it on criss-crossed sheets of unbleached parchment paper, each sheet about 8-inches wide.
- Lower the paper and wafer square back into a cooled 8-inch square baking pan, and press gently into the bottom of the pan.
- Place approximately half of the ice cream mixture on top of cookie square,
- Spread the ice cream into an even layer with an offset spatula.
- Top with the remaining cookie square, right side up, and press down firmly but carefully.
- Place the baking pan in the freezer until the ice cream is firm (at least 4 hours).
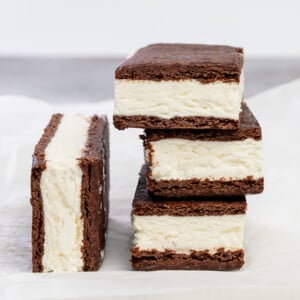
- Once the ice cream is frozen, remove the whole thing from the pan, and slice in half down the center, then each half into 4 rectangles of equal size for a total of 8 ice cream sandwiches.

Gluten free ice cream sandwich variations & substitution suggestions
You can use whatever ice cream you like to create the perfect ice cream sandwich. Mint choc chip? Pistachio? Salted caramel? Roasted strawberry ice cream? Raspberry swirl?
Whatever your favorite ice cream flavor, if it pairs with chocolate, you can use it in these gluten free ice cream sandwiches, as long as you know the ice cream is gluten free too. And, you can make them dairy free.
Dairy-free ice cream sandwiches
For those who are lactose intolerant or vegan, try using dairy free ice cream instead of regular ice cream. You'll also need to switch out the butter for vegan butter (try Miyoko's Kitchen brand or Melt brand).
Egg free ice cream sandwiches
If you're following a vegan gluten free diet or if you're just avoiding eggs, you'll need to replace the egg. In which case, I recommend using a “chia egg”, which is 1 tablespoon of ground white chia seeds and 1 tablespoon of lukewarm water, mixed and allowed to gel.

FAQs
There's lots of choices when it comes to gluten free flour blends. In this recipe for classic ice cream sandwiches, I used my Mock Better Batter recipe, but regular Better Batter or Cup4Cup will work, too.
I recommend using Dutch-processed cocoa powder here because it's the only source of chocolate flavor and Dutched cocoa powder is richer than natural, which is also a bit acidic. If you do use natural cocoa powder, the recipe has a touch of baking soda to neutralize the acid and prevent any problems in baking, so it will work fine. It just won't produce the same rich result.
Ice cream sandwiches are not usually gluten free, since ice cream is usually gluten free, but the wafers or cookies that make the sandwich are made with wheat flour unless they're specifically made gluten free. FatBoy Ice Cream does make a packaged gluten free ice cream sandwich, but they are made in a shared facility that also processes wheat and aren't available in all markets.
Yes! If you want to make things even easier, you can make the chocolate wafer cookie squares way ahead of time. Like, days and even weeks ahead of time.
Just stack the baked cookie squares, wrap them tightly with plastic wrap and stick them in the freezer. You don't even have to thaw them.
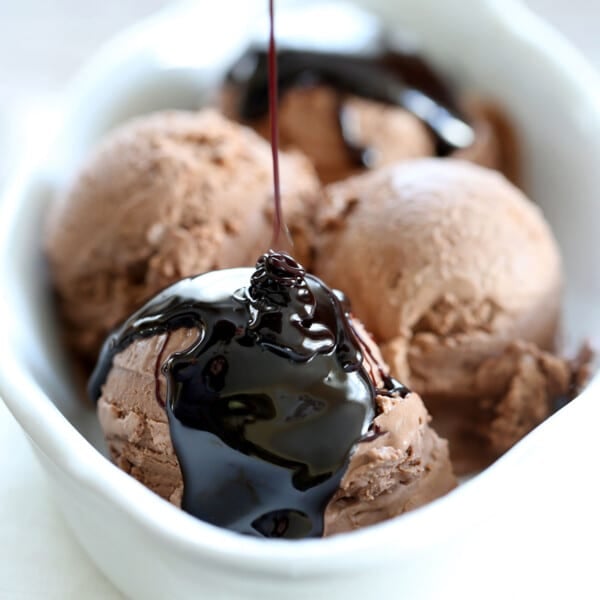
No. You don't have to use homemade ice cream if you don't want to. You could use pretty much any vanilla ice cream in these classic ice cream sandwiches. But if you do decide to go homemade, you won't necessarily even need an ice cream maker. The ice cream in the recipe below is made without an ice cream maker by making a gelatin-based marshmallow mixture, then mixing that with homemade whipped cream. Marshmallow ice cream is very much like my classic 3-ingredient No Machine Ice Cream, which you make with sweetened condensed milk in place of the homemade marshmallow mixture.
If you didn't let the melted butter cool before adding it to the other chocolate wafer ingredients, the raw wafer dough will probably feel a bit greasy to the touch. Try gathering the dough into a ball, covering it with plastic wrap, and letting it sit in the refrigerator for 10 minutes before working with it again.
If you don't mind having uneven, somewhat patchy chocolate wafers, you can try lining the square baking pans and pressing half of the raw chocolate wafer dough into the bottom. To smooth the dough out, try using a small roller if you have one, or even the bottom of a glass to smooth it out. Or maybe try pressing the dough roughly into the bottom of the lined pan, covering it with another piece of parchment, then nesting another square baking pan on top and pressing down. Remove the top pan and top paper, and the dough should be relatively smooth.
How to store gluten-free ice cream sandwiches
Once assembled, wrap each sandwich individually in plastic wrap or aluminum foil and store them in an airtight container in the freezer until you're ready to serve. If you wrap them tightly, they'll stay fresh-tasting for up to 3 months.
When you're ready to enjoy them, like all ice cream treats, they melt pretty fast. So don't take them out of the freezer until you're ready to eat them.

Classic Gluten Free Ice Cream Sandwiches
Equipment
- Handheld or stand mixer
- Candy thermometer for making ice cream
Ingredients
For the chocolate wafers
- ⅞ cups (123 g) all purpose gluten free flour blend, (I used Better Batter; please click thru for full info on appropriate blends)
- ½ teaspoon xanthan gum, omit if your blend already contains it
- ¼ cup (20 g) unsweetened cocoa powder, (natural or Dutch-processed is fine, but I prefer Dutch-processed)
- ⅛ teaspoon baking soda
- ⅛ teaspoon kosher salt
- ⅛ cup (25 g) granulated sugar
- ¼ cup (55 g) packed light brown sugar
- 4 tablespoons (56 g) unsalted butter, melted and cooled
- 1 (50 g (weighed out of shell)) egg, at room temperature, beaten
- 1 teaspoons pure vanilla extract
For the marshmallow ice cream (See Recipe Notes)
- 2 cups (16 fluid ounces) heavy whipping cream
- ½ packet (4 g) unflavored powdered gelatin
- ½ cup (4 fluid ounces) warm water
- 1 cup (200 g) granulated sugar
- ⅛ teaspoon cream of tartar
- ⅛ teaspoon kosher salt
- ½ teaspoon pure vanilla extract
Instructions
Make the chocolate wafers.
- Preheat your oven to 325°F. Set aside two 8-inch square metal baking pans. Do not grease or line them.
- In a large bowl, place the flour blend, xanthan gum, cocoa powder, baking soda, salt and granulated sugar, and whisk to combine well.
- Add the brown sugar and whisk again, working out any lumps.
- Create a well in the center of the dry ingredients and add the melted butter, egg and vanilla, and mix to combine. The dough should come together and be smooth and pliable.
- Divide the dough into two equal pieces. Working with one piece at a time, place it between two sheets of unbleached parchment paper.
- Roll into a square that is about 8-inches all around, and about 1/4-inch thick.
- Remove the top piece of parchment, and trim the edges to create a 7 1/2-inch square with a pastry or pizza wheel or a sharp knife.
- Transfer the dough, still on the bottom piece of parchment paper, to one of the 8-inch square pans, folding the sides of the parchment as necessary to allow the dough to lie flat in the pan.
- Repeat with the second piece of dough.
- Place the two pans in the preheated oven. Bake until set in the center (about 8 minutes).
- Remove the pans from the oven and allow the wafers to cool in the pans for at least 10 minutes before transferring to a wire rack to cool completely.
Make the ice cream.
- In the bowl of your stand mixer fitted with the whisk attachment or a large bowl with a handheld mixer, place the heavy whipping cream. Beat on medium speed until the cream holds soft peaks.
- Transfer the mixture to another bowl and place in the refrigerator to chill.
- In the clean bowl of your stand mixer fitted with the whisk attachment or another large bowl with a handheld mixer, place the gelatin and 1/4 cup (2 fluid ounces) warm water.
- Mix together and allow to sit until the gelatin blooms. It will swell. In a small, heavy-bottom saucepan, place the remaining 1/4 cup (2 fluid ounces) water, sugar, cream of tartar and salt, and mix to combine.
- Clip a candy or deep fry thermometer to the side of the saucepan and place it over medium heat. Allow the sugar mixture to cook undisturbed until the temperature reaches the softball stage, 238°F.
- Remove from the heat, add the vanilla and pour the hot sugar mixture down the side of the mixing bowl with the bloomed gelatin, making sure it doesn’t hit the whisk. The mixture will bubble and then subside.
- Beat the mixture with the whisk on medium speed until the mixture is thick, white and glossy, and has nearly tripled in size.
- Remove the whipped cream from the refrigerator and fold it carefully into the marshmallow mixture until well-combined.
Assemble the ice cream sandwiches.
- Once the wafer cookies are cool, turn one one of the two cookie squares upside down on criss-crossed sheets of unbleached parchment paper, each sheet about 8-inches wide. Lower the paper and wafer square back into a cooled 8-inch square baking pan.
- Place approximately half of the ice cream mixture on top of cookie square, and spread the ice cream into an even layer. This is easiest to do with an offset spatula.
- Top with the remaining cookie square, and press down firmly but carefully.
- Place the baking pan in the freezer until the ice cream is firm (at least 4 hours).
- Once the ice cream is frozen, remove the whole thing from the pan, and slice in half down the center, then each half into 4 rectangles of equal size for a total of 8 ice cream sandwiches.
- Wrap ice cream sandwiches individually in plastic wrap and store in the freezer until ready to serve.
Video
Notes
Nutrition information is automatically calculated, so should only be used as an approximation.


I was craving an ice cream sandwich and these chocolate wafers are AMAZING! So delicious
These are fantastic, but why does it say both 8 fluid ounces and 16 fluid ounces of heavy cream for the ice cream??? I just wing it, going with just over 8 ounces, but it always trips me up when I read it! Either way, they always turn out delicious
Thank you so much for pointing that out! It should only read 16 fluid ounces, and now it does. The ice cream recipe was previously only incorporated by reference, and I made an error when writing it out. It’s fixed now. :)