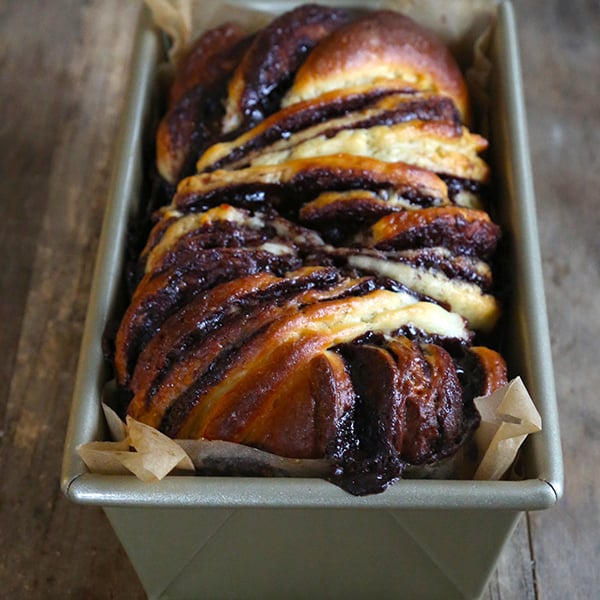

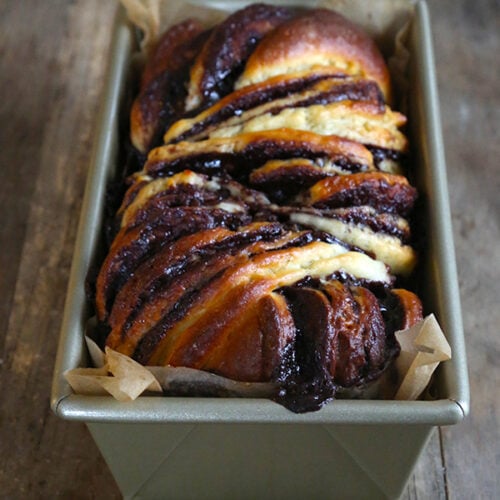
Gluten free chocolate babka is way easier than it looks, with a big “wow” factor!
WANT TO SAVE THIS RECIPE?
I wasn't even planning to mention this, but I can't stop thinking about it: Have you been wondering what's in the new book, Gluten Free Classic Snacks (please say yes!)? As of yesterday, I've started reviewing the page proofs of the book (an electronic PDF copy of the book, with the final layout and photos!!), and it's simply gorgeous. This new book is packed with recipes and full color photos of every single possible packaged snack, cookie, cracker and candy you never thought you'd have again. The ones you thought you'd never, ever be able to share with your gluten free kid. Those. ALL of those. And I've secured permission to share the whole Table of Contents with you. I plan to tell you all about it on Monday here on the blog, and I can't wait!! I think I'll even sneak in a few of the photos from the book, so you can see for yourself what amazing recipes are coming your way next March/April!
Now back to today's recipe…
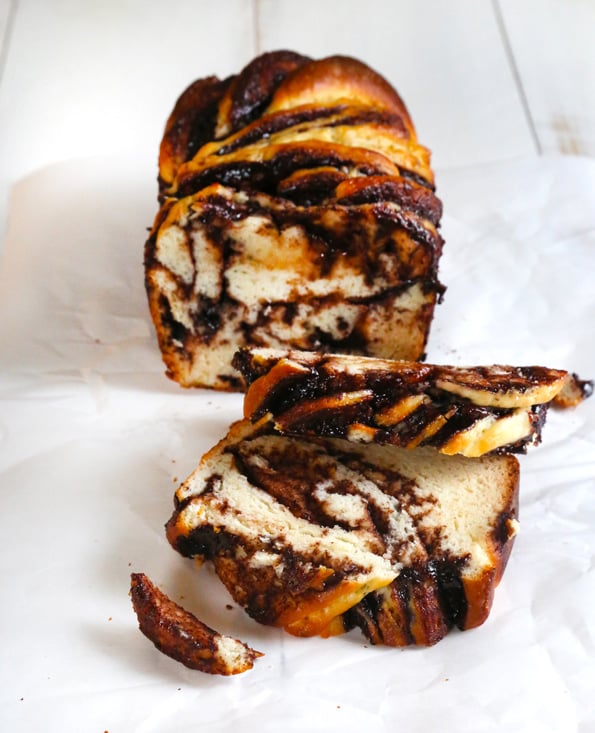
Is babka a New York thing? Kind of like black and white cookies and (apparently) rainbow cookies? Babka is a sweet yeast bread (cake?), and if you don't know it from your local bakery, you at least must know it from Seinfeld, right? (say yes.) This gluten free chocolate babka is basically a version of our (already insanely gorgeous) braided Nutella bread, but swirled with a rich chocolate filling and baked in a loaf pan. It's sweet and rich and decadent. Perfect for the holiday season!

All that filling keeps the bread moist and tender for longer than you'd expect, too. Just imagine the oooohs and ahhhhhs you'd get if you brought this (along with at plateful of Christmas cookies) to that holiday party you're looking forward to. You'd be a hero!
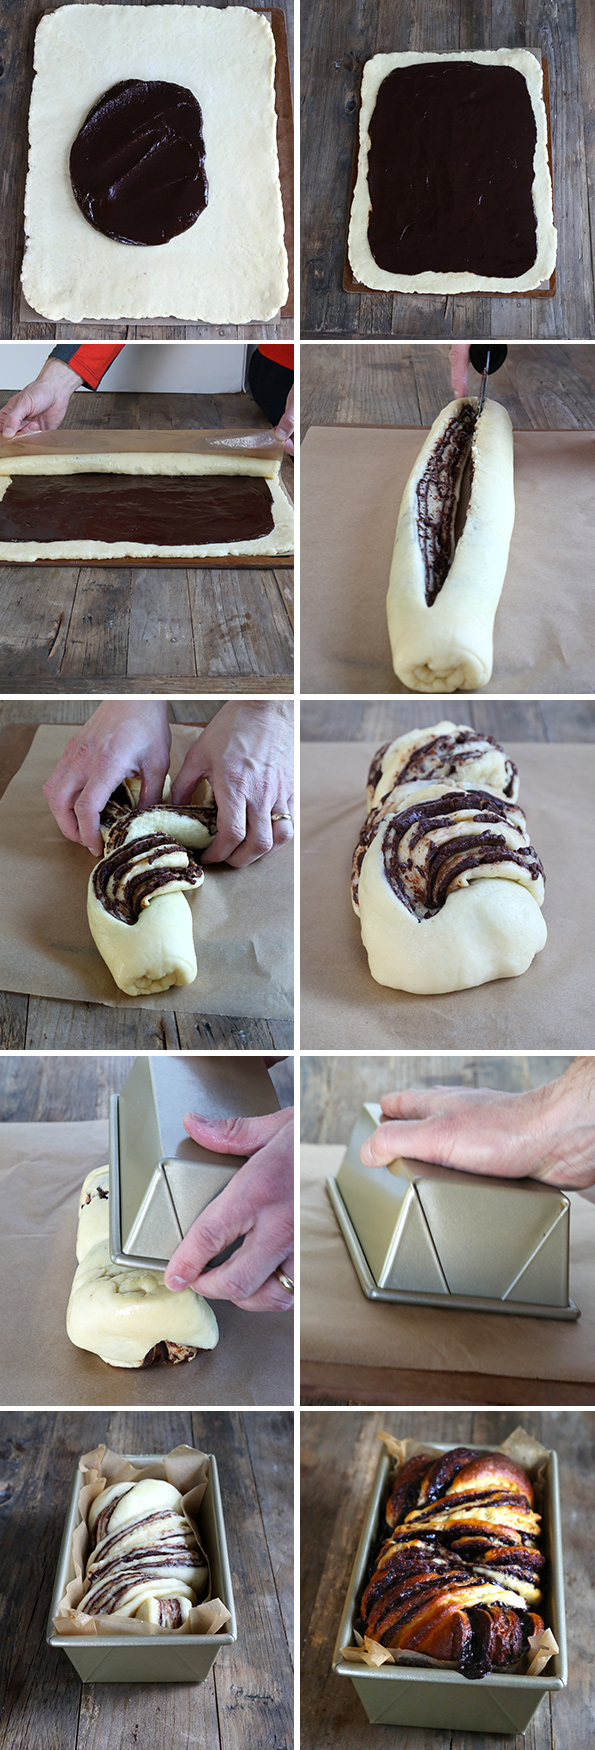
Don't let the number of step-by-steps fool you: this bread is actually incredibly simple to put together. The first rise of the dough is short, since it's such a nice, enriched dough that's already quite easy to handle. But if you've (finally!) been convinced that a refrigerator rise is the way to go, it won't hurt the dough any to spend its first rise in the refrigerator for up to 24 hours (you don't want it longer than that, really, since the yeast flavor will be too pronounced).
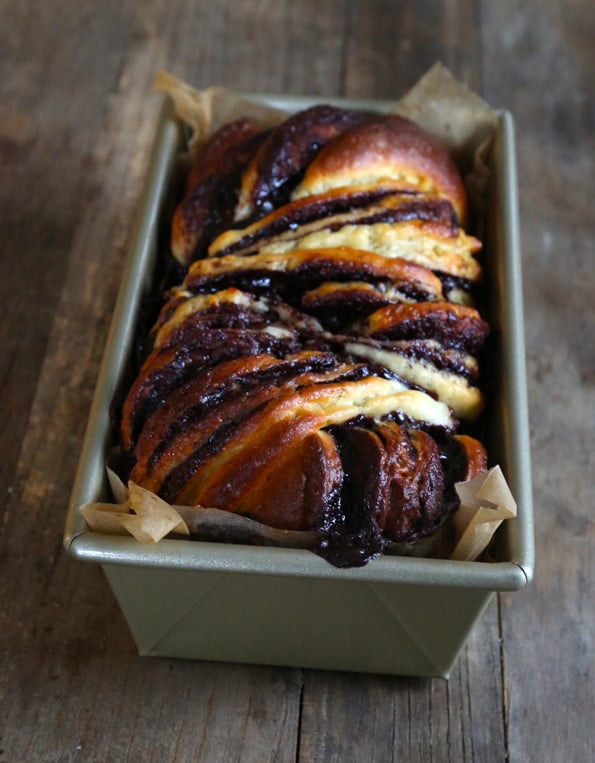
Resist the urge to overfill the dough with more and more filling, by the way! I've been there, and the filling just leaks out of the dough and pools in the loaf pan. When you try to turn out the bread and slice it, it's kind of a big mess.
Gluten Free Chocolate Babka
Equipment
- Stand mixer fitted with the dough hook
Ingredients
- 3 cups (420 g) Gluten Free Bread Flour plus more for sprinkling (please click thru; you must use this blend)
- ¼ teaspoon cream of tartar
- 1 teaspoon instant yeast
- ¼ cup (50 g) granulated sugar
- ½ teaspoon kosher salt
- ⅔ cup (5 ⅓ fluid ounces) warm milk (about 95°F)
- 2 (100 g (weighed out of shell)) eggs at room temperature, beaten
- 4 tablespoons (56 g) unsalted butter melted and cooled
- ¼ cup Homemade Fudge Sauce at room temperature
- Egg wash for brushing (1 egg + 1 tablespoon water, beaten well)
Instructions
Make the bread dough.
- In the bowl of your stand mixer, place the flour, cream of tartar, instant yeast and sugar, and use a handheld whisk to combine well. Add the salt and whisk to combine well. Add the milk, eggs and butter, and mix on low speed with the dough hook until combined.
- Raise the mixer speed to medium and knead for about 5 minutes. The dough is a lovely, smooth, enriched dough. It climbs up the dough hook during kneading but remains intact and smooth.
- Spray a silicone spatula lightly with cooking oil spray, and scrape down the sides of the bowl. Transfer the dough to a lightly oiled bowl or proofing bucket large enough for the dough to rise to nearly double its size, spray the top of the dough with cooking oil spray, and cover with an oiled piece of plastic wrap (or the oiled top to your proofing bucket).
- Set the covered dough to rise in a warm, draft-free environment until nearly doubled in size (about 1 hour).
- Once it has risen, place it in the refrigerator for at least 15 minutes or until it is chilled. This will make it much easier to handle.
Prepare the dough for shaping.
- Once the dough has risen and chilled, line a small rimmed baking sheet with unbleached parchment paper, and set it aside.
- Turn out the chilled dough onto a lightly floured surface and, using the scrape and fold kneading method and using a very light touch, sprinkle the dough with more flour and knead it lightly, sprinkling with flour when necessary to prevent it from sticking, scrape the dough off the floured surface with a floured bench scraper, then fold it over on itself.
- Repeat scraping and folding until the dough has become smoother. Do not overwork the dough or you will incorporate too much flour and it will not rise properly.
Roll out and fill the dough.
- On a lightly floured surface, roll out the dough into a rectangle about 1/4-inch thick, and 10-inches high x 12-inches wide, sprinkling very lightly with more bread flour as necessary to prevent sticking. As you work, shift and move the dough frequently, as shown in my pizza shaping video.
- Before the dough is fully shaped, transfer it to a piece of unbleached parchment paper. Spread the fudge sauce in an even layer on the dough, leaving a 3/4-inch border clean around the perimeter.
- Beginning at a 12-inch side of the dough, and using the parchment paper to assist you, roll the filled dough tightly into a cylinder, like a jelly roll, ending with the seam side down.
- Cover the dough loosely with plastic wrap, and place in the refrigerator to chill for about 10 minutes. This will make the final shaping easier.
Final shaping and rise.
- Grease or line a standard loaf pan with unbleached parchment paper and set it aside. Once the dough has finished chilling, remove it from the refrigerator and uncover it.
- With a very sharp knife or pizza wheel, beginning about 1-inch from one end of the roll of dough, slice along the length of the dough all the way through to the end. You will have 2 strands of layered dough.
- Beginning at the intact end, twist each strand gently so that the cut sides of the dough are facing up. Braid the strands gently but securely back and forth over one another until you reach the end.
- You should have 4 twists before you reach the end. Cinch the open ends together and tuck them under the bread slightly.
- Place one hand on each end of the braid, and press the ends gently toward one another to create a slightly wider, shorter braid. Invert the braid onto a piece of parchment paper on top of a cutting board, then invert the prepared loaf pan over the top of the bread dough, covering the braided dough completely.
- Quickly re-invert the whole operation—from the loaf pan all the way down to the cutting board—and remove the cutting board and top parchment paper.
- Cover the dough with a piece of oiled plastic wrap, and place in warm, draft-free location to rise only until just beginning to swell (about 20 minutes, but it could be more if your rising environment is particularly cold and/or dry).
- Do not overproof.
Bake.
- As the dough is in its final rise, preheat your oven to 375°F. Once the dough has finished rising, uncover it, brush the surface evenly with the egg wash, and place in the center of the preheated oven.
- Bake for 10 minutes, and turn the oven temperature down to 350°F.
- Continue to bake until the dough is golden brown all over and the bread seems mostly firm to the touch (about 25 minutes more).
- Remove from the oven, place the loaf pan on a wire rack and allow to cool for about 10 minutes before removing from the loaf pan, slicing and serving.
WANT TO SAVE THIS RECIPE?

Thanks for stopping by!
Hi, I’m Nicole. I create gluten free recipes that really work and taste as good as you remember. No more making separate meals when someone is GF, or buying packaged foods that aren’t good enough to justify the price. At Gluten Free on a Shoestring, “good, for gluten free” just isn’t good enough! Come visit my bio!

carole says
It sure looks decadent but definitely not like my Great Grandma’s Babka. Gotta try it !!!
Lynda says
Wow! This is special. We have been pining for babka! Question: I need to bake dairy free. I have no problem substituting the milk and the butter but I’m not sure what to do about the whey protein isolate.
Lauren says
Forget the family photos; put a picture of THAT on your Christmas cards! …And expect at least a 60% increase in holiday party invitations.
Gorgeous!
Catherine says
Oh my! I will definitely be trying this!
Mare Masterson says
Cannot wait for that TOC on Monday! I’ve never heard of babka. Wasn’t a Seinfeld fan. This looks interesting. Have yet to try a braided bread. Hum.
Michelle says
I made the nutella bread, and it was much easier than it looked like it would be.
Alexis S says
I am so excited to see this recipe! I haven’t had chocolate babka since we left Pittsburgh 8 years ago! It looks amazing!!! :-)
Jennifer S. says
I have actually heard of this one and man does it look beautiful! AND YES YES YES I want to see the table of contents. can.not.wait.
Lucy says
Absolutely beautiful! and yes I was wondering when your new cookbook comes out, can’t wait!
Lauren Morra says
I cannot handle how gorgeous this is, also that I’m not currently eating it.