
This post may contain affiliate links. Please read our disclosure policy.
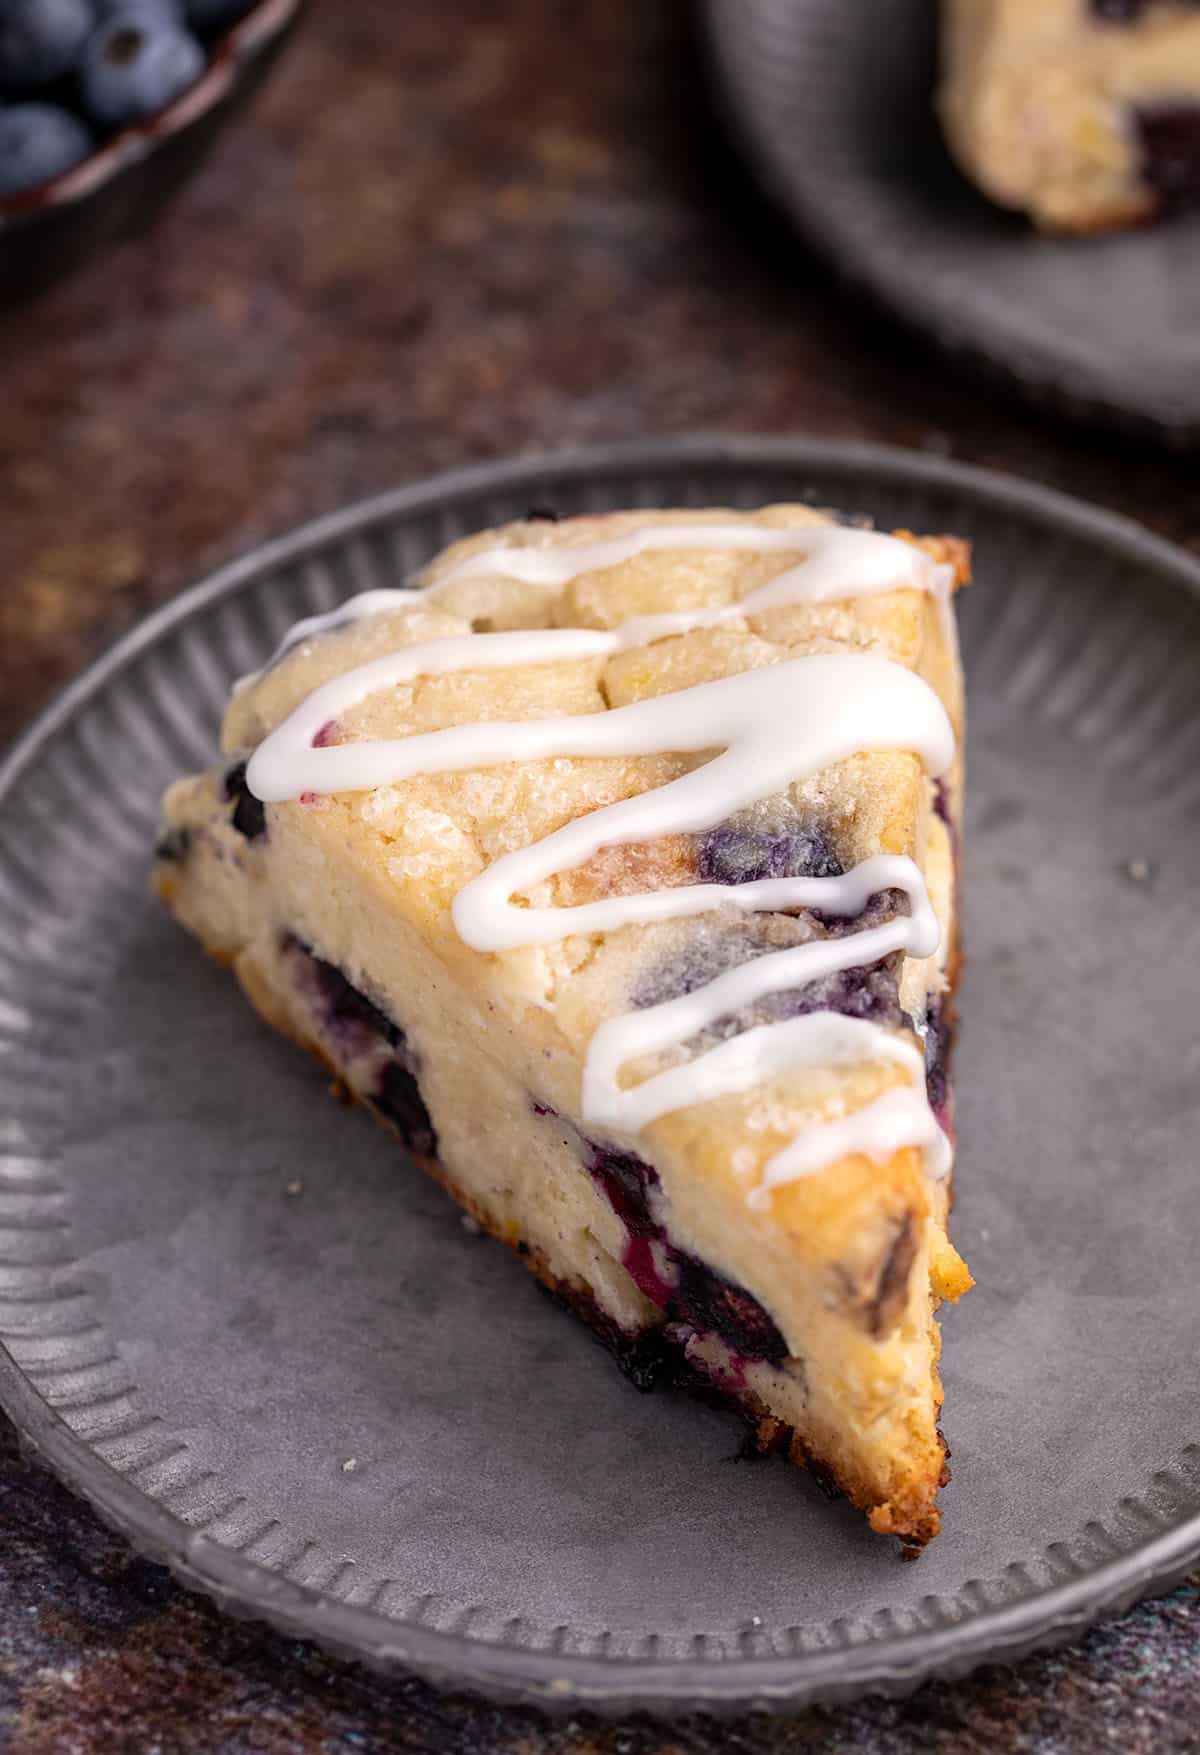
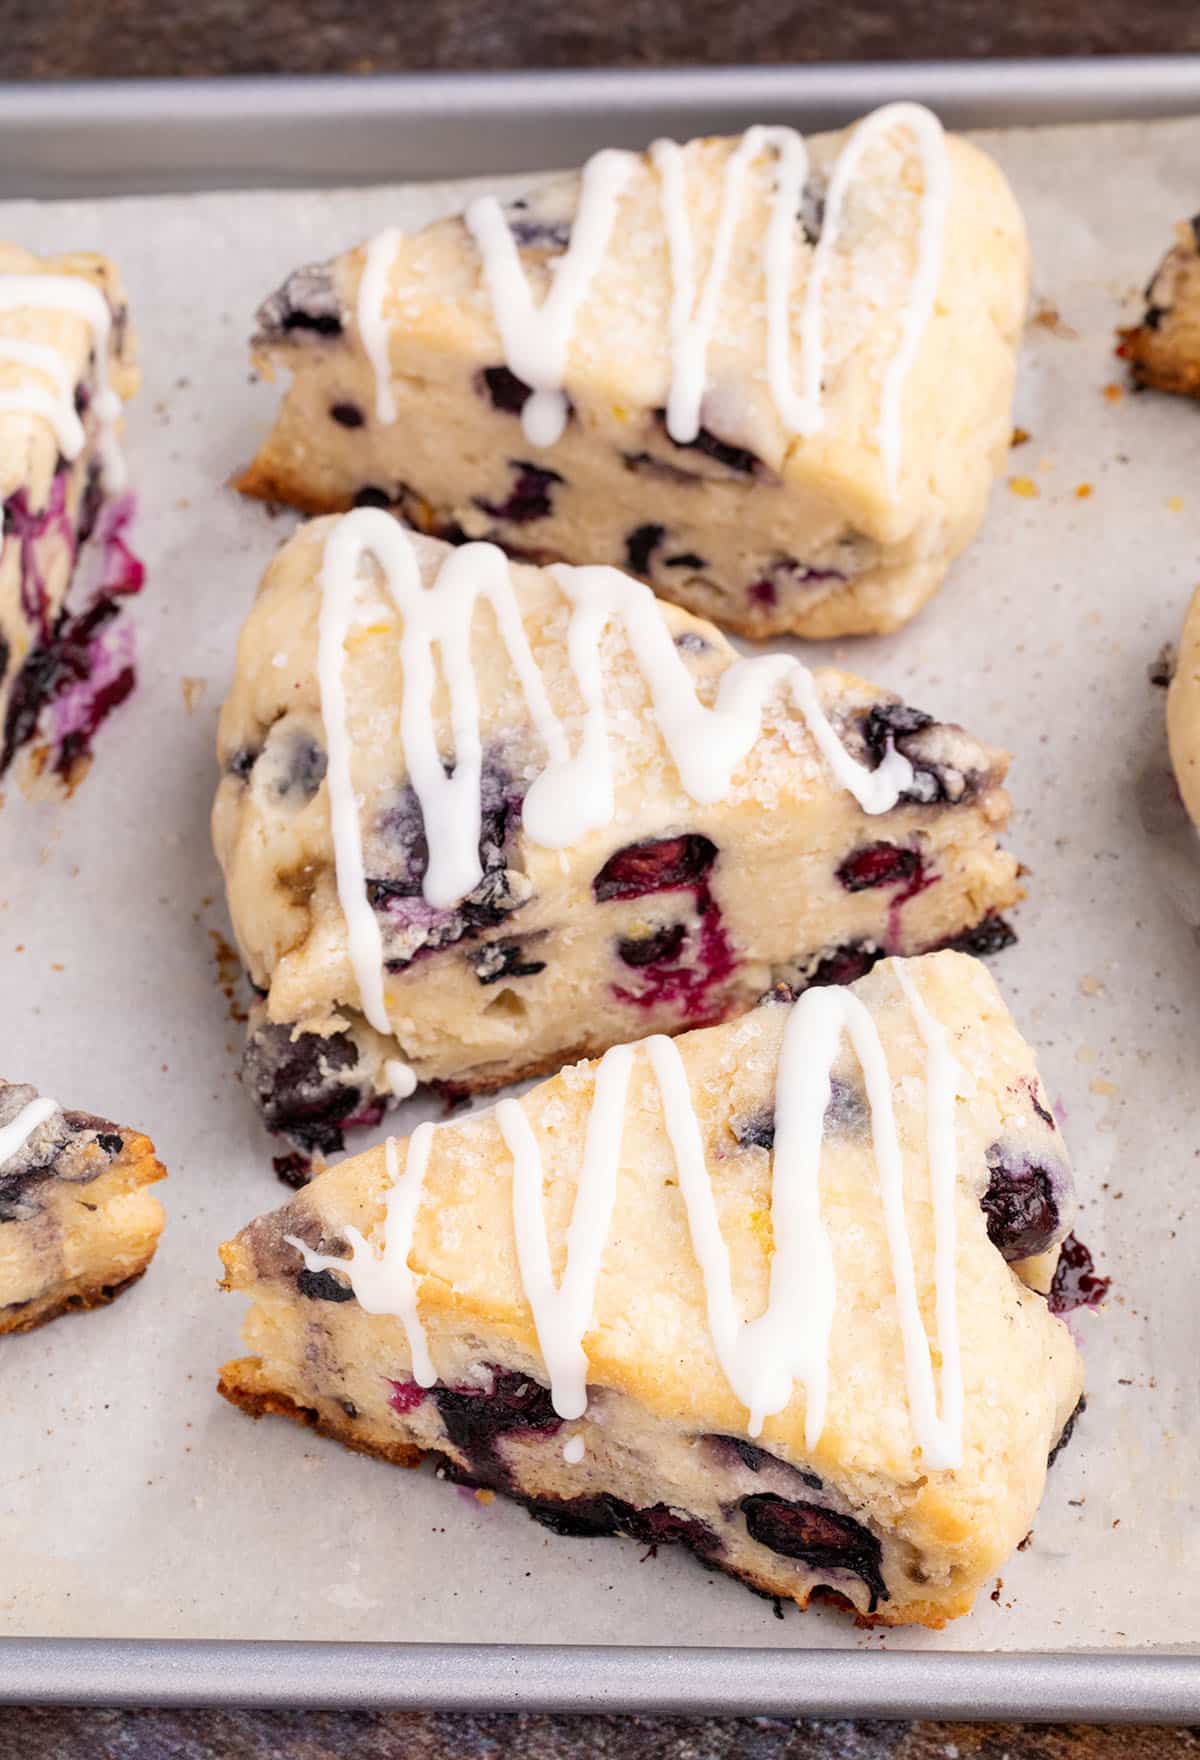
These gluten free blueberry scones are tender and flaky inside, with a lightly crisp top. They're bursting with fruit, but balanced just right to hold it all in!
Why this recipe works
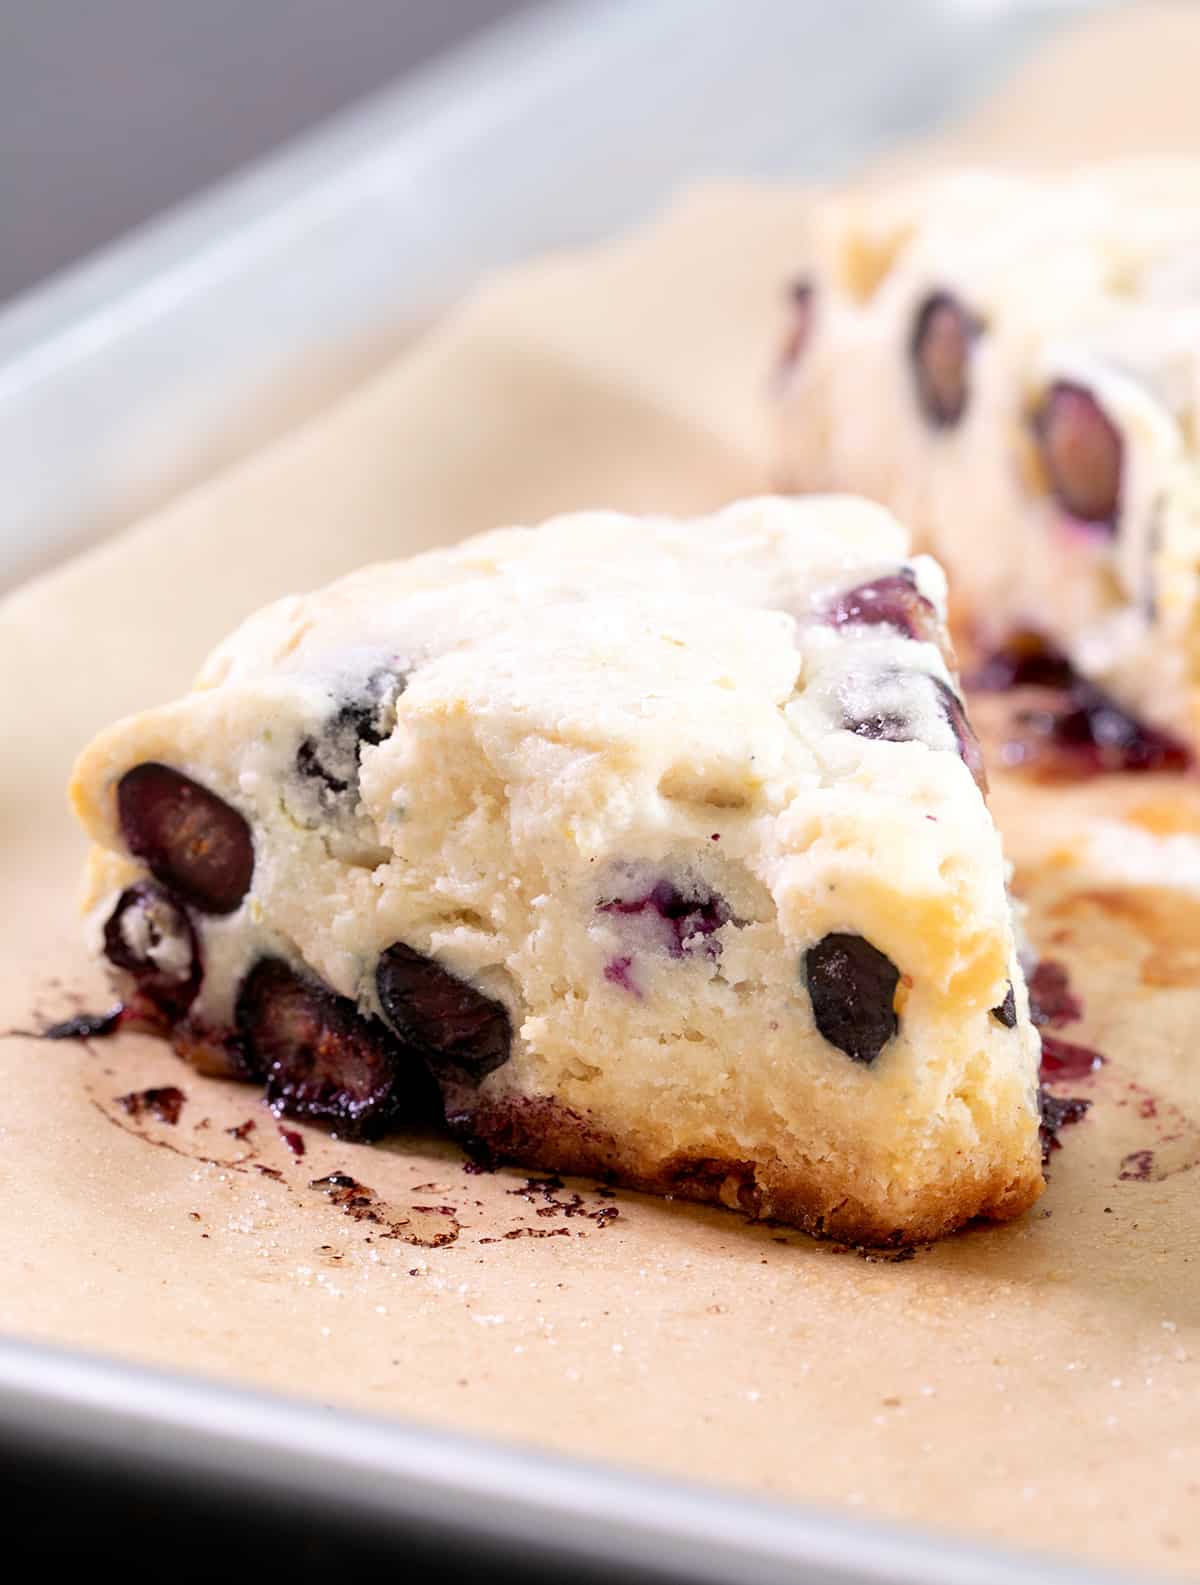
The best gluten free baked scones are both buttery and moist, but pleasantly crumbly. The right recipe has the perfect balance of cold, wet ingredients like butter and milk to keep that crumb tender, and enough flour to keep them from being squishy, like a muffin or other cake.
When you're making not just “regular” gluten free scones, but blueberry scones, you're introducing more moisture into the mixture. We want those blueberries to add texture and flavor without making our pastries weepy. This recipe does just that.
Key ingredients
There are only a few ingredients in these scones, and they're mostly as you'd expect. Each plays an important role in overall success:
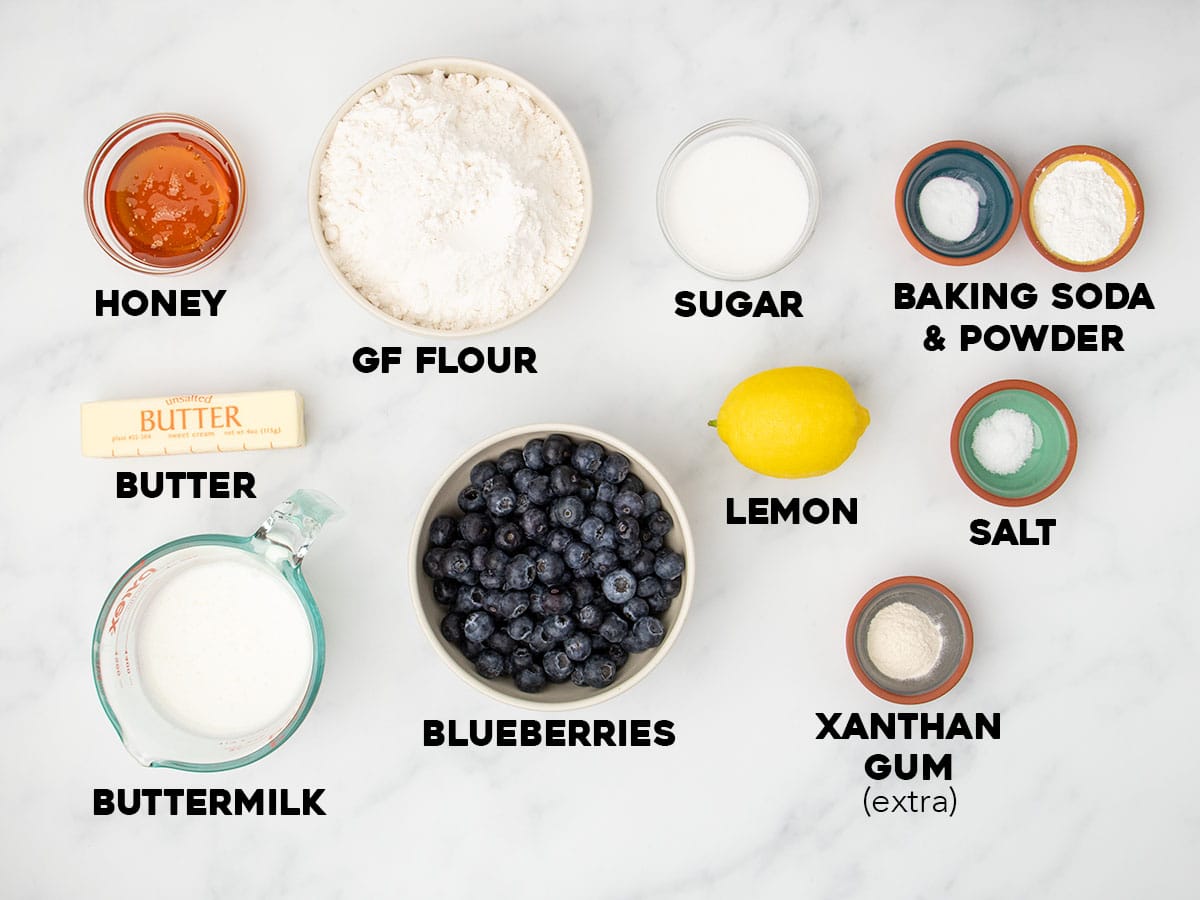
- All purpose gluten free flour – Use a well-balanced all purpose gluten free flour blend based on superfinely ground rice flour to provide enough structure to make crisp-tender scones that don't fall apart. I like Better Batter's original blend, Nicole's Best multipurpose, and Bob's Red Mill's 1-to-1 blend.
- Xanthan gum – An essential binder, it keeps the dough together and helps it rise tall in the oven. Even if your blend already contains xanthan gum, like Better Batter, add 1 teaspoon more for taller-rising, flakier scones. If you're using Bob's Red Mill, which contains even less gum, add 1 1/2 teaspoons.
- Baking powder and baking soda – Add plenty of rise and help the scones brown lightly in the oven.
- Salt – Brightens and enhances the other flavors. I prefer kosher salt, since it's easier to measure in small amounts, but table salt works fine.
- Sugar – Adds some sweetness to the berry flavor, plus locks in moisture in the crumb.
- Lemon zest and juice – Just enough to help brighten and complement the gentle sweetness and flavor of the blueberries without making the pastry taste too distinctly like lemons.
- Butter – Adds buttery flavor and, since it's kept super cold and chunks are distributed evenly throughout the rest of the dough, it expands and creates a crumbly flakiness.
- Blueberries – Small fresh or frozen blueberries work here, as long as they're flavorful! If you have a choice between fresh off-season blueberries that are kind of tough and sour or frozen berries, use frozen. Slice any extra large berries in half so they don't get squished.
- Buttermilk – Adds richness and tang, brings the dough together, and reacts with baking soda to create rise. It must be kept cold to help keep the butter solid. Lowfat or full fat is fine, but avoid nonfat which has too many artificial thickeners.
- Honey – Adds a bit more sweetness and a subtle depth of flavor.
How to make gluten free blueberry scones (with photos)
These scones are easily made in one single mixing bowl. The prep time is just about 10 minutes of active time, with a short time in the freezer for the dough before it's sliced. The full recipe with ingredient amounts is in the recipe card, but here's an overview with photos so you can see how to make these scones in your own kitchen.
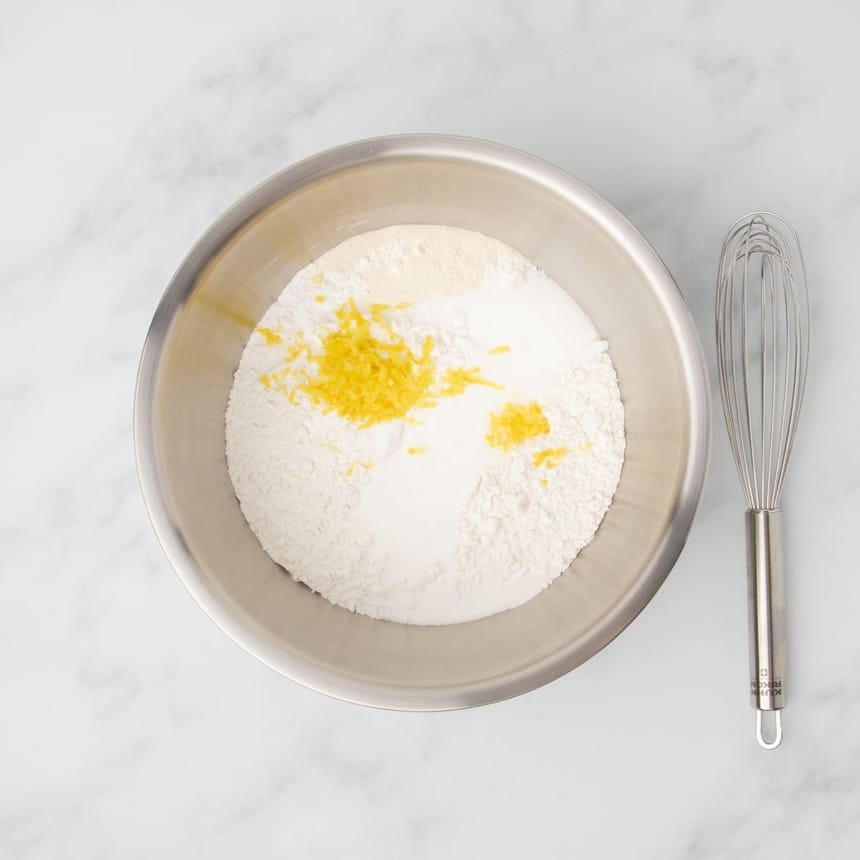
1. Make the raw dough
In a large bowl, mix the dry ingredients (gluten free flour, baking powder, baking soda, salt, plus a small bit of granulated sugar). I add lemon zest to the dry ingredients. Lemon flavor goes so beautifully with blueberries and brightens the whole recipe.
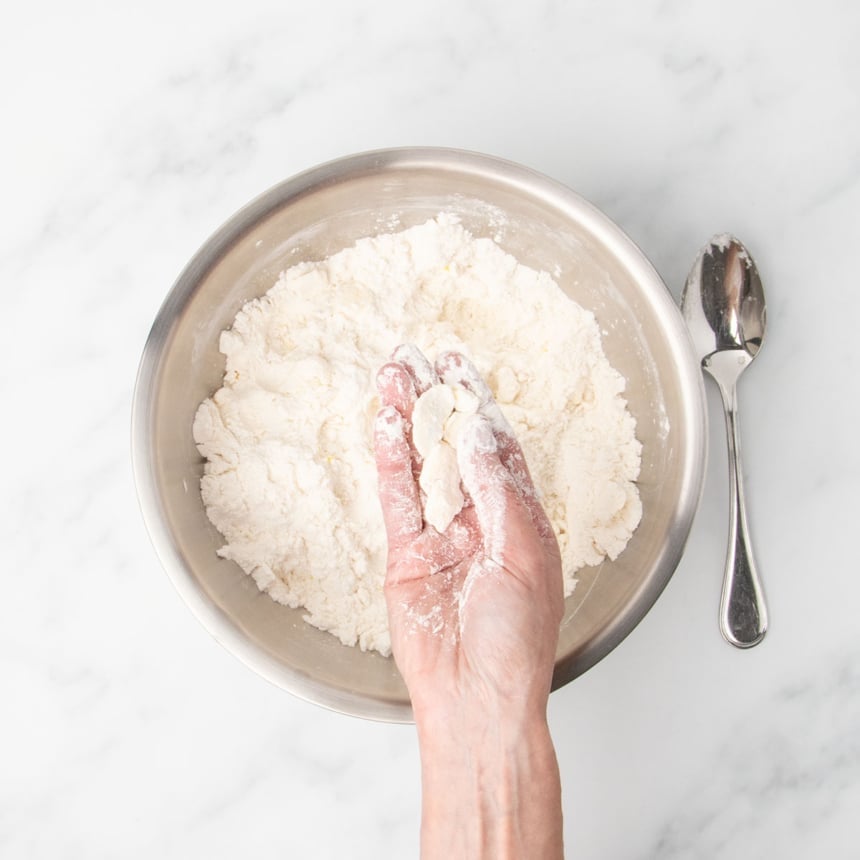
Add chunks of cold butter and flatten them in the dry ingredients to keep the butter from melting too quickly in your hands, or in the oven. Large chunks of cold butter expand in the oven, which creates a flaky texture.
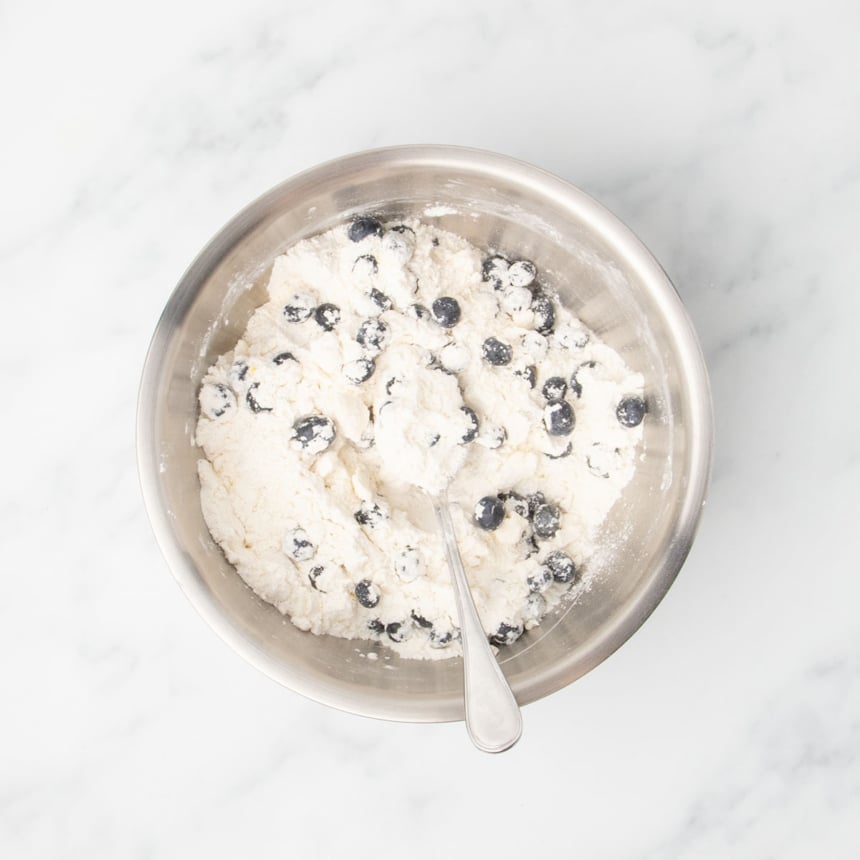
Toss in the fresh blueberries and stir gently so you don't break them. Medium-sized berries work best, as they hold their shape but don't overwhelm any individual scone.
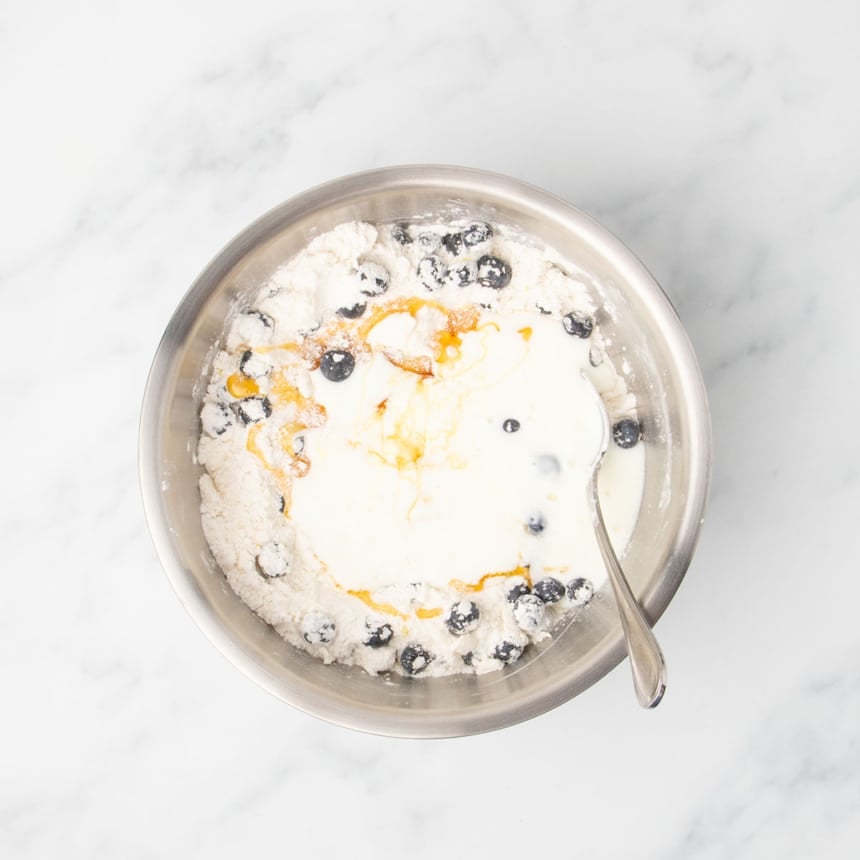
Add cold buttermilk, lemon juice and honey to the flour mixture with blueberries and butter. Mix gently without handling the dough too much so it stays cold and the berries don't break.
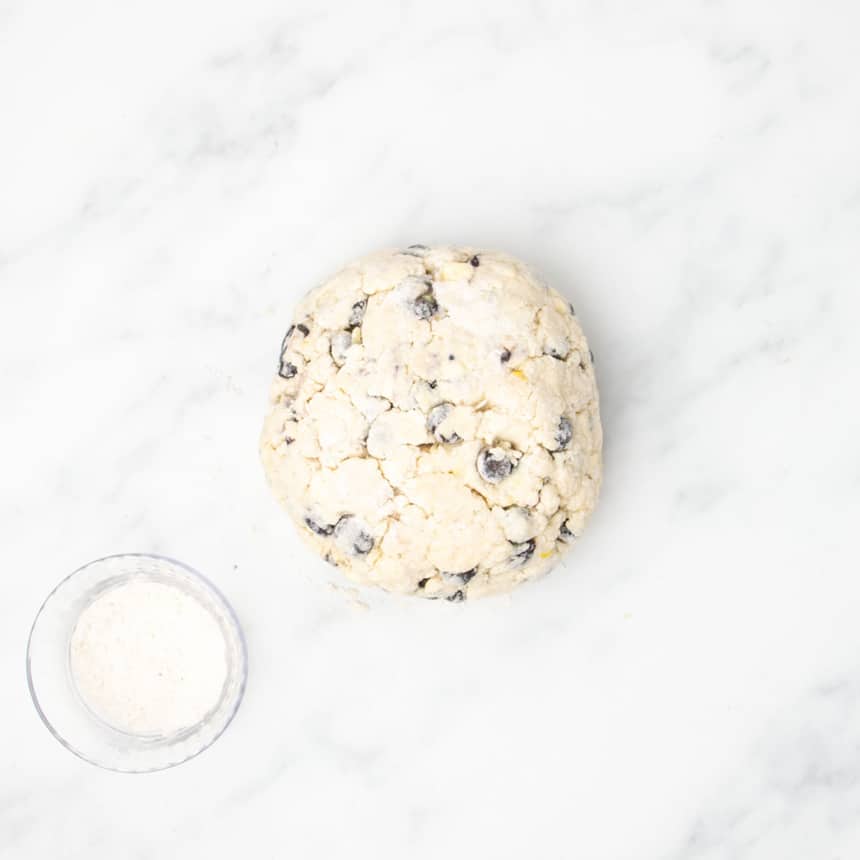
On a lightly floured surface to prevent sticking, press the cold dough into a round disk about 1-inch thick.

2. Shape and bake the scones
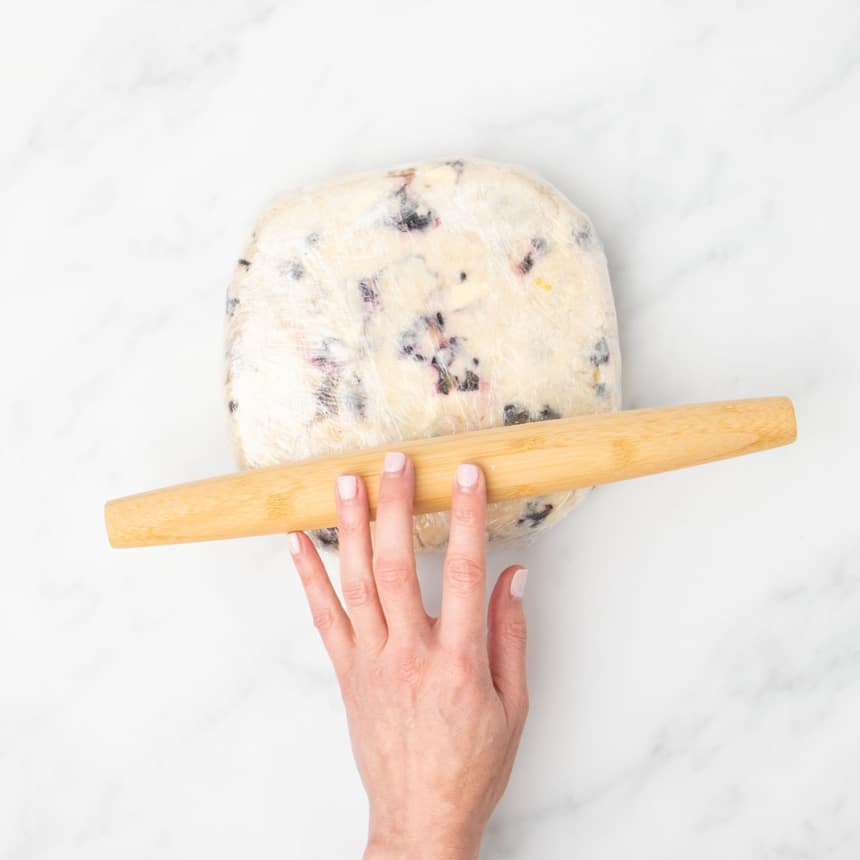
Wrap the disk of dough completely but loosely in plastic wrap, and use a rolling pin to press the dough into an even layer. This creates a smooth surface on both sides of the dough without handling it too much with your hands, which could melt the butter. Chill the dough in the freezer for 10 minutes, to ensure it slices cleanly and is cold going into the oven.
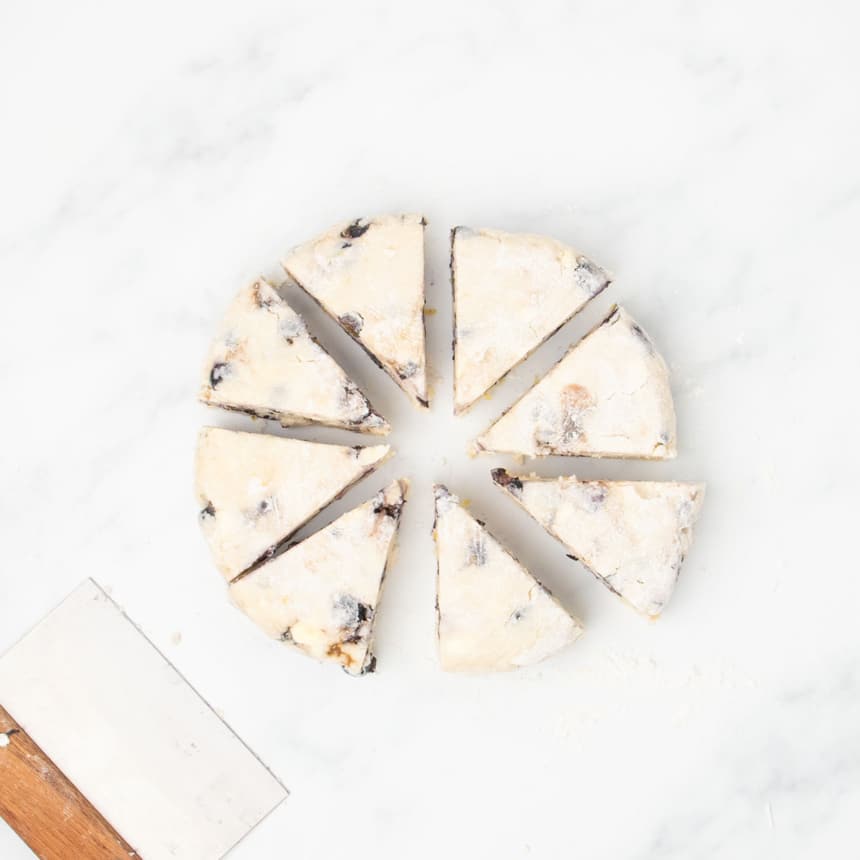
Use a bench scraper or tall knife to slice the disk of dough first in half horizontally, then in half again vertically to create 4 pieces. Slice an “X” through the dough to create a total of 8 triangles. Slice in one motion to make clean, sharp edges, which will encourage the scones to rise tall in the oven.
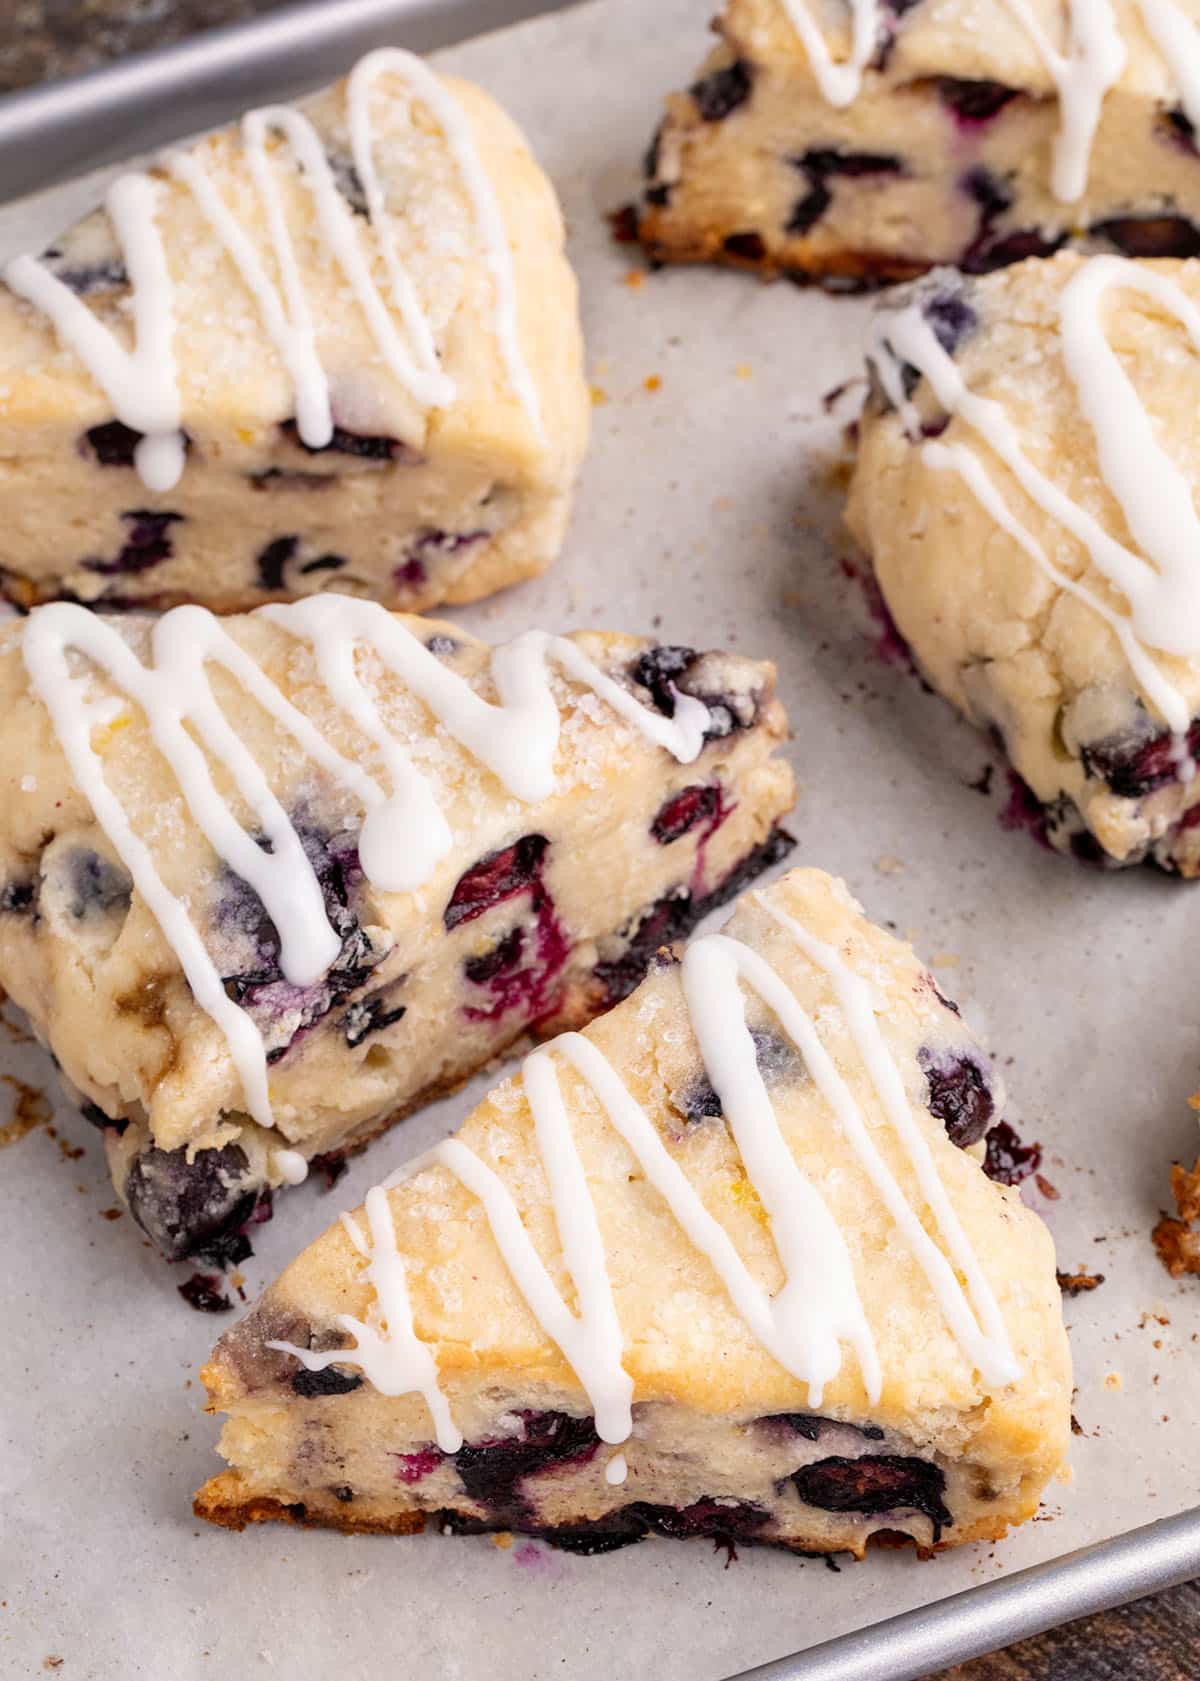
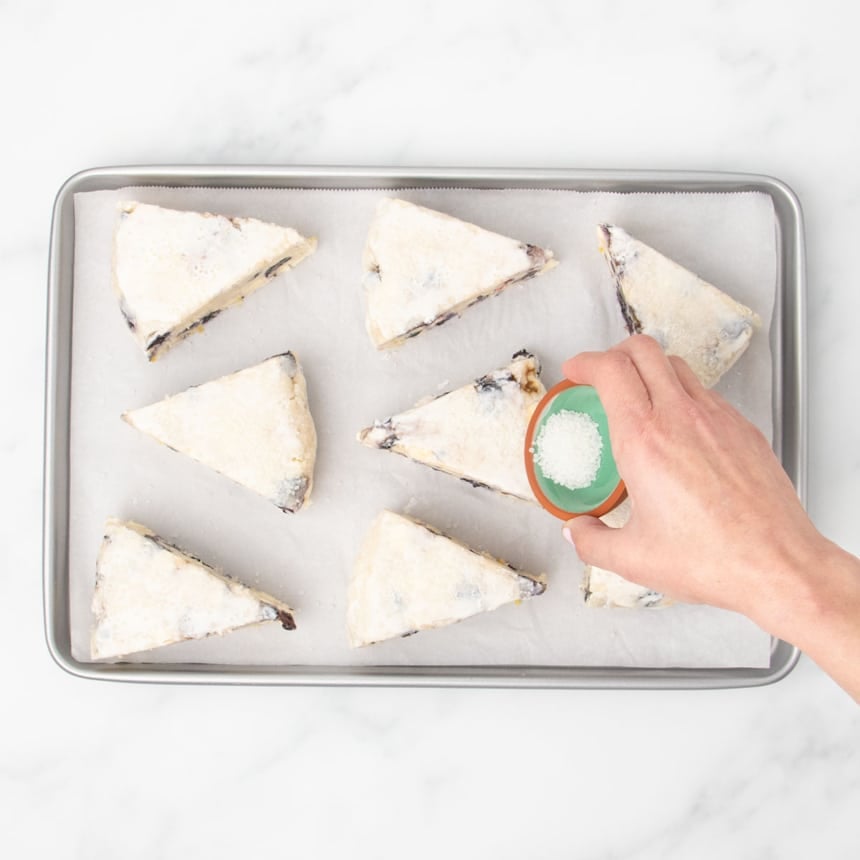
Brush the tops with cream and cover with a bit more sugar. This helps the tops of the scones brown a bit more in the oven without overbaking the pastries.
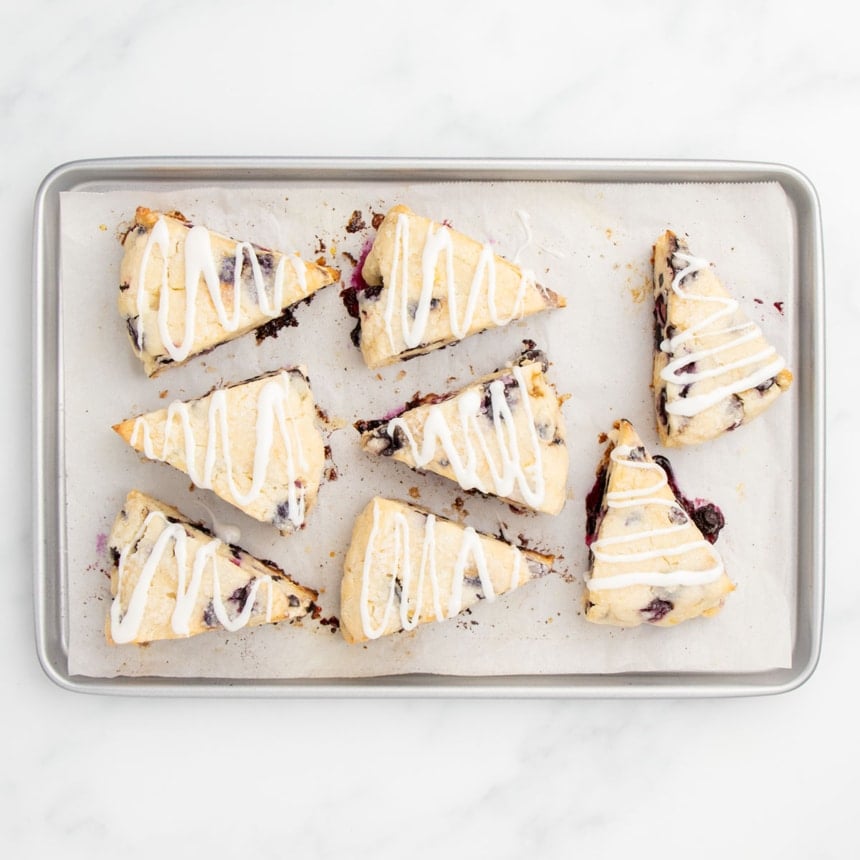
Bake at 400°F for 20 minutes, or until puffed, browned on the edges and bottom and firm to the touch. Cool for 10 minutes and serve.
Expert tips
Here are a few tips that can help guarantee your success the first time making these scones:
Use chunks of very cold butter
Many recipes recommend that you use a pastry cutter or other metal utensil to break the cold butter into “pea-sized pieces.” That often leads to tough pastries, though, since such small pieces of butter will often melt when you handle them at all.
Instead, chop the fat into cold chunks, toss it in the dry ingredients and then flatten it between your thumb and forefinger. This allows you to evenly distribute the butter throughout the dough, where they will expand in the oven and create flakiness.
Skip lamination
In our “regular” gluten free scones recipe, that either has dry mix-ins or none at all, we laminate the dough by rolling and folding it repeatedly, creating many thin layers for super tall scones. You can't laminate dough with berries that haven't been dried first, or you'll burst them as you roll and fold.
Shape carefully
Shape your scones by using a light touch, pressing the dough together just until it holds, but without warming it up. If there are sticky parts, dust your hands lightly with more gluten free flour as you go.
Ingredient substitutions
Dairy free/vegan
To make these dairy-free (and vegan), replace the butter with Miyoko's Creamery or Melt brand vegan butter. In place of buttermilk, try one half (5 fluid ounces) unsweetened coconut milk in the carton and one half (5 fluid ounces) nondairy plain yogurt or sour cream.
In place of honey (to make the scones vegan), use Lyle's Golden Syrup or light corn syrup.
Blueberries
If you don't have fresh blueberries or good ones are not in season, use frozen. Don't defrost them, though, or they'll defrost into really soft mush that will bleed into the batter.
You can also try other berries. Raspberries should work well, but slice them in half so they're about the size of blueberries. Strawberries have more moisture in general blueberries, so try chopping them about the size of blueberries, blot extra moisture with paper towels, and tossing them in some cornstarch before adding them.
Xanthan gum
If you want to avoid xanthan gum, you'll need to select a gluten free flour blend that doesn't already contain xanthan gum, like Nicole's Best. Then, instead of 2 teaspoons xanthan gum, add 5 teaspoons (13 grams) guar gum, 3 teaspoons (9+ grams) konjac powder, or 3 tablespoons (13 grams) “perfect gluten replacement” from Modernist Pantry. For full details, see my post about the best xanthan gum substitute I recommend.
Gluten Free Blueberry Scones Recipe
Ingredients
- 3 ½ cups (490 g) all purpose gluten free flour blend, plus more for sprinkling (See Recipe Notes)
- 2 teaspoons (6 g) xanthan gum, (use only 1 teaspoon if your blend already contains it; or 1 1/2 teaspoons if using Bob's Red Mill 1-to-1)
- 4 teaspoons baking powder
- ⅓ teaspoon baking soda
- ¾ teaspoon kosher salt
- ⅜ cup (75 g) granulated sugar
- Freshly grated lemon zest from 1 medium lemon
- 8 tablespoons (112 g) unsalted butter, cut into a 1/2-inch dice and chilled
- 1 ¾ cups (315 g) fresh blueberries, or frozen
- 1 ¼ cups (10 fluid ounces) buttermilk
- 1 tablespoon freshly squeezed lemon juice
- 4 tablespoons (84 g) honey
- Cream, for brushing (optional)
- Coarse sugar, for sprinkling (optional)
Instructions
- Preheat your oven to 400°F. Line a rimmed baking sheet with unbleached parchment paper and set it aside.
- In a large bowl, place the flour, xanthan gum, baking powder, baking soda, salt, granulated sugar, and lemon zest, and whisk to combine well.
- Add the chopped and chilled butter, and toss to coat it in the dry ingredients. Flatten each chunk of butter between your thumb and forefinger.
- Examine the blueberries. If any are especially gigantic, slice them in half carefully with a serrated knife. Add the blueberries, and toss to coat.
- Create a well in the center of the dry ingredients and add the buttermilk, lemon juice, and honey. Mix gently until the dough begins to come together.
- If necessary, press together into a dough with floured hands, handling the dough as little as possible.
- Turn out the dough onto a large piece of plastic wrap and press into a disk that’s about 6 inches in diameter and 1 inch thick.
- Wrap the disk loosely in the plastic wrap and use a rolling pin to roll the dough all around into a 7-inch disk. Place it in the freezer to chill for about 10 minutes or until firm.
- Remove the dough from the freezer, unwrap it, sprinkle the top with about 1 teaspoonful additional flour and spread out over the top of the disk.
- Using a large, sharp knife or a bench scraper, cut the dough into 2 equal halves, then each of those halves into 4 equal triangles.
- Place the wedges about 2 inches apart from one another on the prepared baking sheet, and using a pastry brush, paint the tops generously with the optional cream. Sprinkle the tops generously with optional coarse or granulated sugar.
- Place the baking sheet in the center of the preheated oven and bake until the scones are puffed, very pale golden all over and slightly more brown on the edges and top (about 20 minutes).
- Remove from the oven and allow to cool for 10 minutes or until firm on the baking sheet before serving.
Video
Notes
Nutrition
Nutrition information is automatically calculated, so should only be used as an approximation.
Storage instructions
Short term: They'll stay fresh at room temperature, wrapped in plastic or in a sealed container, for up to 3 days.
Long-term: Wrap baked and completely cool scones tightly in a freezer-safe wrap like Glad Press n Seal, and freeze for up to 3 months. Defrost at room temperature. To refresh, sprinkle lightly with lukewarm water and in the toaster oven at 300°F until warm.
Make-ahead: Make and shape the raw scones, then store the shaped wedges in the freezer, wrapped tightly. Bake right from frozen after brushing with cream and sprinkling with sugar. Another few minutes in the oven may be necessary, but not much.
FAQs
One of the most common reasons for gluten free blueberry scones (or any gluten free scones) not rising is that the baking powder isn't fresh. Either it's been open too long or it's expired.
Did you use a poorly-balanced all purpose gluten free flour blend, like one of King Arthur Flour's all purpose blends? They will dry out your baked goods. Otherwise, be sure to measure by weight, not volume, whenever possible for precise, accurate measurements, and don't make substitutions unless absolutely necessary.
You can refrigerate the raw scone dough, either sliced into triangles or as a disk, wrapped in plastic wrap, for up to 5 days. Then, slice if necessary, top, and bake as directed.
In place of 1 1/4 cups (10 fluid ounces) buttermilk, you can use the same amount of plain lowfat or whole milk kefir, or half milk + half plain yogurt or sour cream by volume. Avoid anything fat free.
This recipe must have whole, undried fruit. For dried berries or any other mix-in, use our classic gluten free scones recipe.
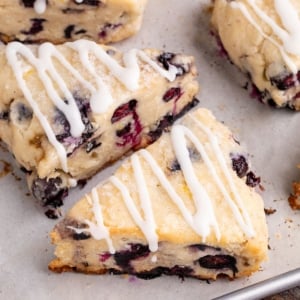
Place about 1/2 cup confectioners' or powdered sugar in a small bowl. Mix in milk, fresh lemon juice, or water just until you have a very thick paste. Mix in more liquid by the drop just until it falls slowly off the spoon, then drizzle on cooled scones.


Quick question. I was thrown off by the 1/3 teaspoon of baking soda and luckily had measuring spoons that to a tad, pinch, or dash.
In my experience, 1 cup of GF flour weighs 130 GM. I followed this recipe using 490 GM. I wonder if I should have calculated the 3.5 cups of flour using my 130 GM per cup making the amount of flour 455 GM rather than 490 GM. Might that have caused the need for additional liquid? Also I let my mix rest for 30 minutes prior to placing into the freezer. My goal is to find the right recipe to create a tea for my grandkids and also my girlfriends.
Thank you
Alice, I’m afraid that’s a misunderstanding of the purpose of weighing ingredients, which is to mimic the ingredients I’m using when I develop the recipe. You ignore volume entirely. It doesn’t matter how you measure flour, only how I measure it.
Taste was fine not much lemon flavor. The dough ball had to be at least 8 inches at 1.5 inches thick. Not sure why so large, I weighed all the ingredients. Also I needed to add additional buttermilk to finally bring the dough together. I ended up cutting into 12 pieces and baking an additional 10 minutes. Now distributed to my taste-testing neighbors.
Thank you
Question: Would King Arthur’s flour be a good choice? I need to make scones for a King Aruther baking contest. I see this makes 8 scones. The scones require for the contest is 9.
Thank you
I’m afraid I recommend against the KAF Measure for Measure GF blend, Kimberly. Please see the all purpose gluten free flour blends page for more information.
Can you substitute Monkfruit for the sugar
Alternative sugars tend to be drying, while regular sugars lock in moisture, so that would significantly alter the moisture content of this recipe, Brenda.
Made these dairy-free following your suggestions. I followed your directions. I used Better Batter flour.
Most ingredients were weighed, but not the teaspoons.
Small frozen blueberries were also weighed.
I used the biggest bowl I had, but had trouble combining ingredients.
My disk to chill was much bigger than 7 inches wide and 1 inch tall.
Each scone was 4 inches long and 3 inches at the widest part, with nice straight edges.
Because they were bigger, they baked longer. Edges were almost too crunchy by the time the insides were baked enough.
This is not a complaint, just noting the difference in amount of dough, and is not intended to become a comment at the end of the recipe. My GF Elderly Mom lives at an Assisted Living facility. They were having an activity featuring scones, and Mom said she’d like to have one. I found your recipes, thought I’d prefer blueberries rather than the other recipe with dried fruit.
Thank you for doing the work to provide GF recipes.
I LOVE these! I make them with coconut milk and some lemon juice, sometimes I use my homemade vegan butter. They are so good!
I’ve made them, but them in circles, frozen them, then I can bake 2 at a time when I want a treat! They are not to sweet! They’re perfect! We have a friend that gets so psyched when she sees them on the table! I’m making some tonight!
I’m very happy to know that these work with vegan butter, TC. Thank you for sharing that. It can be very difficult to get pastry to turn out right without regular butter since everything else melts much more quickly and at a much lower temperature.