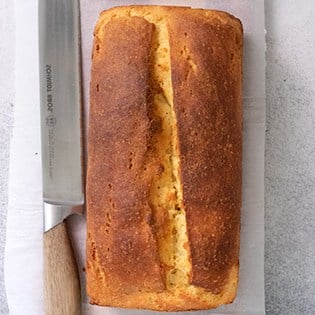

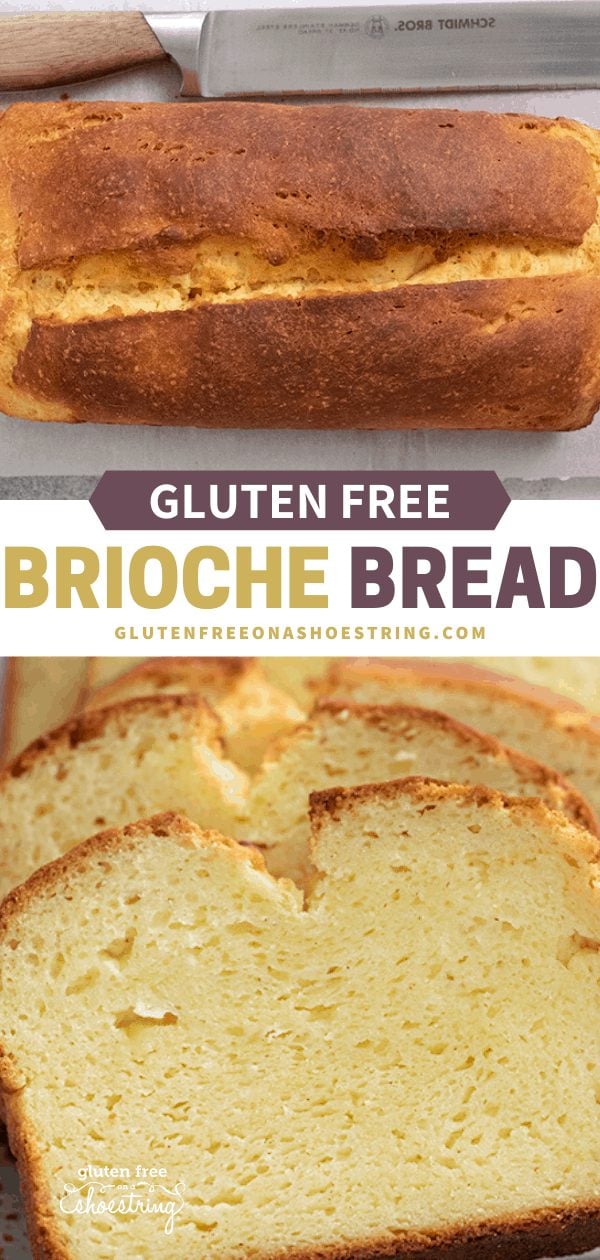
Welcome back to the lightly sweet taste of gluten free brioche bread, rich with eggs and butter, and that golden bakery-style crust and soft yellow crumb inside.

What makes this recipe for gluten free brioche bread special
I consider brioche bread a luxury. One single loaf calls for 5 whole eggs, and 5 ounces of butter, at room temperature.
(Be sure the ingredients are at room temperature, or they won't combine properly.)
To me, all those eggs and butter in a fragrant loaf of bread, with a thick but tender crust and a rich flavorful crumb, sounds dreamy. It certainly has its place. And its place is often soaking in more of the same to make French toast!
This bread is not low fat, or low-calorie. It's an indulgence, and I enjoy it more than if I thought of it like an everyday loaf.
I don't count calories, and I don't think of any foods as “bad.” Everything in moderation.

What to expect during the rise of this gf brioche bread
The many eggs in this loaf of bread help it rise, but it does still call for yeast. You'll find that it doesn't call for a ton of yeast, though.
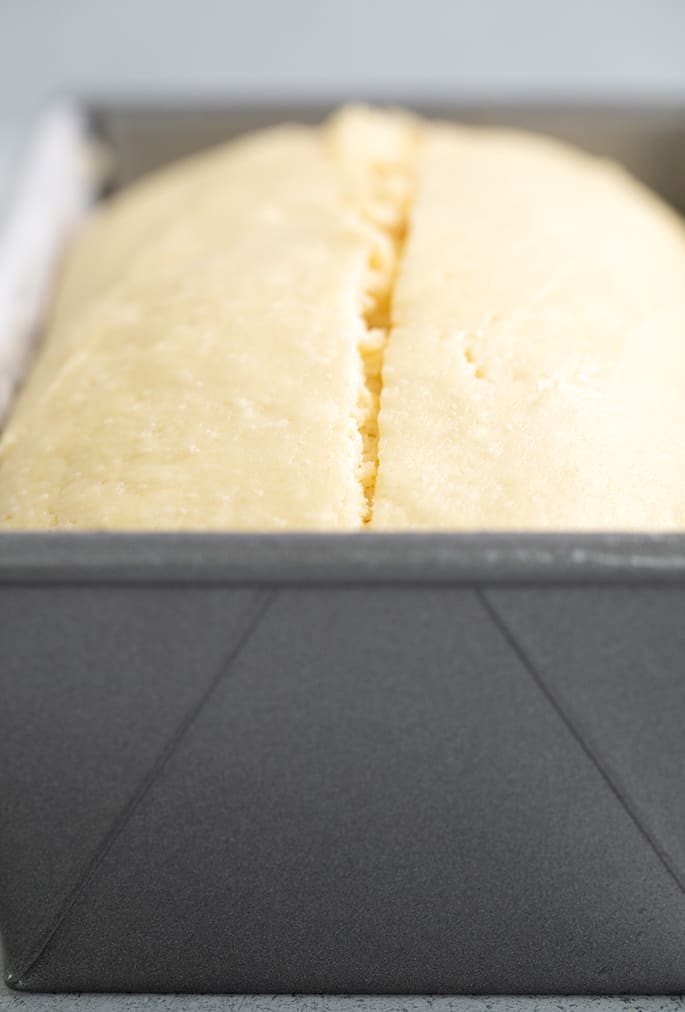
Since brioche has a somewhat tighter crumb than a classic sandwich bread, it's meant to rise very high. It should rise to about 150% of its original volume, but not more. If you are tempted to add more yeast, know that the loaf won't rise higher, but will just have a more jagged top.
Tips on getting gluten free yeast bread to rise
The linchpin to getting yeast bread to rise is no fun, and no one likes it but it remains true. It's patience.
When I make this bread in the summer, and the air is generally warmer and more moist, it rises so much faster. Sometimes, it only takes 40 minutes!
When I make this bread in the winter, when the air is not only colder but significantly drier (even with a humidifier in our house), it can take nearly 2 hours.
If you bake it too early, it won't likely rise and then fall, since it's not a high-rising bread. But it will be shorter and denser.
Do not put it in a low oven. You'll likely kill the yeast. Don't put it in the dryer. Same deal.
I do often turn on my oven to about 300°F and place the loaf pan on top of the stove. That bit of gentle ambient heat helps it rise more steadily.
When is it done rising?
If your yeast bread is still set to rise, but you're getting nervous that it might “overproof,” there is a telltale sign. If the surface of the dough has begun to rise unevenly, taking on a broken or pockmarked appearance, it's a bit overrisen.
No worries, though. You can moisten your fingers and try to smooth out the rough edges, or just pop it right in the oven and bake as instructed.
Ingredients and substitutions in gluten free brioche bread
Gluten free dairy free brioche bread
If you can't have dairy, I would normally steer you toward a bread recipe that isn't highly enriched with lots (and lots) of butter, like this one. But I think we can do it!
Try replacing the butter with vegan butter. My favorite brands remain Melt and Miyoko's Kitchen. I love them equally.
In place of the milk, try any nondairy milk you like. Just make sure it's unsweetened and unflavored.
Can you make gluten free brioche bread without eggs?
You can't replace 5 eggs in a single recipe with any sort of egg replacer. Brioche bread is just not egg-free-friendly. You'd need a vegan-style recipe that was developed egg-free.
Can you replace the instant yeast in this gf brioche bread recipe?
This is a recipe for yeast bread, and cannot be made without commercial yeast. It also cannot be made with wild yeast sourdough starter, which requires a recipe developed specifically for it.
I always bake yeast bread with instant yeast, since it doesn't have to be dissolved in liquid, and you need less of it. Instant yeast is also called rapid-rise and breadmaker yeast. It's all the same.
If you don't have instant yeast and would like to use active dry yeast instead, you'll need to increase the amount by 25%. I've done the calculations for you in the Recipe Notes below.
Gluten Free Brioche Bread
Ingredients
- 2 ½ cups (350 g) all purpose gluten free flour blend (I used Better Batter; you must use one of my recommended blends so please click thru for full info)
- 1 ¾ teaspoons xanthan gum omit if your blend already contains it
- ½ cup (100 g) granulated sugar
- 1 ½ teaspoons (5 g) instant yeast (See Recipe Notes)
- 1 teaspoon cream of tartar
- ¾ teaspoon (5 g) kosher salt
- ½ teaspoon apple cider vinegar
- 5 (250 g (weighed out of shell)) eggs at room temperature
- ½ cup (4 fluid ounces) warm milk about 95°F
- 10 tablespoons (140 g) unsalted butter at room temperature, roughly chopped
Instructions
- Grease and line a standard 9-inch x 5-inch loaf pan and set it aside.
- In the bowl of a stand mixer fitted with the paddle attachment (See Recipe Notes), place the flour, xanthan gum, sugar, yeast, and cream of tartar, and whisk to combine well.
- Add the salt, and whisk again to combine. Add the vinegar, eggs, milk, and butter.
- Place the bowl in the stand mixer and beat on medium-low speed for about 30 seconds. Increase the speed to medium-high, and beat for at least 2 minutes. Scrape down the sides of the bowl, and beat on high speed for another 2 minutes.
- Transfer the dough to the prepared loaf pan, pressing the dough firmly into the corners. Using a moistened spatula, smooth the top.
- Cover the pan with lightly greased plastic wrap, and place the pan in a warm, draft-free location until the dough has reached the top edge of the loaf pan. This can take an hour, or it can take much longer, depending upon the rising environment. In cool, dry weather, it may take significantly longer.
- Overproofing is not a function of time, but of rise. When the surface of the dough begins to take on an uneven, pockmarked appearance, it has begun to overproof.
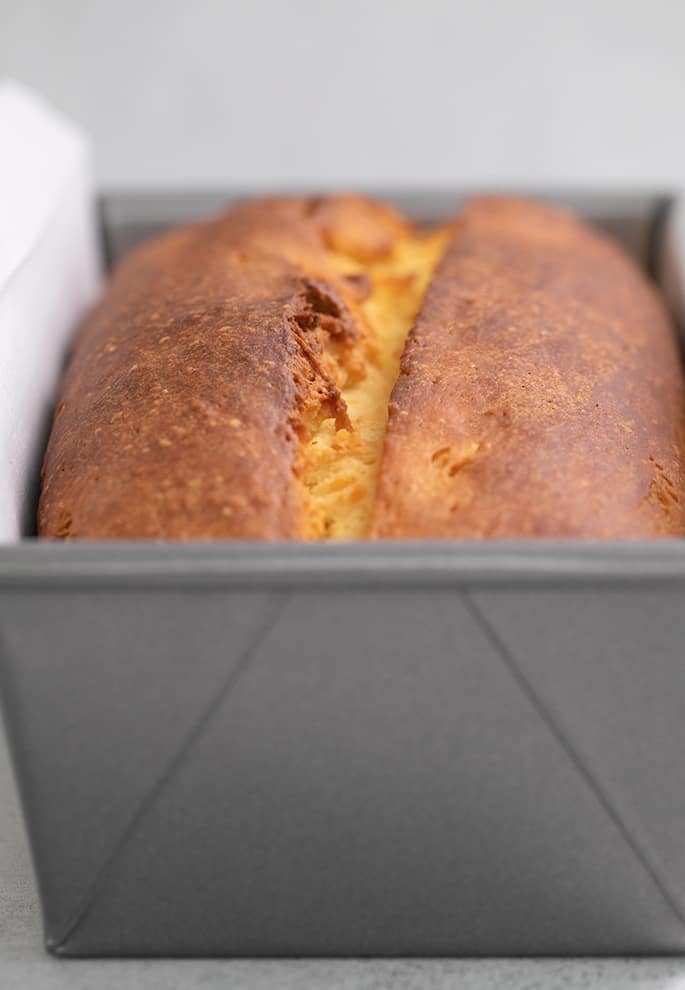
- When the dough has reached the end of its rise, preheat the oven to 375°F. Remove the plastic wrap, score the loaf down the horizontal center using a lame or sharp knife at a 45° angle, cutting about 1/4 inch deep.
- Place the loaf in the center of the preheated oven, and bake for 25 minutes. Rotate the pan 180° in the oven and bake for another 20 minutes.
- For a less browned crust, remove the loaf pan from the oven and transfer the bread to a large piece of aluminum foil. Wrap the bread completely in the foil and continue to bake for another 5 to 10 minutes, or until the inside of the loaf has reached at least 190°F.
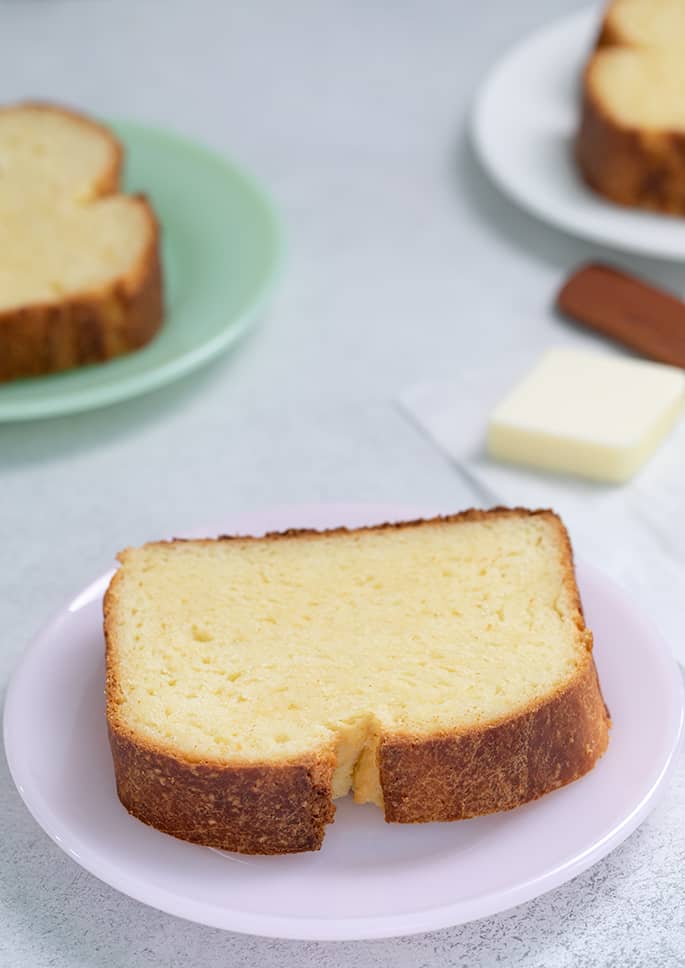
- Remove from the oven, unwrap the loaf, and allow the loaf to cool on a wire rack. For a softer crust, keep the loaf wrapped for at least 20 minutes when it first comes out of the oven, and then unwrap to cool until no longer hot to the touch. Slice and serve.
- For a deeper golden brown crust, remove the loaf pan from the oven, transfer the bread to a baking sheet and then return it to the oven. Continue to bake for another 5 to 10 minutes, or until the inside of the loaf has reached at least 190°F. Remove from the oven and transfer the loaf to a wire rack to cool until no longer hot to the touch. Slice and serve.
Notes
Gluten Free Brioche Bread
Ingredients
- 2 ½ cups (350 g) all purpose gluten free flour blend (I used Better Batter; you must use one of my recommended blends so please click thru for full info)
- 1 ¾ teaspoons xanthan gum omit if your blend already contains it
- ½ cup (100 g) granulated sugar
- 1 ½ teaspoons (5 g) instant yeast (See Recipe Notes)
- 1 teaspoon cream of tartar
- ¾ teaspoon (5 g) kosher salt
- ½ teaspoon apple cider vinegar
- 5 (250 g (weighed out of shell)) eggs at room temperature
- ½ cup (4 fluid ounces) warm milk about 95°F
- 10 tablespoons (140 g) unsalted butter at room temperature, roughly chopped
Instructions
- Grease and line a standard 9-inch x 5-inch loaf pan and set it aside.
- In the bowl of a stand mixer fitted with the paddle attachment (See Recipe Notes), place the flour, xanthan gum, sugar, yeast, and cream of tartar, and whisk to combine well.
- Add the salt, and whisk again to combine. Add the vinegar, eggs, milk, and butter.
- Place the bowl in the stand mixer and beat on medium-low speed for about 30 seconds. Increase the speed to medium-high, and beat for at least 2 minutes. Scrape down the sides of the bowl, and beat on high speed for another 2 minutes.
- Transfer the dough to the prepared loaf pan, pressing the dough firmly into the corners. Using a moistened spatula, smooth the top.
- Cover the pan with lightly greased plastic wrap, and place the pan in a warm, draft-free location until the dough has reached the top edge of the loaf pan. This can take an hour, or it can take much longer, depending upon the rising environment. In cool, dry weather, it may take significantly longer.
- Overproofing is not a function of time, but of rise. When the surface of the dough begins to take on an uneven, pockmarked appearance, it has begun to overproof.
- When the dough has reached the end of its rise, preheat the oven to 375°F. Remove the plastic wrap, score the loaf down the horizontal center using a lame or sharp knife at a 45° angle, cutting about 1/4 inch deep.
- Place the loaf in the center of the preheated oven, and bake for 25 minutes. Rotate the pan 180° in the oven and bake for another 20 minutes.
- For a less browned crust, remove the loaf pan from the oven and transfer the bread to a large piece of aluminum foil. Wrap the bread completely in the foil and continue to bake for another 5 to 10 minutes, or until the inside of the loaf has reached at least 190°F.
- Remove from the oven, unwrap the loaf, and allow the loaf to cool on a wire rack. For a softer crust, keep the loaf wrapped for at least 20 minutes when it first comes out of the oven, and then unwrap to cool until no longer hot to the touch. Slice and serve.
- For a deeper golden brown crust, remove the loaf pan from the oven, transfer the bread to a baking sheet and then return it to the oven. Continue to bake for another 5 to 10 minutes, or until the inside of the loaf has reached at least 190°F. Remove from the oven and transfer the loaf to a wire rack to cool until no longer hot to the touch. Slice and serve.

Samuel says
I can’t believe how good this Brioche is! Nice and buttery, so soft, so airy! I almost ate half a loaf in a few minutes by myself, lol. Thank you so much Nicole!
Nicole Hunn says
You’re very welcome, Samuel. So glad you enjoyed it so much.
Sally says
This bread is awesome when it comes out of the oven, and it’s great for French toast. However, for me it gets quite stale by the next day after making it, even though I store the uneaten bread in an airtight container.
Nicole Hunn says
I wrote a post a long, long time ago with tips on how to store gluten free bread (which is honestly not that different from conventional bread, unless you’re omitting xanthan gum or using a flour blend that I don’t recommend, for example, or otherwise deviating from my recipe as written). Try reading that for some tips.
Kristin McKinney says
This recipe is considerably different from the recipe in your GFSS book. I followed the book recipe and basically ended up with a brick. I’m so disappointed, if I had followed this recipe and not the book I believe I would have had better success. I’m sorry I bought the book.
Nicole Hunn says
This recipe is not made with my gluten free bread flour blend, Kristin. If you attempted to make the one from the book using something other than my particular, specified gluten free bread flour, then yes, it won’t turn out. It sounds like you should return the book, if you can. It uses bread flour in every corner of it, and perhaps you’re not willing or able to bake with it. Every recipe in the books has been tested and retested, but sometimes the blog recipes differ. I don’t pretend otherwise.
Ian Pro says
Have tried this recipe 3 times, each time the bread rises well but when baked rises well above the rim of the pan, and after baking tends to fall disappointingly. Tastes great but I am.wondering 1. If my yeast might be over activated (I live in Barbados so it’s quite hot) 2. Should I reduce the temperature and increase cooking time to see if it will stand firm.and not fall
Nicole Hunn says
Whenever baked goods rise and then fall/deflate as they begin to cool, it’s often due to a too-hot oven. The loaf appears baked on the outside, but the inside isn’t developed enough to provide actual structure. That’s why doneness for yeast bread is sometimes determined by tapping on the loaf (if it sounds somewhat hollow, it isn’t wet and unbaked inside) or by taking the internal temperature to see if it’s baked and set. It can also be an unbalanced recipe (if you made any substitutions, particularly to the flour blend, since you mentioned living in Barbados). You must use the ingredients specified, and measure by weight for reliable success.
Vicky R says
Love the recipe. Made it with cup4cup and it was delicious but would like to know if there is a way to reduce the amount of sugar and still get the same texture.
Nicole Hunn says
I’m glad you enjoyed the recipe, Vicky. Sugar isn’t just a sweetener. It’s also a tenderizer. You can’t reduce it without changing more than just the taste, no.
Trina Palmer says
Hello! First off thank you for this fantastic recipe! I ran with it, I poured the dough onto a greased quarter sheet pan and pressed it out to fill, covered it with plastic and chilled the dough for two hours, after which it was able to be rolled out to make a rolled pastry log. I have some photos I’d love to share with you!
Meghan says
I’m unable to see most of the comments on here so, I’m sorry if you have already answered this… Are you able to braid this recipe?
Nicole Hunn says
No, you can’t braid this dough, Meghan. It’s a batter style bread and cannot be shaped.
Titi says
Hi Nicole,
I love your loaves, they look amazing. I’d like to ask a question, what if I cannot use xanthan gum or any gum in any of my loaves, what do you suggest?
Nicole Hunn says
I’m afraid you cannot make my recipes that call for an all purpose gluten free flour blend without xanthan gum or guar gum, Titi. That’s doubly true of my yeast bread recipes. Sorry!
AE says
Would this work to make rolls if scooped into a muffin tin? If so, how long should they bake? And, thank you for all that you do to make things accessible to families with celiac disease.
Nicole Hunn says
I’m afraid I don’t recommend that, no, AE. Scroll down, as I’ve answered this already in the comments. I should probably put the answer in the text of the post!
Anita says
Wonderful recipe. The bread rose to the top of the pan, and I didn’t even use the narrower gf loaf pan. I forgot to remove it from the pan and wrap it, so it got very dark, but still delicious. I’m wondering if the fact that it was a darker pan contributed to that. Will make again for a treat.
Nicole Hunn says
Yes, you really don’t want to bake in a dark or a glass pan, Anita. Both will cause the loaf to run hotter and cook faster on the outside. Glad you enjoyed it!
Katrina Mustfa says
Great recipe, thank you. (In the UK – used Doves flour)
Nicole Hunn says
Good to know, Katrina. I’ve never tried Dove’s since it isn’t for sale anywhere in the U.S., but I’ve always heard great anecdotal reports that it works everywhere I recommend an all purpose gluten free flour blend.
Jamie says
Not sure what went wrong, the bread didn’t rise as much as I would have liked, just barely to the top of loaf pan, I let rise for about 1 1/2 hours. Then I baked in oven at 375 and by the time 25 minutes was up it was burnt all over and not cooked inside. Should the oven have been at 350 or 325? should it have been covered? I did use psyllium husk instead of xanthum b/c I am Paleo as well as the mykyoto vegan butter, but would that have made that kind of a difference? Confused, any ideas?
Nicole Hunn says
The recipe is precisely correct as written, including the oven temperature. You cannot use psyllium husk as a replacement for xanthan gum, Jamie. And if you’re eating Paleo, I assume you used a completely different flour blend than the rice-based ones that I specify must be used for success in my recipes. You created a completely different recipe!