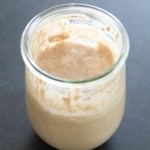
Gluten Free Sourdough Starter Recipe
Learn all the details about how to make a wild yeast gluten free sourdough starter from scratch, step by step. Taste the true mix of yeast in your area, and use it to make gf bread or whatever you like!
Servings: 1 wild yeast sourdough starter
Equipment
- 1 liter capacity nonreactive jar glass, stainless steel or ceramic (must be nonreactive; avoid aluminum)
- Nonreactive spoon wood, stainless steel, or silicone (must be nonreactive; avoid aluminum)
Ingredients
To Create The Starter: per day, for 5 to 7 days
- 1 cup (120 g) whole grain gluten free flour (See Recipe Notes)
- 1 cup (8 fluid ounces) bottled spring or distilled water (or tap water filtered to remove chlorine) at room temperature
To Refresh The Starter: once per week, indefinitely, and before/after using
- ½ cup (70 g) gum-free gluten free flour (See Recipe Notes)
- ½ cup bottled spring or distilled water (or tap water filtered to remove chlorine) at room temperature
Instructions
Creating the starter: Morning of Day One: Beginning
- In a 1 liter capacity nonreactive container like a glass or ceramic jar, place 1/2 cup (about 60 grams) whole grain gluten free flour(s) and 1/2 cup (4 fluid ounces) spring or distilled water.
- Using a nonreactive mixing spoon, mix to combine well.
- Cover the container loosely (without an airtight seal), and allow to sit on the counter at room temperature for 8 to 12 hours.
Creating the starter: Evening of Day 1: Building
- Remove the cover of the container, and add another 1/2 cup (about 60 grams) whole grain gluten free flour(s) and 1/2 cup (4 fluid ounces) spring or distilled water.
- Using a nonreactive mixing spoon, mix to combine well.
- Cover the container loosely, and allow to sit on the counter at room temperature for 8 to 12 hours.
Creating the starter: Morning of Day 2: Building
- Remove the cover of the container, and add another 1/2 cup (about 60 grams) whole grain gluten free flour(s) and 1/2 cup (4 fluid ounces) spring or distilled water.
- Using a nonreactive mixing spoon, mix to combine well.
- Cover the container loosely, and allow to sit on the counter at room temperature for 8 to 12 hours.
Creating the starter: Evening of Day 2: Building
- Remove the cover of the container, and add another 1/2 cup (about 60 grams) whole grain gluten free flour(s) and 1/2 cup (4 fluid ounces) spring or distilled water.
- Using a nonreactive mixing spoon, mix to combine well.
- After 4 additions of 1/2 cup flour and 1/2 cup water, the total contents of the starter should be about 2 cups flour and 2 cups water.
- Cover the container loosely, and allow to sit on the counter at room temperature for 8 to 12 hours.
Creating the starter: Morning and Evening of Days 3 through 7 and beyond: Building and/or Discarding/Building
- Remove the cover of the container, and inspect the contents by tapping the jar on the counter to see if bubbles begin to break the surface of the mixture, and smelling it to see if it has any sour odor at all.
- If it does bubble and has an odor, discard any relatively clear liquid that has accumulated on top (called “hooch”) + about 1/3 of the volume.
- Then feed it: Add another 1/2 cup (about 70 grams) gum-free gluten free flour and 1/2 cup (4 fluid ounces) spring or distilled water.
- Using a nonreactive mixing spoon, mix to combine well.
- If it doesn’t bubble and have an odor, do not discard anything, but feed with 1/2 cup whole grain flour and 1/2 cup water as directed above.
- Cover the container loosely, and allow to sit on the counter at room temperature for 8 to 12 hours.
When is it ready to use?
- The starter is ready to use once it has ever doubled in size, and you have been feeding and discarding for at least one whole day.
- The doubling is easily disturbed, though, and typically won’t last for very long. It just has to have occurred to confidently use it in a bread-baking recipe.
- Before using the starter, you should have "fed" or refreshed it within approximately the previous 12 hours.
- After using the properly fed starter, refresh it (see the next step for instructions), allow it to sit loosely covered on the counter for about 12 hours, and then cover with an airtight seal and refrigerate it until it’s ready to be refreshed or used.
Refreshing (feeding) an active/mature starter
- An active starter can be used for baking, then refreshed and stored, covered, in your refrigerator for about a week. After about a week, you should refresh it.
- To refresh your mature starter, remove it from the refrigerator and discard about 1/3 of the volume (including any clear liquid or hooch from the top).
- Add 1/2 cup (70 grams) gum-free gluten free flour and 1/2 cup (4 fluid ounces) spring water or distilled water. Mix with a nonreactive spoon.
- Cover the starter loosely and allow it to sit on the counter for about 12 hours before covering it with an airtight seal and returning it to the refrigerator.
- Repeat the process every week for the life of the starter.
Video
Notes
Flour for creating the starter
The best whole grain flours for a gluten free wild yeast starter are: brown rice flour; buckwheat flour, or a combination of sweet white sorghum flour and teff flour.
Flour for refreshing the starter
You can continue to use the same whole grain flour to refresh and maintain the starter, but it will affect the flavor and color of the baked goods you make with it. That's why I prefer to use a more refined blend like our gum free gluten free flour blend to refresh the starter.
Nutritional information
Since there are varying types and levels of ingredients in this recipe, it's not possible to provide even estimated nutritional information.
