Do you shy away from any recipe that calls for a gluten free pie crust? Like, say, for baking that classic apple pie around the holidays, or a coconut cream pie for Easter? If you do, I can completely relate.
It may seem like there are just way too many methods and techniques out there, and no real consensus about what you should and shouldn't do to make the perfect gluten free pie crust, one that's never dense or tough, and always light and irresistibly flaky.
So, while I’m not here to tell you that this recipe is the only way to make a light and flaky gluten free (gf) pie crust, I can say that it’s an easy way to make one every single time.

Follow my step-by-step guide to making a classic gluten free pie crust, or learn how to make a light and flaky gf pie crust that’s also completely dairy-free. You can use any gf pie filling you like with this pie crust. If you only need a single crust, simply cut the recipe ingredients in half.
What is the best gluten-free flour to use for this pie crust?
All pie crust recipes need pastry flour. This particular gluten free pie crust recipe uses an easy blend of all-purpose, gf flour, made from rice flour and xanthum gum, with added starch and milk powder (or coconut milk powder if it needs to be dairy-free).
You can find the recipes for my Mock Cup4Cup Gluten Free Flour Blend or Better Than Cup4Cup Flour Blend on my All Purpose Gluten Free Flour Recipes page.
Ingredients and substitutions
Making the pastry dough itself requires just a few basic gluten free pantry ingredients. Keep in mind that this incredibly simple recipe is all about the proportions, so you can scale up or down to your heart's content.
Simply follow these step-by-step instructions for the perfect light and flaky gluten free pie crust, and you can't go wrong!
The approximate ratio of each of the ingredients is:
- 1 cup (140 g) all purpose gluten free flour (including 1/2 teaspoon xanthan gum)
- Scant 1/4 teaspoon baking powder
- Scant 1/4 teaspoon kosher salt
- 4 tablespoons (56 g) cold unsalted butter, diced and chilled (alternatively, use Spectrum nonhydrogenated vegetable shortening or Miyoko's Kitchen brand vegan butter, if you are opting for dairy-free).
- 1/4 to 1/3 cup (2 to 2 2/3 fluid ounces) cold water, iced
Multiply all the ingredients by two (2) for a single pie crust, or by four (4) – as in the recipe below – to make two pie crusts for a double-crust pie.

Gluten free pie crust recipe: tips for perfect crust texture
There are a few pointers to keep in mind when making this classic pie crust to achieve the best results.
- Always begin with cold ingredients.
Chilled ingredients are the key to achieving a light and flaky pie crust texture. Dice the chilled, unsalted butter, and then place it back in the refrigerator to chill again. Begin with cold water, and then add ice to the water – ice water is colder than cold water, and even colder than ice.
- Chill dairy-free alternatives for a shorter period
If you are making a dairy-free gluten free pie crust by replacing the butter with Spectrum nonhydrogenated vegetable shortening, don't cool the chopped shortening for too long, or it will freeze and be difficult to flatten and roll out properly. That's partly why I recommend Miyoko's Kitchen brand vegan butter instead, which can be chilled more readily.
- Don’t chop up the butter or process it until it’s the size of “small peas.”
If you're making a dairy-free pie crust, the same applies to the Miyoko's Kitchen brand vegan butter.
While it may be a common instruction in pie crust-making, I am anti “small peas” in all pastry-making for one reason: very small pieces of butter not only melt too easily when they meet with the heat of your hands (or even warm air), but they melt right into the dough. Even rechilling the dough won't help once the butter in the raw dough has melted.
The reason you don’t want your butter to melt initially is that it’s the butter that creates the spaces in the pastry dough that, when baked, make it light and flaky. As the butter evaporates in the heated oven, it leaves behind light and airy pockets that give the pie crust its flaky texture.
Using butter in larger chunks, and then flattening them between your thumb and forefinger ensures your pastry dough remains easy to handle and shape, and prevents the butter from melting entirely into the dough.
- Handle the dough as little as possible when preparing it
But don't drive yourself crazy. Since we are working with larger pieces of butter than “small peas,” we can always re-chill the dough if it becomes too soft or difficult to handle.

- Be careful about the all purpose gluten free flour blend you choose
The components of a higher starch blend, like King Arthur Flour's gluten free multi-purpose blend, might be okay for a pie crust, but the grittiness of their rice flour simply won't result in a smooth texture.
- Add sour cream for extra moisture and flaky texture
If you don't have to be dairy free and you're looking for extra layers, try our recipe for extra flaky gluten free pie crust. The added sour cream and rebalanced liquids bring it to the next level.
Top tips for rolling out and shaping gluten free pastry dough
Keep the dough moving during rolling, even turning it over frequently, and do not be afraid to sprinkle it lightly with more flour if it becomes sticky.
When manipulating any sort of dough, use the rolling pin to roll – and not press – the dough. Pressing too hard creates uneven thicknesses and unnecessary sticky spots in the dough, so roll more than once over a surface to smooth it out.
If the dough ever becomes a bit too delicate to handle, fold it gently in thirds, wrap it in plastic wrap, and chill it until it begins to firm up.

Gluten free pie recipes to make using this gf pie crust
Hopefully, you are feeling more than inspired and brave enough to roll up your sleeves and get right to work baking some delicious gluten free pies.
To get you started, here are some recipes I love that call for a gluten free pie crust.
- Gluten free coconut cream pie
- Gluten free Dutch apple pie
- Gluten free root beer float pie
- Gluten free cannoli pie
- Classic gluten free pumpkin pie
Feel free to pop a comment below if you have any questions or feedback – I’d love to hear from you!
Gluten free pie crust recipe FAQs
Once you have reached the step of dividing the initially shaped dough in half, it can be wrapped tightly in freezer-safe wrap and frozen for at least two months. Defrost the dough in the refrigerator overnight before proceeding with the recipe. You can also freeze your already-baked pie crust for two months.
Yes! This pie crust recipe has a neutral flavor, and can be used for either sweet or savory pies. In fact, it can be used anywhere you’d use any basic pie crust recipe. If you’d like to use it for something with a top and bottom crust, just be sure to double the recipe.
Yes, certain pies will do best when they are pre-baked, which is also called par-baking or blind baking. If yours is an especially wet filling, to ensure that the crust doesn’t get soggy during baking, you may need to pre-bake the crust before filling it and completing baking.
It’s always best to follow the instructions in the pie recipe you’re making, though, which may or may not call for pre-baking the crust. If you’re using this pie crust recipe but another recipe developer’s pie filling recipe, though, I’d follow the instructions given in that other recipe for how to prepare the pie. They know best!
Easy Gluten Free Pie Crust Recipe By GFOAS
Ingredients
4 cups (560 g) all purpose gluten free flour (My Better Than Cup4Cup Flour is best here), plus more for sprinkling
2 teaspoons xanthan gum (omit if your blend already contains it)
3/4 teaspoon baking powder
3/4 teaspoon kosher salt
16 tablespoons (224 g) unsalted butter, diced and chilled (a 1/2-inch dice is best)*
1 cup to 1 1/3 cups (8 to 10 2/3 fluid ounces) cold water, iced (ice cubes do not count in volume measurement)
*For a dairy-free version, replace the unsalted butter with an equal amount, by weight, Miyoko’s Kitchen brand vegan butter. Melt brand is also very good.
Instructions
Make the dough. In a large bowl, place the flour, xanthan gum, baking powder, and salt, and whisk to combine well. Add the chopped and chilled butter, and toss to coat it in the dry ingredients. Flatten each chunk of butter between your thumb and forefinger so that it’s about 1/8-inch thick. Create a well in the center of the dry ingredients and slowly add the water (reserving the ice cubes), mixing gently until the dough begins to come together. Press together With floured hands, press together the dough into a disk. If there are any crumbly, dry spots at this point, add more water by the teaspoonful and press together with your hands.
Begin to shape the dough. Turn out the dough onto a lightly floured surface. Sprinkle the top lightly with more flour, and roll out into a rough rectangle that is about 1 inch thick. Sprinkle the dough lightly with more flour, fold it over on itself in thirds like you would a business letter, sprinkle again with flour, and roll out the dough once again into a rectangle about 1 inch thick. Repeat the process of rolling, sprinkling and folding at least once more, this time ending with a rectangle about 1/2-inch thick. Using a pizza wheel, pastry cutter or sharp knife, slice the rectangle in half along the length, creating two rectangles of equal size, and roll each separately in thirds once more. Wrap each piece of dough securely in plastic wrap, and place in the refrigerator to chill until firm (30 minutes to an hour).
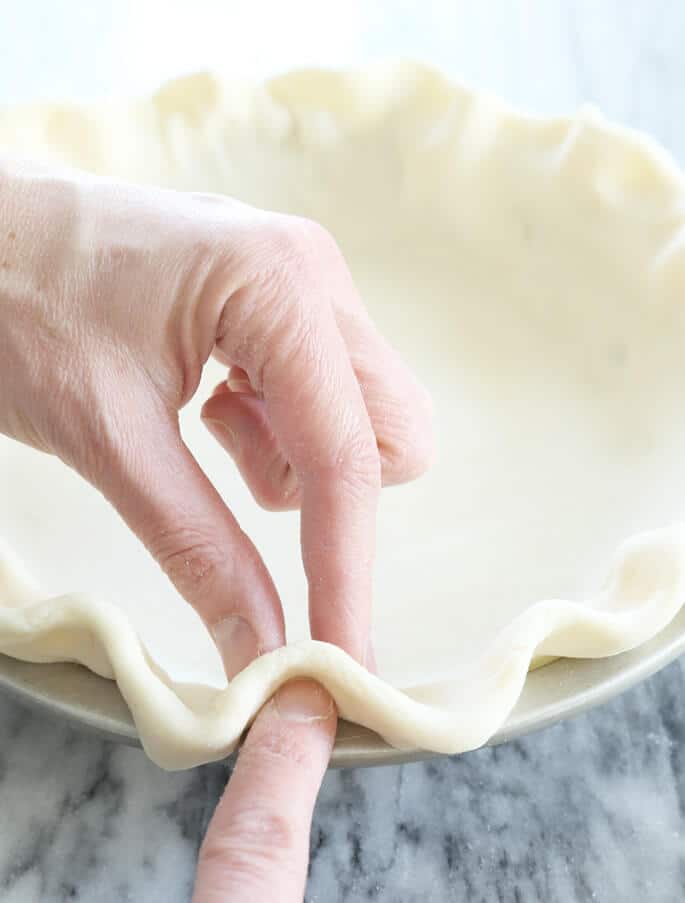
Finish shaping the crust. Once the dough has chilled, remove one piece from the refrigerator, unwrap it and place it on a lightly floured surface. Sprinkle the top lightly with more flour, and roll into an approximately 12-inch square. Trim the edges to create a round about 12-inches in diameter. Gently fold the round in half and lift it into a greased pie plate. Unfold the round in the plate, lift up the edges of the pie crust gently to create slack in the crust, and press it gently and evenly into the bottom and up the sides of the pie plate. Tuck the edges of the dough underneath itself so that the dough overhangs the edges by only about 1/4-inch. Crimp the edges of the dough gently all the way around by pinching the dough at regular intervals with one hand, and creating a crimped impression with the forefinger of the other hand. Cover the pie crust with plastic wrap and place it in the refrigerator to chill until firm, at least 30 minutes (and up to 3 days). When you are ready to complete a double-crust pie, fill the pie, then follow the same procedure for shaping the second half of the pie crust, placing it on the top of the filling, and repeating the same crimping process in reverse, then pressing the edges together. Chill before baking and finish according to the instructions in whatever recipe you are using.
Recommended gluten free pie recipes:
Coconut Cream Pie
Apple Pie in a Bag
Root Beer Float Pie
Cannoli Pie
Classic Pumpkin Pie
Chocolate Chip Pie
superfcbear says
Thank you , always – for the tireless work you do!
i have been making your other pie crust – the one that calls for sour cream. it’s the most pliable and easy to handle crust ever! how will this be different with only butter?
Jennifer S. says
thanks for all the great tips! :)