
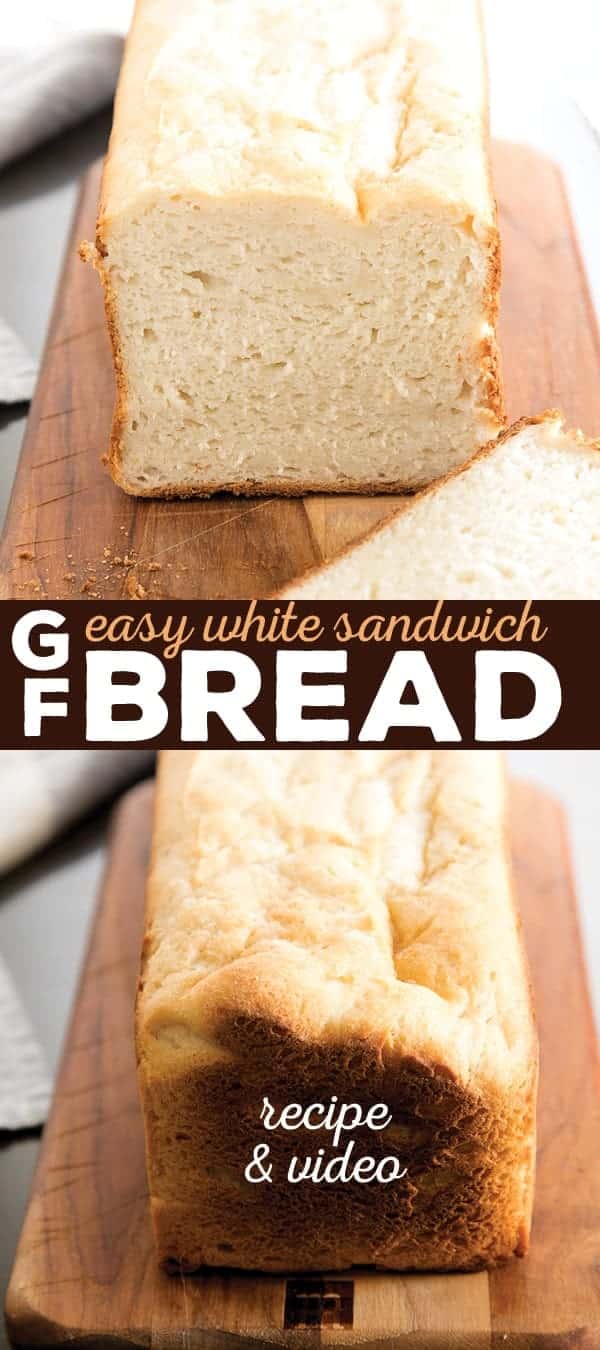
With a soft and tender crumb, this gluten free bread recipe is the original and best. It's the white sandwich bread you've been missing since you started on your gluten free journey.
It really is an amazing recipe if you're on a gluten free diet. It tastes and behaves just like regular bread. It's easy to make and if you follow the recipe closely, you'll get perfect bread every time.
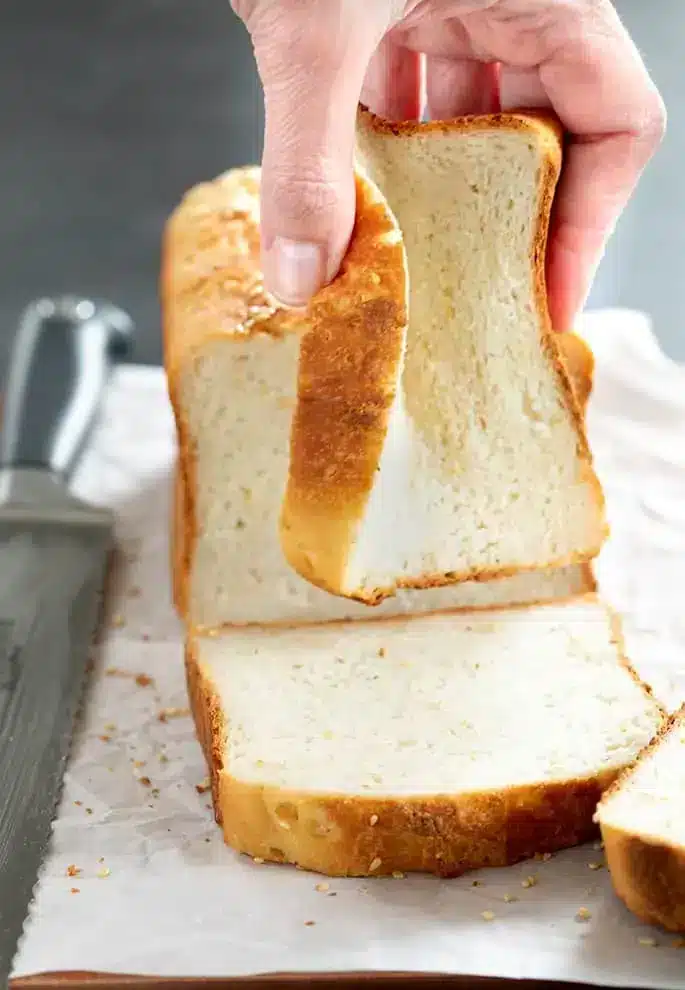
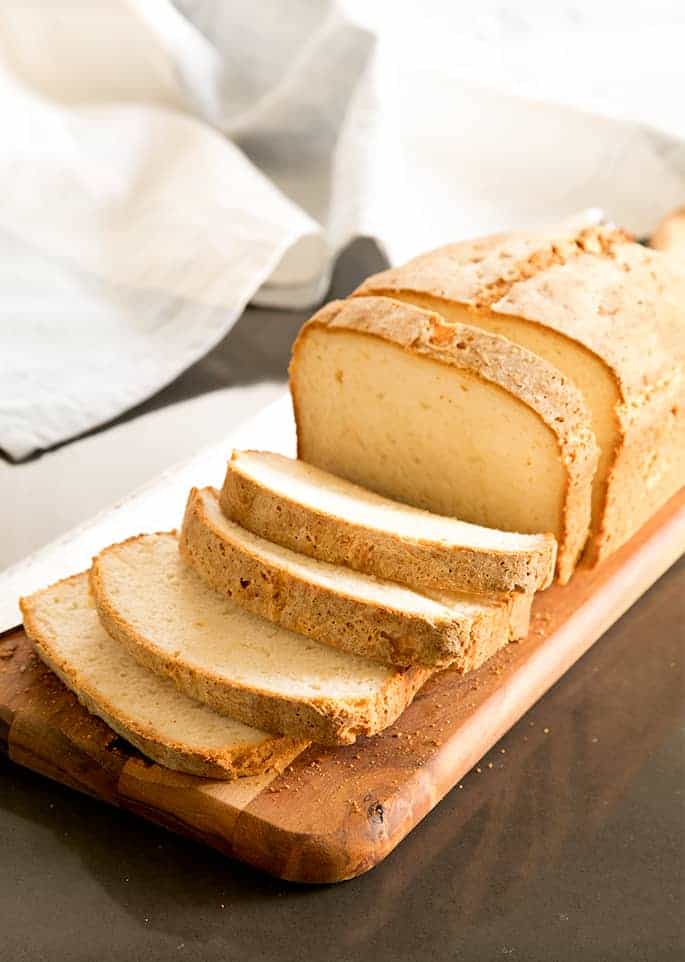
This soft and tender gluten free bread bends and squishes and tastes like the “real thing”, and it has a lovely bakery-style crust to boot.
The original gluten free bread recipe
Use it for yummy sandwiches, grilled cheese, or classic peanut butter and jelly. You can toast it for a bit of crunch, and if you're craving something sweet, sprinkle on a bit of sugar and cinnamon. This gluten free sandwich bread is incredibly versatile — just like bread should be.
Yes, it's been copied and republished by others with “tweaks” to try and make it unique, but that actually ruin the bread. But this is the original, unadulterated recipe that I came up with way back in 2010. And it's quite simply the easiest and the best gluten free bread recipe you'll find.
A batter-style gluten free bread recipe
This batter-style gluten free bread doesn’t look or behave anything like conventional yeast bread when it’s raw or even when it’s baking. That didn’t matter to me at all when I first developed the recipe. So don't be surprised when you're making this gluten free bread and you see it's a batter, not a dough. Don't worry – trust the recipe and keep baking.
I still have such vivid memories of researching every possible additional ingredient I could add to this gluten free bread recipe to help support the dough during its rise.
I finally settled on apple cider vinegar and cream of tartar, plus egg whites, and of course xanthan gum (you simply can’t make gluten free bread that doesn’t fall apart without xanthan gum).
Before that, I wasted a ton of expensive ingredients, including all different kinds of gluten free flours. But it was all worth it. Every failed recipe attempt eventually led to this awesome bread recipe.
What is the dough like?
As we discuss in our beginner's guide to gluten free baking, if you have any experience baking conventional yeast bread, this gluten free bread dough will seem completely unfamiliar to you.
This batter-style gluten free yeast bread dough is more like a loose cookie dough than it is conventional bread dough.
You need a mixer paddle attachment to mix it, most definitely not a dough hook!
The one drawback of this recipe is that I’ve never made it with total success with a bowl and spoon. And believe me, I've tried! Mixing all the ingredients until they’re truly smooth and fully incorporated is just really hard without a stand mixer.
It’s a bit fragile once it’s risen, so handle with care. If you’d like to add seeds to this gluten free bread, do it after the dough has risen. Just brush the top lightly with melted butter and sprinkle with seeds. But be gentle or you'll ruin the rise.

The best gluten free flour blend for this bread recipe
You've got a lot of choices when it comes to gf flours, but my go-to gluten free flour blend for this recipe (and many others) is Better Batter.
It's an all purpose gluten free flour blend with just the right proportions of rice flour, potato flour, xanthan gum, and other ingredients for baking more than just the best gluten free bread.
I highly recommend that you stick with Better Batter for this recipe. However, if you're interested in trying a different blend for this recipe, consider the other options on our all purpose gluten free flour blends page.
Letting the gluten free bread rise
To speed up the rising process, some people recommend letting the dough sit in a warm oven. I want to make it clear: I absolutely never recommend using an oven to proof bread.
Believe me, it's not because I like sitting around waiting for my bread to rise. Instead, the reasoning is very simple: When you use a warm or hot oven to proof bread, you could easily kill the yeast, and dead yeast = no rise.
For best results when making this easy gluten free bread recipe, please don't use a warm oven for proofing. Instead, choose a naturally warm, draft free spot and let the yeast do its thing. And keep in mind that, if your environment seems quite cool (but isn't truly cold), your yeast bread will still rise, just more slowly.
Tips for baking the perfect gluten free sandwich bread
I've put together my top tips to help you get perfect gluten free bread every time. Trust the recipe and follow these tips for flawless gluten free sandwich bread time and time again.
Use the best bread pan for baking gluten free sandwich bread — the Pullman loaf pan
I had always wanted to try making it in a Pullman loaf pan. That was the only way to see if I could get those perfect, no-dome slices that are truly made for sandwiches.
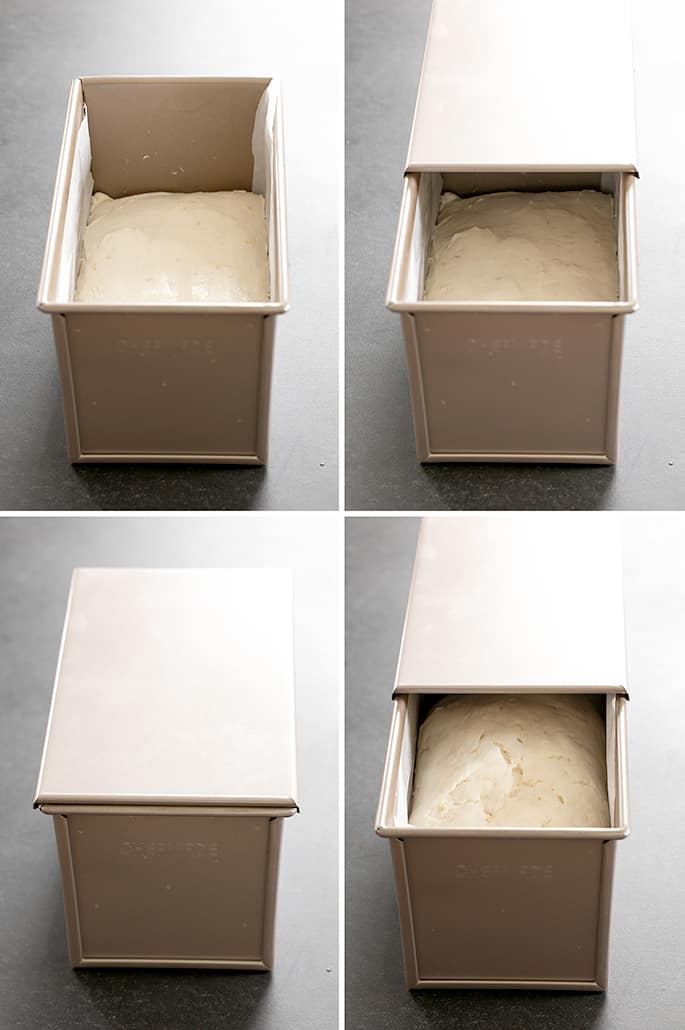
Baking in a Pullman pan (which is that taller, narrow pan with a lid that slides on) also tends to make softer bread. The moisture in the bread is trapped inside the pan during baking, and the bread absorbs it as it bakes.
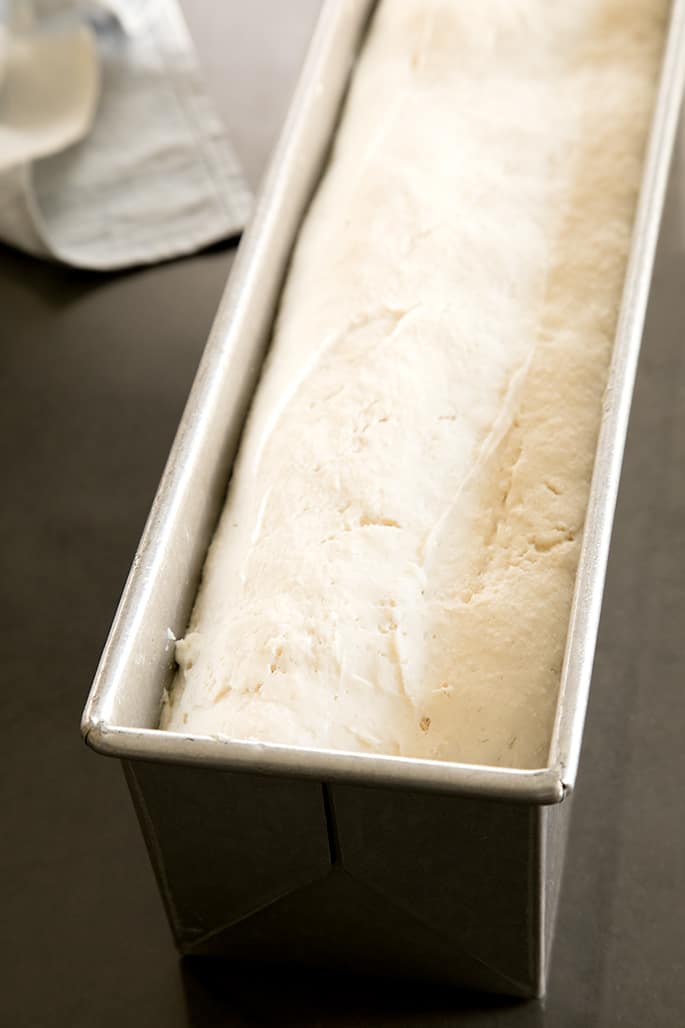
The photo above is a loaf baked in a 2 pound Pullman loaf pan. The photos below are of the bread rising in a 1-pound Pullman loaf pan.
You can make a 1-pound Pullman loaf, or a 2-pound Pullman loaf. The baking time is nearly the same, as the pans are much longer but also considerably more narrow.
For the 1-pound Pullman pan
For the 1-pound pan, you don't do anything different to prepare the bread dough. When it's ready to rise, use the Pullman cover instead of plastic wrap, then bake for about 40 minutes with the lid on. Remove the lid and allow the top to brown.
For the 2-pound Pullman pan
For the 2-pound loaf pan, double the recipe and be sure to mix the ingredients with a bit of extra care. The instructions are the same as for the 1-pound pan for rising and baking, just baked in a 2 pound Pullman loaf pan.
Choosing the right yeast for gluten free sandwich bread
Yeast is an essential ingredient for most bread recipes, but when you head to the grocery store, you may notice a few different varieties, including instant yeast and active dry yeast.
Is yeast gluten free?
Let's get this out of the way first: Most types of yeast are gluten free, but as always, you'll want to carefully check ingredient labels to be sure the one you're choosing is safe. Yeast in a single-cell fungus that converts sugar and starch into carbon dioxide and alcohol, which is what causes baked goods to rise. So, in its natural state, yeast is naturally gluten free.
However, always choose a certified gluten free yeast, as other types may be processed in a factory that processes yeast on the same production line as gluten-containing ingredients, resulting in cross-contact contamination.
Instant yeast vs active dry yeast
Two of the most common products you'll find on the shelf are instant yeast and active dry yeast.
My homemade gluten free sandwich bread recipe calls for instant yeast, which may also be labeled as quick rise.
If you'd like to substitute active dry yeast instead, you can, but you'll need to take a few extra steps. First, multiply the weight of instant yeast by 1.25 for the right ratio.
Because active dry yeast has a thicker coating around the yeast, you'll need to help break it down. You can do this by soaking it in some of the milk for this recipe until it foams.
Once foamy, add it and the rest of the milk when the recipe calls for it.
Use a pan liner or cooking spray
There's no question that you need a pan liner or cooking spray to stop your bread welding to the sides and base fo the pan. If you're not using a pan liner, make sure your non stick cooking spray is gluten free! I like to use coconut or olive oil.
Don't let the bread cool completely in the pan
Let your homemade gluten free sandwich bread cool in the pan for about 10 minutes, but then transfer it to a cooling rack so it doesn't get soggy from escaping steam.
Bake your gluten free bread in the center of the oven
You'll enjoy a consistent baking temperature and better airflow, and you'll keep your bread from hitting the roof of the oven.
Use a bread knife or serrated knife
If you don't have a bread knife, be sure to use some kind of serrated knife for slicing. Otherwise, you may squish or tear your bread.
Gluten free white sandwich bread recipe ingredients and substitutions
As always, unless specifically indicated otherwise, I haven't made this recipe with any substitutions.
These are mostly just my best-educated guesses for how to accommodate other dietary restrictions. Proceed with caution when modifying any recipe!
Gluten free dairy free bread
Making this bread dairy free is easy. Just replace the butter with vegan butter. Melt and Miyoko's Kitchen brands are my favorite.
You can even use Earth Balance Buttery Sticks and reduce the salt to 1 teaspoon.
Avoid using the soft vegan spreads though, this bread recipe calls for butter, so use the plant butter blocks for the best dairy free results.
Use any dairy free milk you like, just be sure it's not nonfat and is unsweetened. I really like unsweetened almond milk here, as it doesn't impact flavor and still contains enough fat so the rest of the recipe doesn't require any adjustment. Full fat canned coconut milk is never an appropriate substitute for dairy milk, as it has very little moisture.
Egg free gluten free bread recipe
This is a little harder since the recipe calls for egg whites, not a whole egg.
I’ve never tried this recipe with any substitutions to make it egg-free, but I’d recommend trying a “chia egg” (1 tablespoon ground chia seeds + 1 tablespoon lukewarm water, mixed and allowed to gel). Alternatively, aquafaba may behave more like egg whites. If you try either, let us know how it goes!

Storing gluten free sandwich bread
This easy gluten free bread recipe produces incredibly tender bread that stores easily on the kitchen counter. Just keep it sealed in an airtight container at room temperature, and it will last for about 2 days.
I also recommend that you don't pre-slice any gf bread before use, unless you're going to freeze it. Doing so may cause it to dry out prematurely, so leave the loaf whole and slice as needed.
Adding seeds
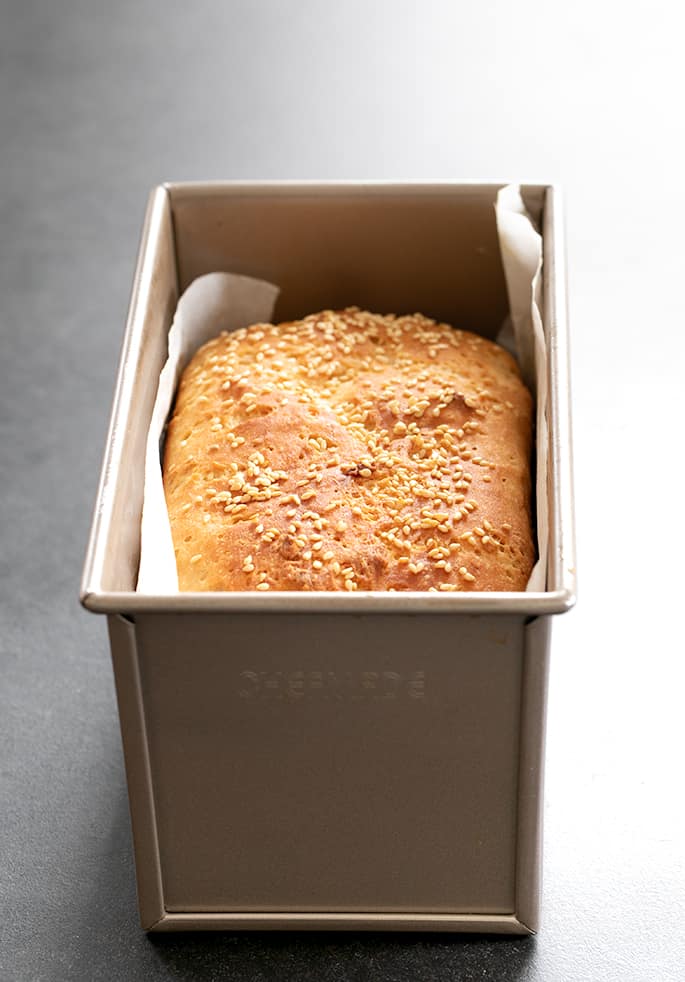
If you want to dress your bread up a little, and turn it into a fancier-looking bread, or give it a bit more flavor and crunch, you can sprinkle the top with seeds. Do it after the loaf has risen and is ready for the oven.
Lightly sprinkle the seeds over the top, but don't push them down too much as the risen dough is quite fragile. Add sesame, chia, quinoa, sunflower, or pumpkin seeds, and maybe even some finely chopped nuts.
Freezing gluten free sandwich bread
Another wonderful thing about this gluten free sandwich bread recipe is that it also freezes fabulously! This means you can enjoy a yummy gf sandwich at a moment's notice.
For freezing, slice the bread into individual portions. Make sure each slice has cooled completely, and then wrap tightly and freeze.
When you're ready for a sandwich, remove as many slices as you need and refresh them by popping them right in the toaster (no need to defrost first).
Get more gf bread information
If you're waiting for the right ingredients or just need a sandwich while the bread rises, I've reviewed 8 gluten free brands of bread that I really like. I've also compiled my top 10 secrets to baking gluten free bread.
I'm happy to share everything I know with you! If you're ready for the next step, I'm there for you, too. When you're ready, join me in learning about baking with my gluten free bread flour blend, which calls for some additional ingredients that you'll have to order by mail, but the bread is next level!
Gluten Free Bread Recipe FAQs
For lots of general tips on gf yeast bread baking, please see how to make gluten free bread. You'll find 10 rules and lots of FAQs. Here are some specific questions that are frequently asked about this white gluten free bread recipe:
While they're designed to make life easier, I can't recommend using a bread machine for this recipe, even if it has a gluten free setting.
Again, it's not because I'm a fan of more work or that I dislike using a bread machine. Rather, I'm a fan of consistent results, and you just can't achieve that with a bread machine. There are simply too many bread machine models to tailor this recipe, and a set of instructions for one brand of machine doesn't work for another, so I say skip the machine for best results.
So long as you slice this gluten free sandwich bread thin enough to fit in your toaster slots, you'll toast it like you do traditional wheat bread.
Some people say they find gf bread harder to toast. That may be the case for drier breads, but this recipe produces a soft, tender bread that's perfect for toasting.
This recipe is like those wildly expensive, really yummy gluten free artisan bread products you can find at the store that make the most wonderful toast doorstops with lashings of butter and your favorite toppings.
My top recommendation for gluten free baking is Better Batter. It's what I used in this recipe and what I use in most of my creations.
You can try a different flour blend if you'd like, but I can't promise results.
And, trying to make your own gluten free flour blend by adding brown rice flour or coconut flour to differing amounts of potato starch or tapioca starch is a recipe for disaster unless you really know what you're doing.
Remember, every potential ingredient for gluten free flour blends behave differently and have differing properties.
No, you can't just substitute gluten free flour for traditional flour — gluten free baking requires several adjustments, and it's even more important when it comes to baking a gf bread recipe.
To produce a gluten free bread that looks and tastes anything like the “real thing”, you have to use a specially formulated gluten free bread recipe—like this one!
Honestly, there are several reasons why your gluten free bread might not rise. First and foremost, I implore you to follow my gluten free bread recipe exactly as written to avoid this type of problem.
This includes using the same ingredients, especially the flour blend.
One reason you bread may not be rising is that you're simply not allowing it enough time to proof. Ideally, it'll rise in 30 to 45 minutes, but depending on local conditions, it may simply take longer.
Don't try to speed up the proofing process by sticking your dough in a hot oven — that's a quick way to kill your yeast, and then your bread will never rise.
Make sure to use instant yeast. If you only have active dry yeast on hand, follow my instructions above to make the substitution.
Dense bread can be a result of your bread not proofing for long enough, or the yeast dying off if, for example, you proofed it in a hot oven. It may also be because you didn't mix the ingredients together well enough in a stand mixer, tried to use a handheld mixer to make the dough, or tried to make it by hand.

How to make white gluten free bread for sandwiches, step by step (below)
Easy White Gluten Free Bread Recipe for Sandwiches | Tender and Springy
Ingredients
- 3 cups (420 g) all purpose gluten free flour blend (I used and highly Better Batter or my mock Better Batter blend here; click thru for the mock blend and full info)
- 2 ¼ teaspoons xanthan gum omit if your blend already contains it
- 2 ½ teaspoons (8 g) instant yeast
- ¼ teaspoon cream of tartar
- 2 tablespoons (25 g) granulated sugar
- 2 teaspoons (12 g) kosher salt
- 1 ½ cups (12 fluid ounces) warm milk (about 95°F)
- 4 tablespoons (56 g) unsalted butter melted and cooled (plus more for brushing if using seeds)
- 1 teaspoon apple cider vinegar
- 2 (50 g) egg whites at room temperature
- Toasted sesame seeds for sprinkling optional
Instructions
- Grease or line a 9-inch x 5-inch loaf pan (or slightly smaller) and set it aside.
- In the bowl of a stand mixer fitted with the paddle attachment, place the flour, xanthan gum, yeast, cream of tartar and sugar. Whisk together with a separate, handheld whisk. Add the salt, and whisk again to combine.
- Add the milk, butter, vinegar and egg whites, mixing on low speed after each addition. Scrape down the sides of the mixer bowl as necessary during mixing.
- Turn the mixer to medium-high speed and mix for about 3 minutes. The dough will be thick, smooth and quite wet.
- Scrape the dough into the prepared loaf pan. Using a wet spatula, smooth the top.
- Cover the dough with lightly oiled plastic wrap and allow it to rise in a warm, draft-free place for 30 to 45 minutes or until it’s about 150% of its original size.
- It should be overflowing the top of the loaf pan by at least 1/2 inch when you retrieve it, but it will not have doubled in volume. It may take longer to rise properly in colder, drier weather and less time in warmer, more humid weather.
- When the dough has nearly reached the end of its rise, preheat the oven to 375°F.
- Remove the plastic wrap, and using a sharp knife or lame slash the top of the loaf about 1/4-inch deep. If using the optional seeds, brush the top of the risen bread gently with melted butter, and sprinkle with the seeds.
- Place the pan in the center of the preheated oven. Bake for 45 minutes to 1 hour, or until the internal temperature of the bread reaches about 195°F on an instant-read thermometer. The outside will form a thick, brown crust.
- Remove the loaf from the oven, and allow it to cool for about 10 minutes in the pan before transferring to a wire rack to cool completely.
- To freeze this bread, cool completely and then slice, wrap tightly, and freeze. Defrost as many slices at a time as you need in the toaster.
Notes
Nutrition
Easy White Gluten Free Bread Recipe for Sandwiches | Tender and Springy
Ingredients
- 3 cups (420 g) all purpose gluten free flour blend (I used and highly Better Batter or my mock Better Batter blend here; click thru for the mock blend and full info)
- 2 ¼ teaspoons xanthan gum omit if your blend already contains it
- 2 ½ teaspoons (8 g) instant yeast
- ¼ teaspoon cream of tartar
- 2 tablespoons (25 g) granulated sugar
- 2 teaspoons (12 g) kosher salt
- 1 ½ cups (12 fluid ounces) warm milk (about 95°F)
- 4 tablespoons (56 g) unsalted butter melted and cooled (plus more for brushing if using seeds)
- 1 teaspoon apple cider vinegar
- 2 (50 g) egg whites at room temperature
- Toasted sesame seeds for sprinkling optional
Instructions
- Grease or line a 9-inch x 5-inch loaf pan (or slightly smaller) and set it aside.
- In the bowl of a stand mixer fitted with the paddle attachment, place the flour, xanthan gum, yeast, cream of tartar and sugar. Whisk together with a separate, handheld whisk. Add the salt, and whisk again to combine.
- Add the milk, butter, vinegar and egg whites, mixing on low speed after each addition. Scrape down the sides of the mixer bowl as necessary during mixing.
- Turn the mixer to medium-high speed and mix for about 3 minutes. The dough will be thick, smooth and quite wet.
- Scrape the dough into the prepared loaf pan. Using a wet spatula, smooth the top.
- Cover the dough with lightly oiled plastic wrap and allow it to rise in a warm, draft-free place for 30 to 45 minutes or until it’s about 150% of its original size.
- It should be overflowing the top of the loaf pan by at least 1/2 inch when you retrieve it, but it will not have doubled in volume. It may take longer to rise properly in colder, drier weather and less time in warmer, more humid weather.
- When the dough has nearly reached the end of its rise, preheat the oven to 375°F.
- Remove the plastic wrap, and using a sharp knife or lame slash the top of the loaf about 1/4-inch deep. If using the optional seeds, brush the top of the risen bread gently with melted butter, and sprinkle with the seeds.
- Place the pan in the center of the preheated oven. Bake for 45 minutes to 1 hour, or until the internal temperature of the bread reaches about 195°F on an instant-read thermometer. The outside will form a thick, brown crust.
- Remove the loaf from the oven, and allow it to cool for about 10 minutes in the pan before transferring to a wire rack to cool completely.
- To freeze this bread, cool completely and then slice, wrap tightly, and freeze. Defrost as many slices at a time as you need in the toaster.
Karen Lahaie says
Do you have a Gluten-free white bread recipe for a bread maker machine
Nicole Hunn says
No, I don’t use or recommend a bread maker. Please see the text of the post under the heading “Is this homemade gluten free bread suitable for bread machines?”
Fuad says
Hi Nicole
I would like to try the GF bread recipe but I am afraid I can not find pectin here, can I skip adding it to moke better batter mix?
many thanks
Nicole Hunn says
No, you can’t make the mock Better Batter blend without pectin. I recommend you use the mock Cup4Cup recipe instead.
Anna says
I have been using the mock better batter for this recipe and it never came out quite right. This time I used the better than cup4cup mix and it came out beautifully!