Raise your hand if you've already received your preordered copy of Gluten Free Classic Snacks! My hand, sadly, is not raised. Sure, I have my early copies of the book (some of which I just sent out yesterday to giveaway winners!), but I always preorder my cookbooks through amazon so I can track progress. (I believe that Barnes & Noble has actually beaten amazon this time!) You know that feeling when you have the perfect gift for someone you love and you just-can't-wait, not one-more-minute to give it them? Yeah, that's what this book is like for me. It's SO GORGEOUS! Filled with simply beautiful full color photos of every packaged cookie, snack cake, cracker, breakfast treat and candy we've been missing. Okay, almost everything. Classic Snacks does not have a recipe for Gluten Free Little Debbie Style Peanut Butter Crunch Bars. And why is that??

Well it's definitely not because it can't be done. It's really because of deadlines (the photo shoot is coming and the recipe isn't done! the manuscript is due and the recipe isn't perfect yet!), and maybe just maybe a wee bit of a lack of imagination on my part.

From time to time, I will be posting recipes that would have belonged in Classic Snacks. They're the right kind of recipe (packaged snacks! cookies!), and the recipe is spot on (tastes just like the original!). But to be completely and totally honest, deadlines didn't get in the way with this one. I just didn't think of it until the book had already gone to print! Didn't even occur to me until I was rolling by the snack aisle in the grocery store the other day and saw them just sitting there on the shelf. Just sitting there!

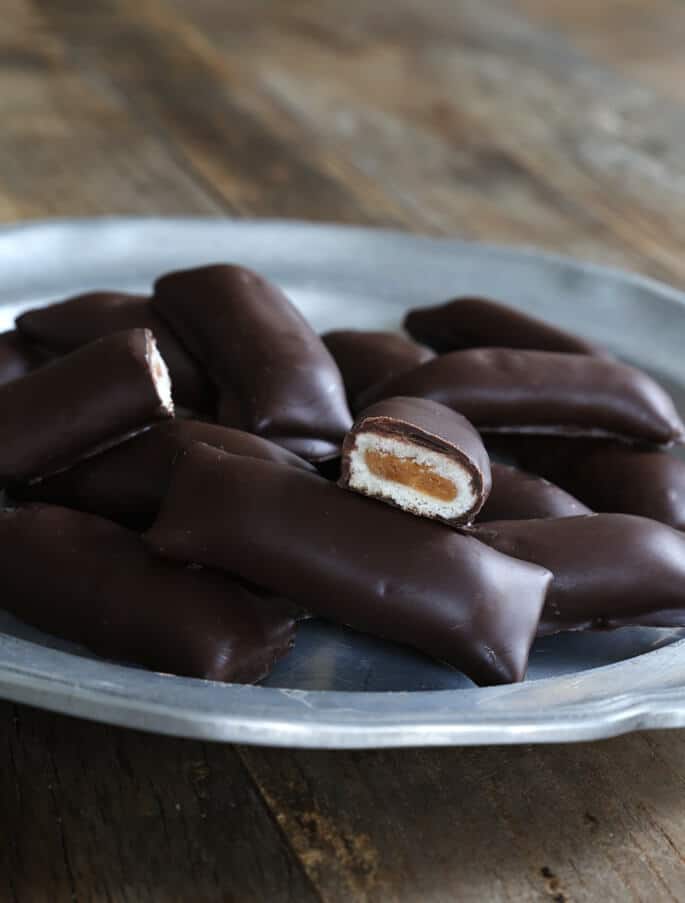
Well I'm happy to report that, not only are these crispy shortbread cookies filled with peanut butter and coated in chocolate authentic as could be, but they're actually really quite easy to make. All it takes is mixing up a quick and easy peanut butter filling and letting that chill, then making a modified shortbread cookie dough, rolling it out and slicing it into rectangles, then rolling up the filling in the dough. Bake the cookies, let them cool, and coat in chocolate. The cookies stay crispy, and the filling stays put during baking. It's amazing what you can do with some basic gluten free pantry ingredients in the proper amounts, with the right method. Really, if I had to sum up Classic Snacks in a sentence, that would be it!
I've made this promise before and I'll make it again and again (and again): If they can make it with gluten, we can make it without. Count on it!
Gluten Free Little Debbie-Style Peanut Butter Crunch Bars
Ingredients
For the Peanut Butter Filling
1/2 cup (128 g) smooth creamy peanut butter (I used Skippy Natural peanut butter)
1 tablespoon (14 g) unsalted butter, at room temperature
3/4 cup (86 g) confectioners’ sugar
1 egg white (about 20 g), at room temperature
1 tablespoon (21 g) light corn syrup (optional)
For the Cookie
2 cups (280 g) all purpose gluten free flour (I used Better Batter)
1 teaspoon xanthan gum (omit if your blend already contains it)
1/4 teaspoon kosher salt
1 cup (115 g) confectioners’ sugar
8 tablespoons (112 g) unsalted butter, at room temperature
1 egg white (about 20 g), at room temperature
1 teaspoon pure vanilla extract
1 tablespoon (21 g) light corn syrup (optional)
1 tablespoon lukewarm water, plus more by the half-teaspoonful as necessary
For the chocolate glaze
12 ounces dark chocolate, chopped
3 tablespoons (42 g) virgin coconut oil
Instructions
Preheat your oven to 325°F. Line a small rimmed baking sheet with unbleached parchment paper and set it aside.
First, make and chill the peanut butter filling. If your peanut butter is particularly thick, you may want to heat it briefly either in a small bowl in the microwave or in a small saucepan over low heat to loosen it. In a medium-size bowl, place all of the filling ingredients and mix to combine. The corn syrup is optional, but it helps keep the filling from spreading in the cookies during baking. Cover the bowl and place the filling in the refrigerator to chill while you make the cookie dough.
Make the cookie dough. Line a large rimmed baking sheet with unbleached parchment paper and set it aside. In a large bowl, place the flour, xanthan gum, salt and confectioners’ sugar, and whisk to combine. Create a well in the center of the dry ingredients and add the butter, egg white, vanilla, optional corn syrup and 1 tablespoon lukewarm water, mixing to combine after each addition. The dough should be thick but not at all stiff or hard. If it seems stiff or hard, add more water by the half-teaspoonful and mix to combine until the dough reaches the desired consistency. If you omit the corn syrup, you will almost certainly need to add the additional water.
Shape the cookie dough. Divide the cookie dough into two roughly equal parts. Cover one piece in plastic wrap and place the other on a flat surface between two sheets of unbleached parchment paper. Roll out the dough into a rectangle about 1/8-inch thick. If the dough appears to crack during rolling, it is too dry. Add some more water and knead it into the dough. Trim the dough to make clean edges, and slice it into rectangles about 2-inches x 3-inches. Gather any scraps together with the remaining half of the dough, and repeat the process until you have used up all the dough.
Assemble and bake the cookies. Remove the peanut butter filling from the refrigerator and pull off small pieces (each less than 10 grams) and roll into logs about 2-inches long x 1/2-inch wide. Place one piece of peanut butter filling near one long edge of each rectangle of dough, parallel to the edge, and roll the dough tightly around the filling. Pinch together the edges of the dough to seal, and trim off any jagged edges from each side. Place, seam side down, about 1-inch apart from one another on the prepared baking sheet. Place the baking sheet in the center of the preheated oven and bake until the cookies are just beginning to brown on the edges (about 12 minutes). Remove from the oven and allow to cool completely on the baking sheet. The cookies will crisp as they cool.
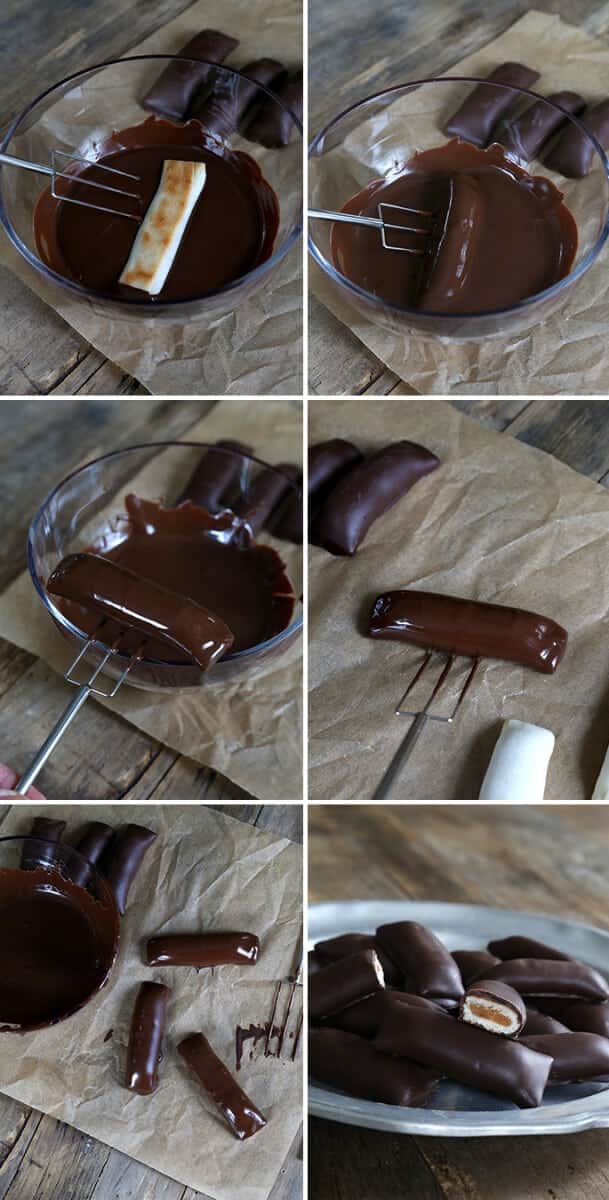
Prepare the glaze and dip the cookies. Line a large rimmed baking sheet with wax or parchment paper and set it aside. In a medium-size, microwave-safe bowl, place the chocolate and coconut oil and microwave in 30-second increments at 70% power, stirring in between. Allow the chocolate to sit at room temperature until it begins to thicken a bit. Immerse the cooled cookies one at a time in the glaze. Press down on the cookie with a dipping fork (or the tines of a regular fork), then flip it gently in the chocolate. Pull it out of the chocolate by slipping the fork under it and bobbing the cookie on the surface of the chocolate a few times before pulling it along the edge of the bowl and carefully placing it on the prepared baking sheet. Allow the chocolate glaze to set at room temperature. Store the cookies in a sealed glass container at room temperature. They should stay fresh for at least 5 days.

Stacey Patrick says
Preordered through Amazon, but nothing yet…. This recipe looks good!! Will have to experiment with it :).
Missy says
My book was delivered today while I was at church.
Nicole Hunn says
Yay, Missy! I can’t wait to hear how you like it!!
Michelle Zapalski says
you know, I’ve never had a little debbie before!
Nicole Hunn says
No, Michelle! Really?! Well you’ve been missing out. But hopefully not any more! ;)
Lucy says
Going over to amazon right now! I have tools I wish to order as well so all has to arrive at the same time, that way one trip to the US for one pick-up! Hubby ordered some hilling disks for the potato garden maybe all will arrive at the same time…fingers crossed :)
Nicole Hunn says
The book is definitely for sale in Canada, Lucy! But if you’re doing it that way, I’m sure you have good reason. Fingers crossed the stars align for all your purchases. :)
Lucy says
I can only get the Better Batter mix in the US, or I would buy from amazon Canada. Imaginary redlines can be a real pain :(
Nicole Hunn says
Gotcha, Lucy. :)
Jennifer S. says
So, the doorbell just rang – it was not my book but it was all the tools that I could order from Amazon! So I just need this book -like NOW! :) Remind me were the little Debbie star crunch bars in this new cookbook? I can’t wait for the kit kats. I need to go order my chocolate molds now so I’m ready.
Nicole Hunn says
You’d better believe they’re in there, Jennifer! Page 103 (photo page 105). That’s one of the recipes that I’m most proud of because there are a few copycat recipes out there, but they’re basically glorified rice krispie treats. These are the real deal—with a thin cookie inside, covered by caramel-chocolate-krispies. Ditto for the Kit Kats. Major proud accomplishment. So basically you’re singin’ my songs!!
Lauren says
Your book is in my cart! Also, I’ve never even seen these little peanut butter crunch bars before, but they look wonderful! I’ll have to try them out with sunbutter and see how that goes. But this weekend’s take-to-church sweet treat is going to be lemon raspberry white chocolate fudge. Ought to be interesting!
Nicole Hunn says
If Sunbutter is thinner than peanut butter, Lauren, I’d try thickening it with a bit more confectioners’ sugar, or even some flour, to get the filling to the proper consistency. Otherwise it will leak out during baking!
Lauren says
Thanks for the tips! I’d been mulling it over because yes, I think my brand of sunbutter is definitely runnier than Skippy. Now that you mentioned flour, I think I’ll go for a mix of flour and extra confectioner’s sugar. I’m sure I’ve mentioned it, but it’s awesome that you’re willing to share your knowledge with your fans here!
Nicole Hunn says
Always, Lauren! Sharing what I know is the only reason to do what I do. :)
Diane Stemple Swearingen says
Ordered my book today!
Nicole Hunn says
Thank you, Diane!
Melissa Mitcham says
I can’t wait toake this for my kids to put in their Easter baskets. This looks great!
Nicole Hunn says
Great idea, Melissa!
Lelia says
I can’t wait for mine!! (Come on Amazon!) You are out of control – look at how yummy these look. :)
Nicole Hunn says
Aw, thanks, Lelia! I know right? Come on amazon!