
Gluten Free Hawaiian Rolls | with bread shaping videos
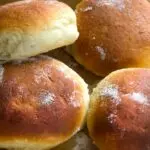
Super soft, lightly sweet gluten free Hawaiian rolls are highly enriched, impossibly tender rolls with the most tender crumb. Use them as sandwich rolls, or just enjoy a toasted roll with butter.
Yield: 8 bun-size rolls
Equipment
- Stand mixer with dough hook (gf bread flour) or paddle attachment (all purpose gf flour)
Ingredients
For Hawaiian rolls with gf bread flour
- 3 cups (420 g) Gluten Free Bread Flour blend (please click through for full details; you must use this blend)
- 2 teaspoons (6 g) instant yeast
- ¼ cup (50 g) granulated sugar
- 1 teaspoon (6 g) kosher salt
- 4 tablespoons (56 g) unsalted butter at room temperature
- 1 (50 g (weighed out of shell)) egg at room temperature, beaten
- 17 tablespoons (8.5 fluid ounces) pineapple juice at room temperature (1 cup + 1 tablespoon)
- 1 teaspoon vanilla extract
- Egg wash 1 large egg, at room temperature, beaten with 1 tablespoon water
For Hawaiian rolls with AP gf flour
- 2.5 cups (350 g) all purpose gluten free flour blend I used and highly recommend Better Batter here
- 1 teaspoon xanthan gum omit if your blend already contains it
- ½ cup (60 g) tapioca starch/flour plus more for sprinkling
- 2 ⅓ teaspoons (7 g) instant yeast
- ¼ cup (50 g) granulated sugar
- 1 teaspoon kosher salt
- 5 tablespoons (70 g) unsalted butter softened
- 1 egg (50 g (weighed out of shell)) at room temperature
- 1 ¼ cups (10 fluid ounces) pineapple juice at room temperature
- 1 teaspoon vanilla extract
- Egg wash 1 large egg, at room temperature, beaten with 1 tablespoon water
Instructions
Make the bread dough.
- Place the flours (gf bread flour OR all purpose gluten free flour blend, xanthan gum, and tapioca starch/flour), yeast, and sugar in the bowl of your stand mixer, and use a handheld whisk to combine well. Add the salt, and whisk to combine.
- Add the butter, egg, pineapple juice, and vanilla, and mix on low speed (with the dough hook for the bread flour blend or the paddle attachment otherwise) until combined. Raise the mixer speed to medium and knead (or beat) for about 5 minutes.
- The dough will be quite sticky, but should be smooth and stretchy. For the all purpose gluten free flour blend variation, continue to beat the batter with the paddle attachment until it begins to take on a whipped appearance.
- Spray a silicone spatula lightly with cooking oil spray, and scrape down the sides of the bowl.
- Transfer the dough to a lightly oiled bowl or proofing bucket large enough for the dough to rise to double its size, and cover with an oiled piece of plastic wrap (or the oiled top of your proofing bucket).
- Place the dough in the refrigerator for at least 12 hours and up to 3 days.
Shape the rolls.
- On baking day, line a rimmed baking sheet and set it aside. Remove the dough from the refrigerator and turn it out onto a lightly floured surface. Knead until smoother as described in the General Shaping Tips below (See Recipe Notes).
- With a floured bench scraper, divide the dough into 8 pieces of equal size. Shape one piece into a round by following the Directions for Shaping Small, Round Rolls below (See Recipe Notes).
- Place the first roll in the prepared baking pan. Repeat with the remaining pieces of dough, placing the rolls less than an inch apart from one another.
Let the shaped rolls rise.
- Cover the baking pan with oiled plastic wrap and set it aside in a warm, draft-free location to rise for 30 minutes.
- Uncover the pan and brush the rolls generously with the egg wash. Allow the rolls to finish rising, uncovered, until nearly doubled in size, about 20 minutes more. If the rolls begin to take on a dimpled appearance, they have begun to overproof.
To bake the rolls.
- About 20 minutes before the rolls have completed their final rise, preheat your oven (to 350°F for the bread flour dough and 375°F for the all purpose gf flour dough).
- Place the baking pan on the lower rack of the preheated oven and bake until lightly golden brown, and the inside of the rolls registers about 185°F on an instant-read thermometer (about 20 minutes for bread flour; 25 minutes for the other variation).
- To maintain the softest rolls, cover the hot rolls, just out of the oven, loosely with a tea towel. Allow the rolls to cool briefly before slicing and serving.
- Once completely cool, leftover rolls can be wrapped tightly in freezer-safe wrap and frozen for up to 4 months. Defrost at room temperature, sprinkle lightly with water, and refresh in the microwave or a toaster oven.
Notes
General gluten free bread flour bread shaping tips.
Unless otherwise noted, always begin on a well-floured surface with floured hands. With the help of an oiled bench scraper, keep moving the dough as you shape it, particularly if it begins to stick to the surface or your hands. The process of kneading the dough in this book will be done using the scrape-and-fold method.
Scrape the dough off the floured surface with the bench scraper, then fold the dough over itself. Sprinkle the dough lightly with flour, scrape the dough up again, and fold it over itself again. Repeat scraping and folding in this manner until the dough has become smoother.
Keep the outside of the dough and the surface covered in a light coating of flour as you shape the dough. Handle the dough with a light touch to avoid kneading the flour into the dough, which might dry it out and result in a tight, unpleasant crumb.
A light touch is the key. Repeat that to yourself as a mantra as you first learn to shape this bread dough. It’s the most important rule in shaping. More technique, less muscle.
You’ll notice that the recipes do not include instructions to allow dough that has been rising in the refrigerator to come to room temperature before shaping. Always begin with cold dough when shaping the dough in this book. It is much easier to shape.
How to shape small gluten free round rolls.
On a well-floured surface, flatten the dough into a disk, then pull the edges toward the center of the disk and secure the edges together by pressing them between your thumb and forefinger.
Turn the dough over so that the gathered edges are on the bottom and cup your whole hands around the dough, to coax it into a round shape.
Place the round of dough on a lightly floured surface and cup only one palm around the dough with the side of your hand resting on the counter (the side of your hand nearest your pinkie).
Maintaining contact between the side of your hand and the surface, begin to move your hand in a circular motion while gently coaxing the edges of the dough upward (toward the top of the round) with the tips of your fingers.
GF Hawaiian rolls bread flour blend recipe from the book Gluten-Free on a Shoestring Bakes Bread: Biscuits, Bagels, Buns, and More by Nicole Hunn. Excerpted by arrangement with Da Capo Lifelong, a member of the Perseus Books Group. Copyright © 2013.
Blog recipe revised in 2019, and again in 2022 (added variation without gluten free bread flour, including photos and video).
Nutrition information is approximate and for the all purpose gluten free flour blend version only, not the bread flour blend version.
Nutrition
Calories: 344kcal | Carbohydrates: 54g | Protein: 7g | Fat: 10g | Saturated Fat: 5g | Polyunsaturated Fat: 1g | Monounsaturated Fat: 3g | Trans Fat: 0.3g | Cholesterol: 132mg | Sodium: 361mg | Potassium: 128mg | Fiber: 3g | Sugar: 10g | Vitamin A: 385IU | Vitamin C: 4mg | Calcium: 25mg | Iron: 1mg