
Gluten free baking needn’t be a bore, especially if armed with a range of tasty, easy, and affordable gluten free recipes to tempt your palate and imagination. While cooking for a gluten free diet requires a change in a few ingredients, my range of versatile gluten free (gf) flour mixes can be applied to just about any recipe out there – with satisfying results.
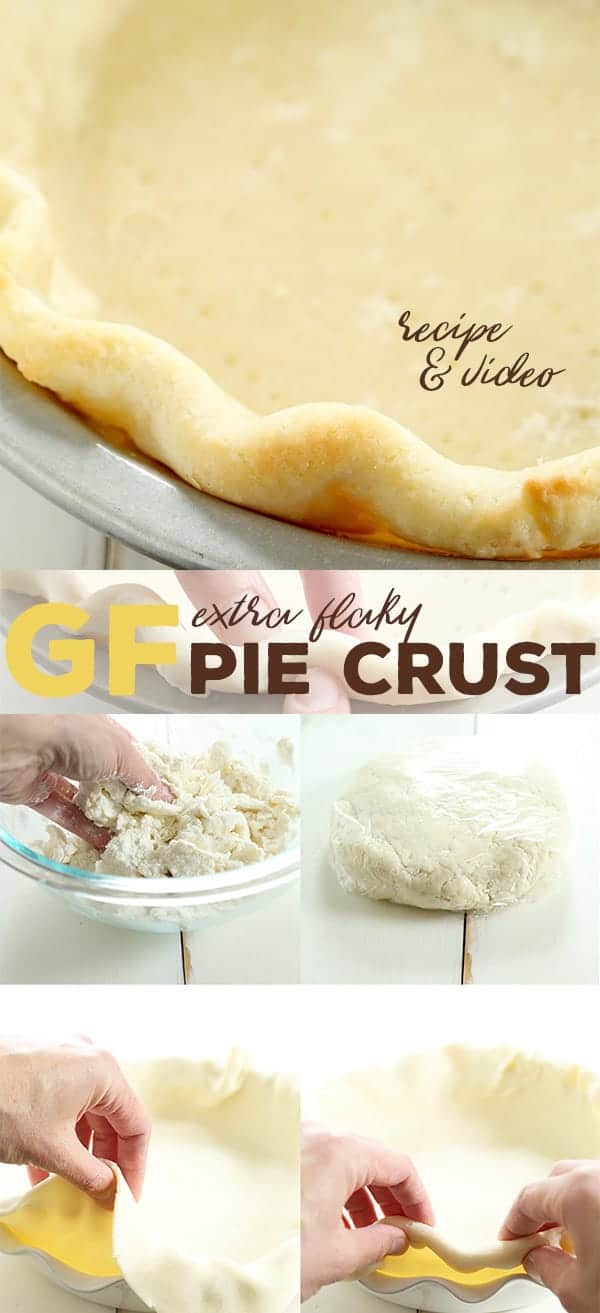
Take, for instance, perfecting the home-baked pie crust. If you are adding a delicious apple or pecan pie to your gluten free baking repertoire this fall or winter, you’ll definitely want to try my recipe for a light and extra flaky gluten free pie crust.
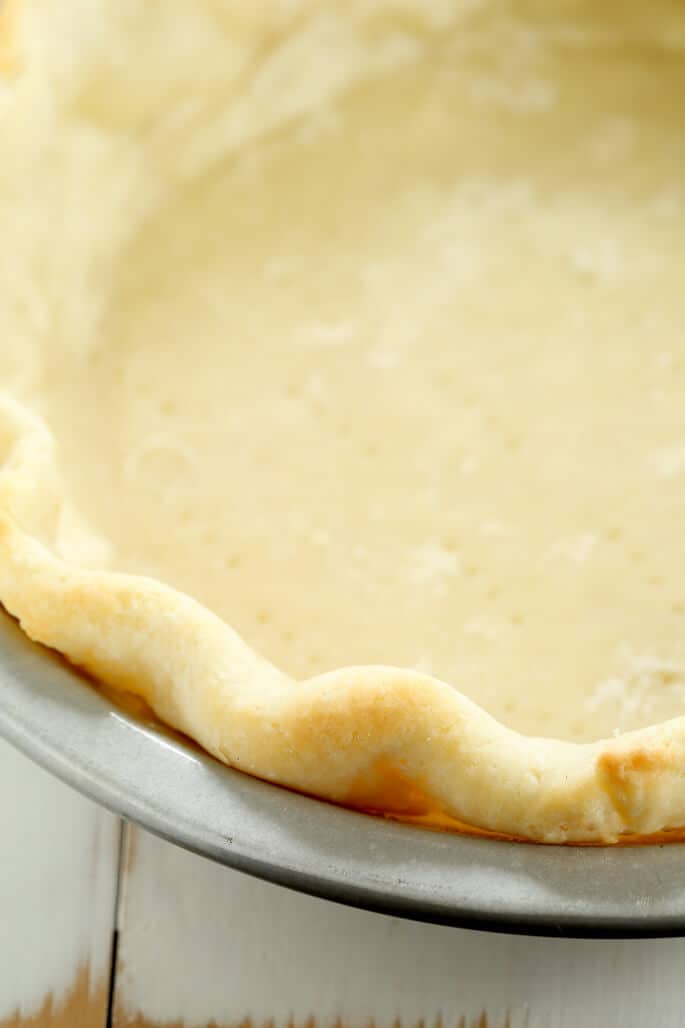
This perfect pie crust gives my regular gluten free pastry crust a run for its money. It’s tender and flaky where it counts, rolls out perfectly every time, and you can use it for single or double-crust pie recipes.
I promise that once you’ve got the hang of it, you’ll never settle for any of those dry, pre-made, store-bought pie crusts again.
Common pie crust challenges and solutions
Pie crust can either be too tough, soggy, or too crumbly, or the edges can shrink during baking. A disappointing pie crust is often the result of overworking the dough when mixing or rolling it, not allowing enough time for the dough to rest or chill before baking, or underbaking it in an oven that’s not hot enough.
Why should I avoid overworking the dough?
I find that the common method of making the pie crust into “pea-sized pieces” tends to make tougher crusts. So I don't recommend making this pie crust using anything other than a bowl and a spoon: a stand mixer is a definite no, and I wouldn’t recommend a food processor either (if you must use a food processor, process the dough as little as possible!)
Working with a bowl and spoon makes it possible to create large but flat and solid pieces of fat that are evenly distributed throughout the raw dough, which is how you get those fabulous flaky layers!
How do I prevent the crust from becoming soggy?
While getting your temperatures and ingredients right helps solve other texture issues, parbaking your crust for ten minutes helps avoid soggy pie crusts.
If you're parbaking your crust, as directed in the full pie crust recipe below, you'll know it's done baking when it is very lightly golden brown on the edges. The bottom of the crust should be less shiny but not browned; the browning happens when you’ve filled the crust with your filling of choice and finished baking the pie.
The “science” behind an extra flaky gluten free pie crust
Add sour cream. The secret ingredient that makes this gluten free pie crust so effortlessly flaky is the sour cream. My recipe calls for 120g of full-fat sour cream – preferably chilled. Why? As a fatty, creamy, and tangy dairy product, sour cream adds wonderful richness and moisture to any cake or baked item without thinning the batter like water, milk, or buttermilk would. Thin pie pastry can become hard and leathery, so you need just the right amount of moisture to ensure the pastry dough sticks together when you roll it out or crimp the edges. Sour cream is perfect for this.
Keep ingredients chilled. As with most baked pasties, keeping all your pie crust ingredients cold (or chilled) while you're working with them is also key to achieving the right flaky texture. When exposed to the heat of the preheated oven, the cold ingredients, especially the added fat (usually butter, or sometimes lard, solid coconut oil, or shortening), evaporate and push out the surrounding dry ingredients, creating flaky, crispy layers. This is why I start with solid chunks of butter, which I then coat in the dry ingredients before flattening them with my fingers.
I also use a variation of my gluten free pastry flour with added cornstarch and milk powder for extra lightness and tenderness.
Top tips for the perfect gluten free flaky pie crust
My basic principles of flaky pastry-making remain the same:
- Begin with relatively large chunks of butter (no pea-sized bits, please!), coat them in dry ingredients, and then flatten them between your thumb and forefinger. That way, when the butter melts a bit as you're working with the pastry, it will firm back up when you chill the shaped pastry.
- Rather than using ice water to bring the dough together, use sour cream, which will also add tenderness to the dough that is like nothing else.
- Be sure to lift the pie crust up and into the bottom and sides of the pie plate rather than attempting to stretch it. That'll keep it from shrinking during baking.
- I've included instructions for par baking the crust in the full recipe below, but your gluten free pie recipe may or may not require that step.
If you're a visual learner, I've created a how-to video to help show every stage of pie-crust making. It's right above the recipe itself, which also explains how to smooth and roll out the chilled dough and shape it in the pie plate.
Crimping the pastry crust edges
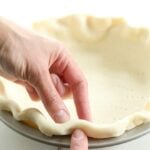
There are a few ways to decorate a baked gluten free pie – one of them is to crimp the edges. To do this, place the thumb and forefinger of one hand about one inch apart on the edge of the pie crust pointing from the inside out.
From the outside in, press the knuckle of the forefinger of your other hand in the center of the other two fingers.
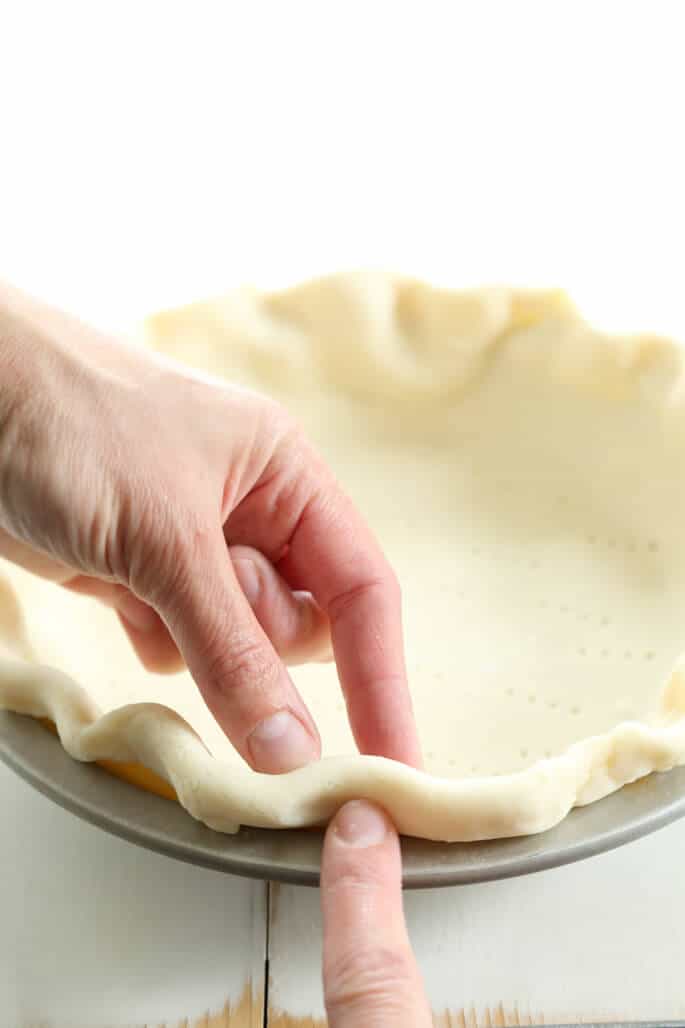
Gently pinch the inside fingers together around the outside knuckle. Move around the whole perimeter of the crust, repeating the process inch by inch, and you'll have a beautiful crimped edge.
Personalizing your gluten free flaky pie crust
My extra flaky gluten free pie crust can be modified easily for other dietary requirements.
Gluten free, dairy free crust
I often get asked about making this extra flaky gluten free pie crust dairy-free. My first and best suggestion is to use my recipe for a classic pie crust instead and replace the butter with butter-flavored Spectrum non-hydrogenated vegetable shortening. It's a much easier swap, and that is a truly lovely pie crust.
Be sure your all purpose gluten free flour blend is dairy-free, as well, if you're going to make that recipe dairy-free. I recommend my Better Than Cup4Cup blend in pastries like pie crust, which contains milk powder, so be sure to use coconut milk powder to make the blend dairy-free.
But if you'd like to stick with this recipe, I'd try the same swap for butter, and try replacing the sour cream with either Greek-style (strained and thickened) plain non-dairy yogurt, or non-dairy sour cream. I have not tried that swap, though, so you'll have to experiment.
Gluten free, vegan crust
The only animal products in this or the other pie crust recipe are those derived from dairy. Since there's no meat and no eggs, if you follow the instructions for making this recipe dairy-free, it will also be vegan.
Try my recipe and let me know what you think
My flaky gluten free pie crust recipe is virtually fail-proof and enjoyed by many avid bakers who are living and thriving on a gluten free lifestyle.
If you are new to a gluten free diet, learn about all the many benefits of following a gluten free lifestyle. You’ll find a wide range of delicious recipes on my blog to ease you into cooking and baking, gluten free.
FAQs
Yes, this extra flaky gluten free pie crust dough can be wrapped in plastic or aluminum foil and chilled for up to three days in your refrigerator before you are ready to make your favorite gluten free pie recipe.
I have used this extra flaky gluten free pie crust for my classic apple pie recipe, pecan pie recipe, chocolate chip pie recipe, and coconut cream pie recipe – all of them gluten free! You can also bake up the best of summer's stone fruits and fill this gorgeous crust with all your favorites.
Simply store your baked or unbaked pie crust or dough in the freezer for two months, or until you need it. Be sure to wrap it very tightly in freezer-safe plastic before freezing so it doesn’t dry out. Let it gently defrost in the refrigerator overnight before rolling it out, parbaking it or adding your filling in preparation for baking.
The secret to an extra flaky gluten free pie crust is adding a bit of cold sour cream to the mixture. The sour cream’s high-fat content and tangy acidity help create extra tenderness without compromising any layered flakiness.
Yes, you can bake this crust in a glass pie pan, which will allow you to see the bottom of the crust and accurately judge how much it has browned. Baking in glass is similar to baking in porcelain, as both retain heat very well, so watch carefully to ensure you don't burn your crust.
I don't recommend making this pie crust using anything other than a bowl and a spoon, since that makes it possible to create large but flat solid pieces of fat that are evenly distributed throughout the raw dough. That's how you get those layers!
The common method of making the pie crust into “pea-sized pieces” tends to make tougher crusts. A stand mixer is a definite no, but if you must use a food processor, process the dough as little as possible!
If you're parbaking your crust, as directed here in this gluten free pie crust recipe, you'll know it's done baking when it is very lightly golden brown on the edges. The bottom of the crust should only be less shiny, but not browned, which will finish when you fill and finish baking.
Extra Flaky Gluten Free Pie Crust
Ingredients
- 1 ½ cups (210 g) all purpose gluten free flour blend I highly recommend Cup4Cup, my Better Than Cup4Cup blend, my Mock Cup4Cup, or my Better Batter Pastry Hack blend, plus more for sprinkling
- ¾ teaspoon xanthan gum omit if your blend already contains it
- ¼ teaspoon baking powder
- ½ teaspoon kosher salt
- 6 tablespoons (84 g) unsalted butter roughly chopped and chilled
- ½ cup (120 g) sour cream full fat, preferably, chilled
- Ice water by the teaspoonful as necessary
Instructions
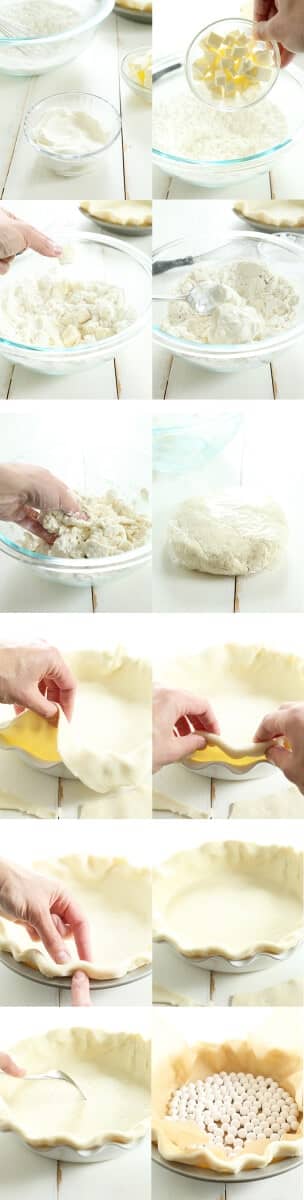
Make the pie crust dough.
- In a large bowl, place the flour, xanthan gum, baking powder and salt, and whisk to combine well. Add the chopped and chilled butter, and toss to coat it in the dry ingredients.
- Flatten each chunk of butter between your thumb and forefinger. Add the sour cream, and mix to moisten the dry ingredients with the sour cream. The dough should be shaggy and somewhat crumbly.
- Knead the dough together with clean hands until it begins to come together. Add ice water by the teaspoon only if necessary for the dough to hold together.
- Turn the dough out onto a sheet of plastic wrap, and press into a disk as you close the plastic wrap around the dough. It will still seem rough. Place the dough in the refrigerator to chill for 30 minutes.
- Preheat your oven to 375°F. Grease a 9-inch metal pie plate generously and set aside.
Smooth out the chilled dough.
- Once the dough has chilled, turn it out onto a lightly floured piece of unbleached parchment paper. Sprinkle the dough lightly with more flour, and roll it out into a rectangle that is about 1 inch thick, moving the dough frequently and sprinkling it lightly with flour if it begins to stick.
- Fold the dough over on itself like you would a business letter. Sprinkle the dough again lightly with flour, and roll out the dough once again into a rectangle about 1 inch thick.
- Twice more, remove the top piece of parchment paper, sprinkle lightly with flour, and fold the dough over on itself like you would a business letter.
Shape the dough in the pie plate.
- Roll out the dough into an approximately 12-inch round, about 3/8-inch thick. Roll the pie crust loosely onto the rolling pin and then unroll it over the prepared pie plate.
- Trim the roughest edges of the crust with kitchen shears. Lift up the edges of the pie crust gently to create slack in the crust, and place the crust into the bottom and up the sides of the pie plate.
- Tuck the excess pie crust under itself, and crimp the edge gently all the way around the crust by pinching the dough at regular intervals with one hand, and creating a crimped impression with the forefinger of the other hand. Cover the pie crust with plastic wrap and place it in the refrigerator to chill until firm, at least 30 minutes (and up to 3 days).
Parbake the crust.
- Remove the pie crust from the refrigerator and unwrap and discard the plastic. Pierce the bottom of the pie crust all over with the tines of a fork.
- Place a sheet of parchment paper on top of the raw crust and cover the bottom of the crust with pie weights or dried beans.
- Place in the center of the preheated oven and bake until the crust is lightly golden brown on the edges, about 10 minutes.
- Remove the pie weights and parchment and allow the crust to cool before proceeding with your recipe.
Notes
Extra Flaky Gluten Free Pie Crust
Ingredients
- 1 ½ cups (210 g) all purpose gluten free flour blend I highly recommend Cup4Cup, my Better Than Cup4Cup blend, my Mock Cup4Cup, or my Better Batter Pastry Hack blend, plus more for sprinkling
- ¾ teaspoon xanthan gum omit if your blend already contains it
- ¼ teaspoon baking powder
- ½ teaspoon kosher salt
- 6 tablespoons (84 g) unsalted butter roughly chopped and chilled
- ½ cup (120 g) sour cream full fat, preferably, chilled
- Ice water by the teaspoonful as necessary
Instructions
Make the pie crust dough.
- In a large bowl, place the flour, xanthan gum, baking powder and salt, and whisk to combine well. Add the chopped and chilled butter, and toss to coat it in the dry ingredients.
- Flatten each chunk of butter between your thumb and forefinger. Add the sour cream, and mix to moisten the dry ingredients with the sour cream. The dough should be shaggy and somewhat crumbly.
- Knead the dough together with clean hands until it begins to come together. Add ice water by the teaspoon only if necessary for the dough to hold together.
- Turn the dough out onto a sheet of plastic wrap, and press into a disk as you close the plastic wrap around the dough. It will still seem rough. Place the dough in the refrigerator to chill for 30 minutes.
- Preheat your oven to 375°F. Grease a 9-inch metal pie plate generously and set aside.
Smooth out the chilled dough.
- Once the dough has chilled, turn it out onto a lightly floured piece of unbleached parchment paper. Sprinkle the dough lightly with more flour, and roll it out into a rectangle that is about 1 inch thick, moving the dough frequently and sprinkling it lightly with flour if it begins to stick.
- Fold the dough over on itself like you would a business letter. Sprinkle the dough again lightly with flour, and roll out the dough once again into a rectangle about 1 inch thick.
- Twice more, remove the top piece of parchment paper, sprinkle lightly with flour, and fold the dough over on itself like you would a business letter.
Shape the dough in the pie plate.
- Roll out the dough into an approximately 12-inch round, about 3/8-inch thick. Roll the pie crust loosely onto the rolling pin and then unroll it over the prepared pie plate.
- Trim the roughest edges of the crust with kitchen shears. Lift up the edges of the pie crust gently to create slack in the crust, and place the crust into the bottom and up the sides of the pie plate.
- Tuck the excess pie crust under itself, and crimp the edge gently all the way around the crust by pinching the dough at regular intervals with one hand, and creating a crimped impression with the forefinger of the other hand. Cover the pie crust with plastic wrap and place it in the refrigerator to chill until firm, at least 30 minutes (and up to 3 days).
Parbake the crust.
- Remove the pie crust from the refrigerator and unwrap and discard the plastic. Pierce the bottom of the pie crust all over with the tines of a fork.
- Place a sheet of parchment paper on top of the raw crust and cover the bottom of the crust with pie weights or dried beans.
- Place in the center of the preheated oven and bake until the crust is lightly golden brown on the edges, about 10 minutes.
- Remove the pie weights and parchment and allow the crust to cool before proceeding with your recipe.
Lois says
Oh my goodness, Nicole! I made an Italian Cream Pie today with your extra flaky gf pie crust recipe and it was absolutely delicious! My previous attempts have been failures. So I bought the Cup4Cup flour and I followed your recipe to the letter. It came out perfectly! I have had celiac disease for 50 years and have been married for 55 years. I make this pie every year for my family for Easter. Everybody always tells me how delicious it is, but all I could do is sit back and take the compliments. Today I conquered it! Even my husband, who eats gluten and loves anything that is flaky or with a crust, loved it. I can’t thank you enough, Nicole, for all you do for the gluten free community.
Nicole Hunn says
Aw, Lois, that’s so great and you’re so very welcome. It’s so unfair for you not to be able to partake (especially when you’re the cook!) and I’m so glad you have a seat at the table now. That’s a long time to have celiac disease and wait for some decent pie. Welcome back!
D. Beasley says
I made this crust. It wasn’t flaky. It was hard to cut.
Nicole Hunn says
I’m not sure if you’re asking for help in troubleshooting, but I would first look to any ingredient substitutions, especially to your flour blend, whether you measured by weight, instead of volume which is inherently inaccurate, if your butter was overhandled and melted instead of cold which will never lead to a flaky result, and whether you incorporated too much flour into the dough as you shaped it.
Jan H says
I made this pie crust to the best of my ability, weighing the ingredients, but I used King Arthur flour, since that’s what I had available. It seemed promising and it worked very nicely, but it certainly wasn’t tender or noticeably flaky. The crimped edge of the pie turned out rock hard though it looked lovely.
I’ve pretty well given up on pies in my gf life because crust just seems so unrewarding. I’ll try one of the commercial flour blends you recommend if I decide to give this a try again.
Nicole Hunn says
I’m afraid what you’re reviewing is the flour blend, Jan, not the recipe.
Jennifer Weiss says
It was super flaky and delicious, and my husband loved it too, and had no idea it was gluten free.
Jennifer Weiss says
Nice flavor crust! I couldn’t get mine very thin without it breaking apart. Do you find you need several teaspoons of ice water? I’m thinking my dough was just too dry, although it did come together with only one teaspoon and then I put the ball in the saran wrap and into the fridge to chill. It just didn’t roll out as easily as yours in the video. Also, any suggestions for a vegan alternative to the sour cream? Thanks!
Nicole Hunn says
The amount of ice water is very variable, Jennifer, based on so many factors among, for example, the temperature of the ingredients, the way you selected and measured the flour blend (if you didn’t measure precisely by weight, you likely overmeasured your flour; if you selected a less than ideal blend, it’s likely drier), the temperature in the environment. It also may have dried out in the refrigerator if it wasn’t wrapped well enough, as the air in the refrigerator is especially drying. For dairy free alternatives, please see the text of the post under the heading “Gluten free, dairy free crust”
Maggie says
Jennifer — I had the same question about sour cream. Turns out there are vegan sour creams out there! Kroger has one, as does Tofutti. Probably there are more. I’ve used the Kroger one in this recipe with great success (haven’t tried any others).
Nicole Hunn says
Good to know that you like the Kroger brand vegan sour cream, Maggie!
Maggie says
Getting my crust ready for Easter quiche and I just used Tofutti sour cream as that’s what I had so I can offer more thoughts. The Kroger brand was very wet and needed no extra ice water. (I messed up in my measurements when I made the dough — used 2x the butter so had to go back and 2x everything else, so I can’t say for sure, but it seemed plenty wet.) The Tofutti is much drier, almost like cream cheese, and I ended up using quite a bit of water.
Lilli says
Hi Nicole! I need to make a pie that has a pie crust on top as well on the bottom. Do I just make two of these?
Thanks in advance!
Nicole Hunn says
Yup, Lilli, just change the number in the “yield” section of the recipe card from “1” to “2” and it will double all the ingredients for you. It won’t, however, modify any of the recipe instruction language so you’ll have to read the recipe with the double recipe in mind.
Betsy Russell says
Thank you for this recipe – loved this and with some left over I rolled out very thin put some seasoning on it and make crackers They were so good. Thank you so much for all your recipes.
Brenda says
How long do you pre bake the pie crust to fill with sour cream lemon filling, or coconut cream pie filling? The first time I made this pie crust it turned out perfect when making a baked pumpkin pie. But when making the sour cream lemon pie, and baking the crust until golden on the bottom….and cooling and filling with the cooled pie filling, it turned out hard.
How long should I cook the pie crust when filling it with a filling that doesn’t have to be baked? Thank you!
Nicole Hunn says
This crust recipe behaves just as a conventional one in baking. When I blind bake a pie crust, I dock it, fill it with pie weights, and bake at 375°F for about 25 minutes. But since you’re not using my pie recipe, only my crust recipe, I’d follow the “sour cream lemon pie” recipe you referenced.