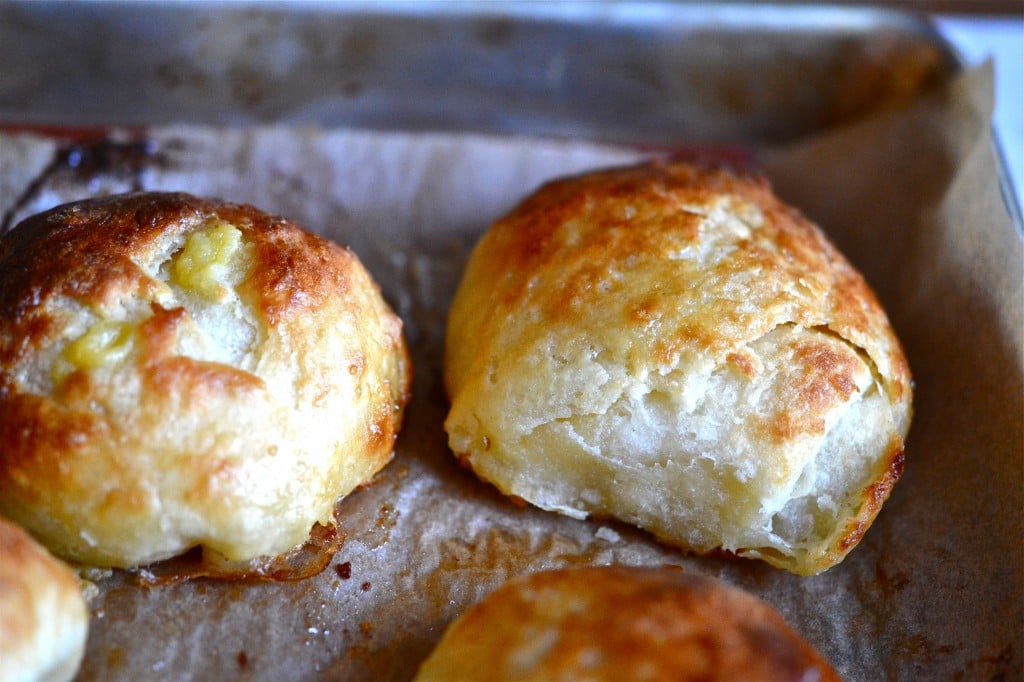
These take, like, a long time to make.
But you decide — are they worth it?
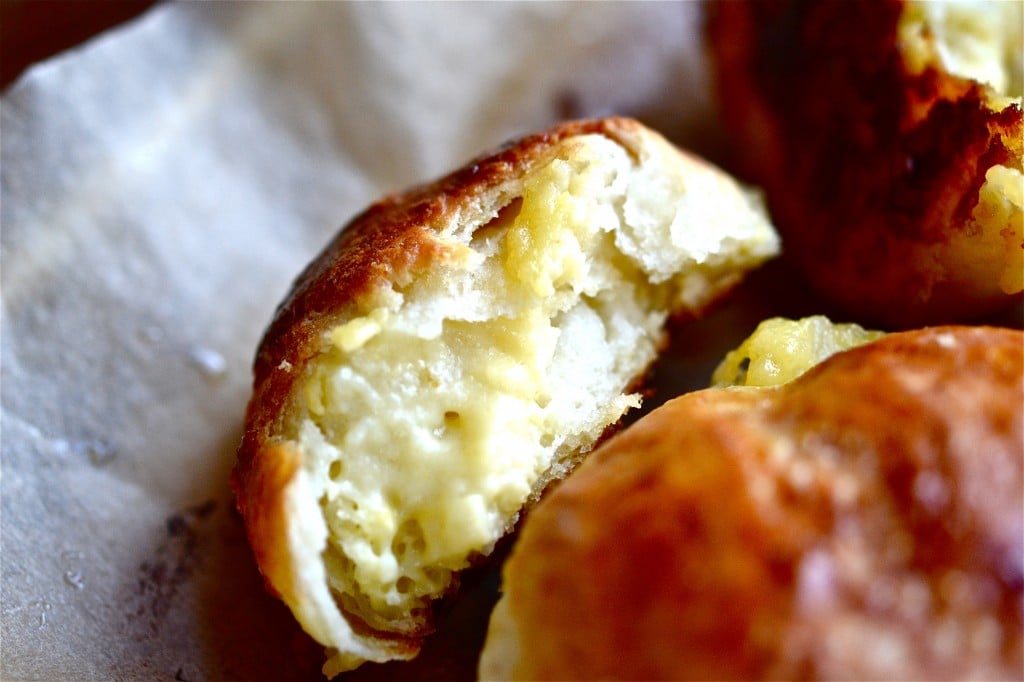
That's what I thought. And the weekend's coming like gangbusters.
Team Gluten Free! We believe.
I have been informed by my radio that Thanksgiving is a mere 2 weeks away. Two weeks! So next week, we best get started on some recipes. In the meantime, please turn to page 152 of My Cookbook for the best stuffing I'll ever eat.
Page 57 for How-To Brine Your Turkey (forget deep frying — brining does the trick).
Page 196 for Pumpkin Bread.
And Page 216 for Pumpkin Pie with Ginger Cookie Crust. Careful, though. That last one's a doozy.
Today, though, these beauties are for after Thanksgiving. Just for you. You shall eat them while someone who loves you rubs your tired tootsies. And if this person does a very good job, he or she may have one. And here's how it's done.
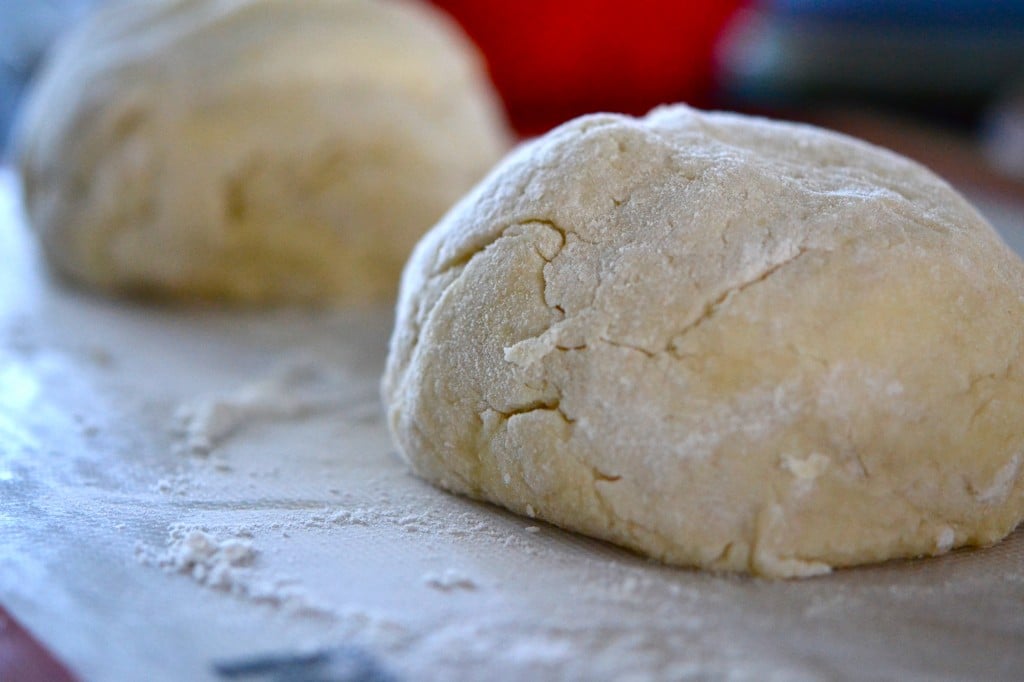
Make the dough as per usual. It has some butter. No biggie. Then wrap & chill it.
Next, roll it out 1/4-inch thick between two sheets of parchment. Into a rectangle.
Please forgive me. I have no rolling-out photo. ‘Cause I have a congregation of one over here, and rolling takes two hands. No hands left for photos. Next time, come over and take some photos, would you?
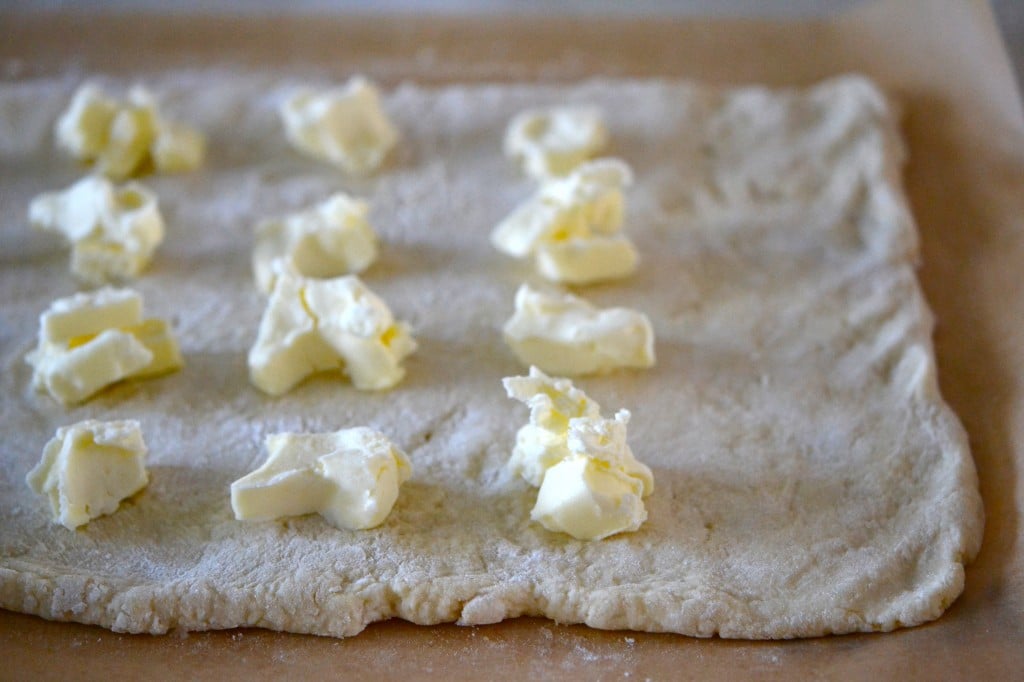
But wait! There's more butter. There's always more butter. Dot it on two-thirds of the rectangle, starting on a short end.
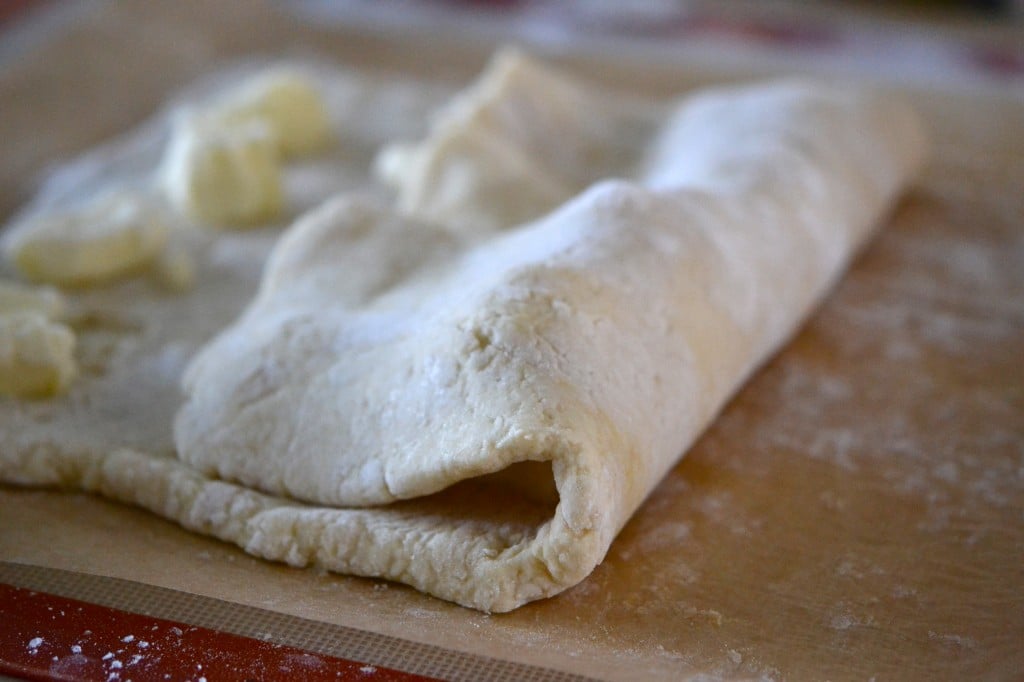 Then fold over the bare one-third, like a business envelope (do you say aaaaanvelope or ehnvelope?).
 Then the other third. Seal in the butter.

Then, roll it out again, rolling the pats of butter right in. See the butter? It's flat butter now. That's good.
 Oh em gee, we're folding again. Another business letter. Who are we writing anyway?
I don't write business letters anymore. I used to write them, and they put people to sleep, I'm certain. “Dear Mr. So-&-So, Please to theretofore and heretofore, have your client comply with the whoseewhatsit on the double. Or else we'll see you in court!”
Zzzzzzzzzz…….
 We have rolled, dotted with butter, then folded, rolled again – now folded once more. Now — we chill. Again. Until firm in the freezer. It's the best way, because it's speedy. And I am not renowned for my patience.
The First Turn Is Complete. We will ‘turn' 3 times total. Here's the part that can be confusing for pea brains like yours truly. A Turn comprises: (1) rolling out into a rectangle, (2) folding in thirds like a business letter (with the long side alongside your body), and (3) chilling once more.
But here's the rub. It's called A Turn because, with each successive Turn, you rotate the dough one quarter turn before you begin the next rolling out exercise. So you are always rolling from one long side of the rectangle to the other. Otherwise, you'd end up with the longest most narrow piece of dough ever, & the butter wouldn't become layered as nicely in between the bits of dough.
 After you have done The Three Turns, chill again. Make the custard. Then carefully slice the dough into 3-inch squares.
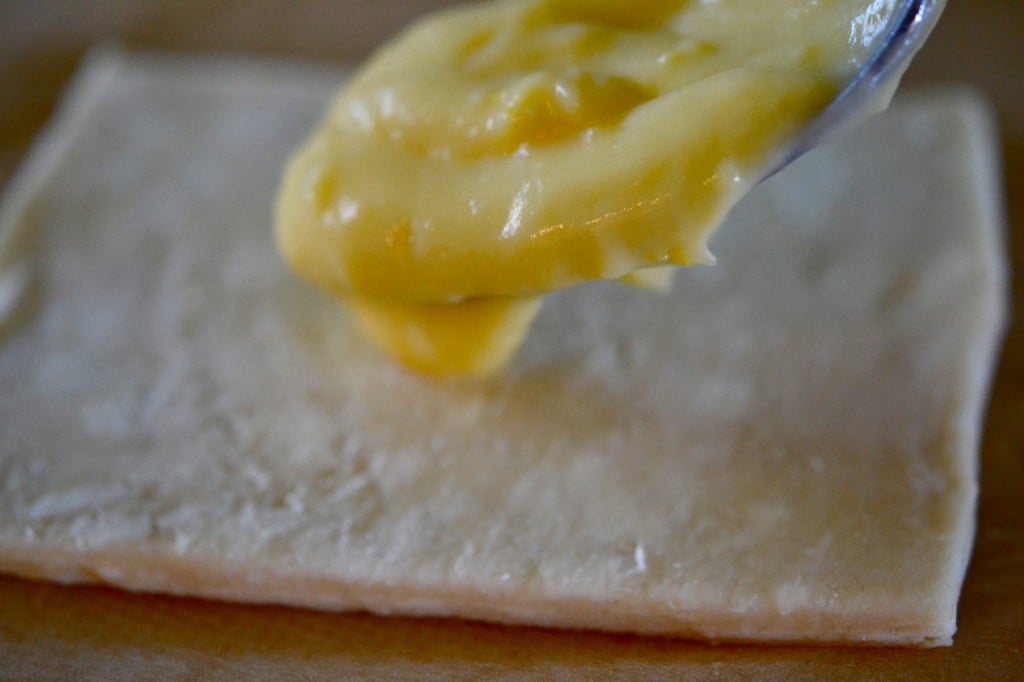 Fill them with a tablespoon of custard.
 Brush the edges with an egg wash so they'll stick.
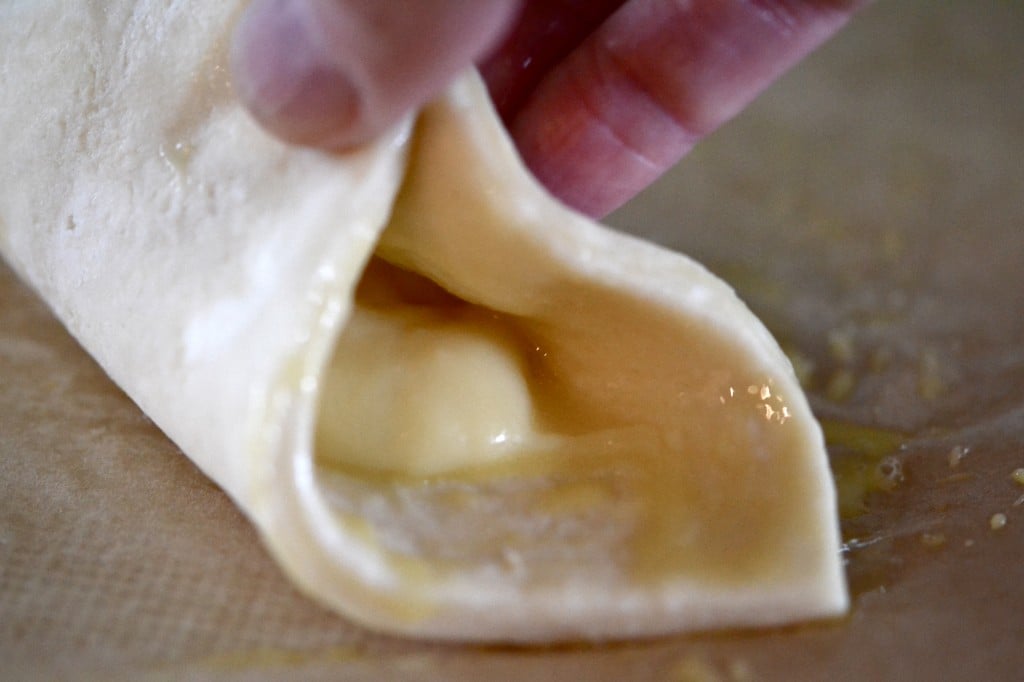
Pinch two opposite corners together.
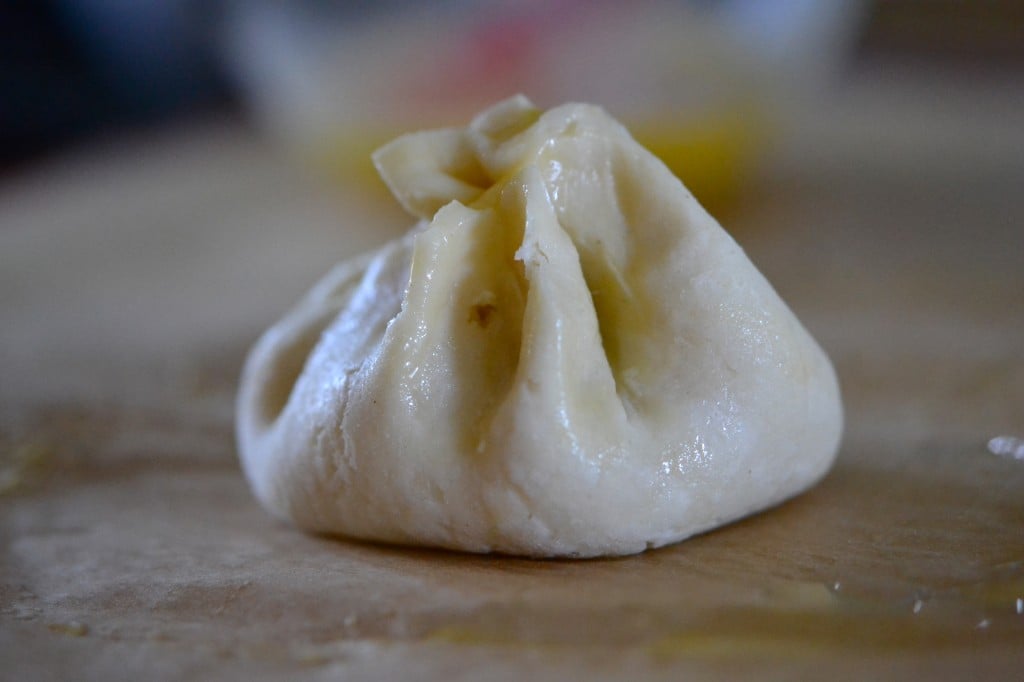
Then pinch the other two, to make a little purse. Press the edges together to seal them closed, and the custard in.
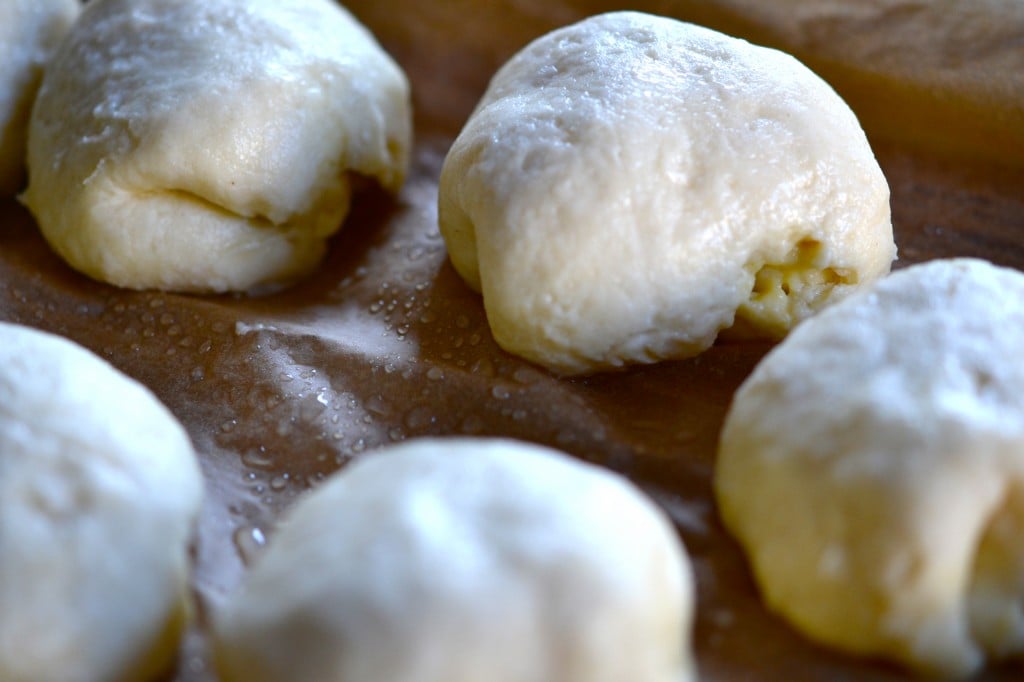
Then allow them to rise in a warm, draft-free space until they are about 1 1/2 times their original size.
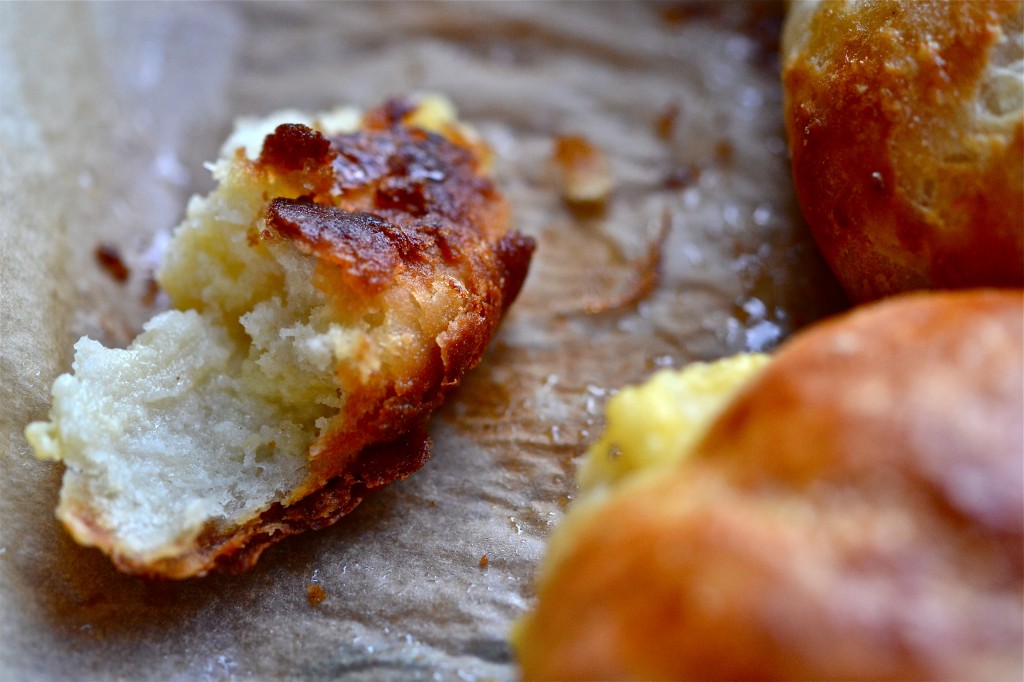
Bake 'em. Eat 'em.
Here's the deets:
| Custard-Filled GF Pastries How-To |
- 2 1/4 cups all-purpose gluten-free flour (I use Better Batter)
- 1 1/2 teaspoons xanthan gum (omit if using Better Batter)
- 2 1/4 teaspoons instant (rapid-rise or breadmaker) yeast
- 14 tablespoons sugar, divided
- 1 1/2 teaspoons kosher salt
- 2 sticks (16 tablespoons) unsalted butter, divided (4 tablespoons at room temperature, the rest chilled)
- 3/4 cup milk, warmed to about 100 degrees F
- 2 extra-large eggs plus 5 egg yolks, divided
- 2 cups chilled milk (with as much fat as possible)
- 1 teaspoon pure vanilla extract
- 1/4 cup Bird's custard powder (or equal amount cornstarch)
- In the bowl of a stand mixer fitted with the paddle attachment, combine the flour, xanthan gum, yeast, 6 tablespoons sugar, salt and 4 tablespoons butter (divided into tablespoons). Beat on low for about 1 minute, until the butter is incorporated into the dry ingredients. Add the ¾ cup warm milk, the whole egg and 1 yolk, and mix until the dough just begins to come together. Place a large piece of plastic wrap on a flat surface, and dump the dough out onto the plastic wrap. Press the dough together, and cover tightly with the plastic wrap. Place in the freezer until firm, about 30 minutes.
- Once the dough has chilled, roll it out between two pieces of parchment paper into a rectangle that is about 10-by-15 inches, and about ¼ inch thick, no thinner (see photos). Dust with additional flour as necessary to prevent the dough from sticking to the parchment paper. Take the remaining 12 tablespoons (chilled) butter and divide into individual tablespoons, and then space evenly over ⅔ of the dough, leaving one short side bare (see photos). With the bare short side facing you, fold it over the middle third of the butter (as you would a business letter), then fold the remaining third over to seal in the tablespoons of butter (see photos).
- Roll the dough out again into a rectangle about 10-by-5 inches, and fold again in thirds (see photos). Cover with plastic wrap and place in the freezer for 15 minutes or until firm. Congratulations. You have just completed the first ‘turn.'
- Remove the dough from the refrigerator, uncover it, and place it horizontally on a fresh sheet of parchment paper. Cover with another sheet of parchment paper, and roll out again into a rectangle about 10-by-5 inches. Fold once more, business letter style, and return to the freezer for another 15 minutes or until firm. Repeat the process once more. After 3 turns, cover and place the dough in the freezer for about 30 minutes (or in the refrigerator for at least an hour), until firm.
- While the dough is chilling, make the custard. In a medium saucepan, combine the 2 cups chilled milk, remaining 8 tablespoons sugar, vanilla, 4 egg yolks, and custard powder. Whisking constantly over low heat, cook the mixture until it begins to simmer. Raise the heat to medium-low, and cook until it thickens, about 2 minutes. Transfer the custard to a medium-sized bowl, and allow to cool slightly. Place a piece of plastic wrap directly on the surface of the custard, and place in the refrigerator to chill. You will have extra custard.
- Back to the dough. Roll out the chilled dough between two pieces of parchment paper into a smaller rectangle, this time about ⅜ inch thick. Using a pastry wheel or sharp knife, slice the dough into squares of about 3 inches. Place 1 tablespoon of chilled custard in the center of each square of dough. Brush the border of each square with the remaining egg white (see photo). One by one, form the pastries. Gather two opposite corners of each square of dough together, and pinch. Gather the other two opposite corners, and press all sides together to form a sealed pouch (see photo). Invert the bun onto a parchment-lined baking sheet. Repeat with the remaining squares of dough.
- Place the buns, evenly spaced on the parchment-lined baking sheet, in a warm, draft-free area to rise until they begin to swell to nearly 1 ½ times their original size (about 40 minutes). While the buns are rising, preheat your oven to 400 degrees F.
- After the buns have risen, brush the tops with the remaining egg wash, and place them in the center of the preheated oven. Bake, rotating once, until golden brown, about 25 minutes.
- Serve warm.
So many directions! I know.
Be super careful about which flour you choose. I have not tried this recipe with anything other than Better Batter.
I hope that is the longest printable recipe I ever post on this here blog. Amen.
Love,
Me

Gabrielle Su on Facebook says
Finally! WAHOOOOOOO!!!! Watch out Brie! You’re getting baked! ;)
HRH says
Did someone say dip them in chocolate?! Oh man, calculating all the hrs on the treadmill to negate just one DIPPED IN CHOCOLATE! HEHE Hi shoestring, scrumdilliumpcious recipe! Thanks for sharin’, can’t wait to try them! Xoxo
Nicole says
As I live and breathe — is it actually you, HRH? Right here on the blog? Will wonders never cease… So happy to have you here. Hope you’ll stick around. :)
xoxo xo Nicole
HRH says
Thanks Shoestring! :D I was a good girl this year and that earned me a smart phone for early Christmas gift. Now I can actually access & interact with your blog. Hazzah!
Nicole says
Hooray! So glad to have you. Don’t forget to check back tomorrow. I’ll be waiting. ;)
xoxo Nicole
P.S. Who says it doesn’t pay to be a good girl.
Sarah White says
Any advice on making these non-custard filled? Could I use the dough to make croissants or rolls?
Nicole says
Hi, Sarah,
Absolutely! Of course. This dough is very similar to puff pastry, except it is yeasted so it has to rise before baking. You could use it to make croissants or rolls. It would also be great filled with chocolate (like another reader suggested in the comments) — or anything else you would do with puff pastry. It would be amazing if you used it in this recipe for Apple Tartlets, too. Just eliminate the custard filling.
xoxo Nicole
Sue Powell on Facebook says
Oh hoorah! For the pastry recipe, I feel croissants and tart tatins coming on. Thank you!!!!
Ashley says
These look oober yummy. I have a question, for these and for yeast-items in general, if I use the active yeast (instead of the bread quick rising yeast), I tend to have difficulty getting my dough to rise – well, I have difficulty getting the dough to rise with either product, actually. I heard a tip to place my dough on a plate in my dishwasher and turn the heat on to help it rise. Have you heard of anything like this? What would you recommend?
Nicole says
Hi, Ashley,
Here is a post with my recommendations for getting gluten-free bread to rise: Arise, Fair Gluten-Free Bread. I also discuss it in greater detail in my cookbook, on pages 89-90. You don’t have to turn on your dishwasher to get your bread to rise! I hope that’s helpful…
xoxo Nicole
Ashley says
Nicole,
Thank you so much for the info! I will definitely try the microwave + wet towel trick this weekend – I’m going to make some delicious (I hope!) GF Bread, using a recipe in your cookbook of course :)
Nicole says
You bet, Ashley. My pleasure. :)
I’m so glad you’re willing to give baking GF bread another try. The White Sandwich Bread recipe in the cookbook is a good place to start, since it’s a very forgiving recipe. Just be sure to use a good all purpose GF flour blend, like Better Batter, and you’ll be good to go!
xoxo Nicole
Ashley says
Nicole,
My white sandwich bread rose! I used Better Batter and I did the whole towel/microwave trick and it worked great. My only issue with the bread was it seemed to sink while it was baking, and it came out very heavy. I forgot to beat my egg whites before adding them to my batter, could that be the reason my bread didn’t turn out lighter?
Nicole says
Hi, Ashley,
So glad your bread rose! If it sank while baking, most likely you let it rise too long. If it rose initially in the oven, and then sank, that could be too much moisture (proper moisture levels really do depend upon the environment in your kitchen) or a too hot oven that causes an initial ‘oven spring,’ followed by sinking. Don’t worry. You’re getting there. Just try not to let your bread rise too long, get an oven thermometer to guarantee proper temperature, and pay close attention to the consistency of the batter as described in the recipe. You don’t need to whip the egg whites for this recipe. That wasn’t the problem. You’re on the right track. You’ll get there. :) I am closing comments on this post, so if you have further questions, just post on Monday’s post (Cornmeal Cranberry Cookies).
xoxo Nicole
Peggy says
I really like Joann C’s suggestion of dipping in chocolate! YUM!!!!
Nicole says
Me, too, Peggy. JoAnn is clearly a genius.
I really really want to post a recipe for Eclairs (especially since the custard from this recipe would work for eclairs, too), but the dough is Pate a Choux, which is a recipe in the cookbook. Trying to find a work-around…
xoxo Nicole
Alyssa says
These look amazing! I think I will now be visiting your blog daily:) We are also dairy free in our house so I think I’ll try it using homemade cashew milk for the pastry along with organic palm shortening. We’ll see how it goes, I think I’ll also put dark chocolate in the center like a pain au chocolate (my husband favorite). Thanks again for the recipe!
Nicole says
Hi, Alyssa,
I love visitors! I do hope you’ll stop by often. I would love to hear how these turn out with cashew milk (sounds like a good bet – good fat in there) and palm shortening (also sounds like a good bet). I think they’ll turn out great. Dark chocolate in the center sounds dreamy! Thanks for posting. :)
xoxo Nicole
Joan Funk on Facebook says
I love reading your recipes, they are so much fun to read, always make me laugh and drool, NOT a good combination!! Must try these!
JoAnn C says
Happy Happy Anniversary/Birthday to you! So nice to share this birthday month with you. This is why our great minds think alike. And thank you for entering me in the give away, that was very thoughtful.
HAPPY BIRTHDAY WEEKEND NICOLE!!!!!
Nicole says
I know, right, JoAnn? We’re, like, the same person. It’s an honor to share a birthday month (and a sign) with you. Happy Birthday (soon) to you, too!
xoxo Nicole
JoAnn C says
Wow! I think when I make these I’m going to dip them in chocolate and lick my fingers too! I’m all about the chocolate. I may not even share them since I’ll make them for the 25th anniversary of my 24th birthday next week. I was going to make chocolate bread, but…oh hell who am I kidding I’m making that too! Anniversaries of 24th birthdays only come around once a year and I should do it up right. Right? As an added bonus I just received your cookbook today too. Happy Weekend Nicole. And it was a fun surprise seeing you on GlutenFreely.
Nicole says
Hi, JoAnn,
It’s great to hear from you. You always make me giggle. You really do have to treat yourself right on an anniversary of a 24th birthday. If you don’t, who will? This Sunday just so happens to be the 15th anniversary of my 24th birthday, and it is my anniversary-style opinion that someone else should make you these pastries plus the chocolate bread.
So glad you received the cookbook. Maybe we’ll be spending the weekend together? ;)
Thanks for visiting me on GlutenFreely.com! You’ll be seeing lots of me around there.
Oh, and I saw your comment on the Barney Butter post. I am so insanely jealous of your absence from Facebook. You are absolutely entered in the giveaway, anyhow, and I have my fingers crossed for you. :)
xoxo Nicole
Anneke says
Hello Nicole! Still a faithful reader, even if not making my usual comments like I was before . . . clearly, I have to find the time to make these, they look awesome! My mom just visited and spent lots of time reading your cookbook. We would be in the kitchen, and I would say, “well, Nicole says . . .” Finally, she said, “who is this Nicole?” She thought you were a friend , having missed the fact that you are the cookbook author. I had to tell her, of course, that your ARE a friend, just not the kind she thought! Still using your recipes all the time, even though I haven’t been around much, so thanks again. And again, and again! Anneke
Nicole says
Hi, Anneke!
I was just today wondering how you were. For real. Just this morning. It’s so nice to hear from you! So glad you’re still finding success in the kitchen (at least I assume you are, since I haven’t heard otherwise, and you sound well). You were my barometer!
*and of course we’re friends – in every sense but the in-person sense, which I would gladly remedy if I could*
I’ll still be here, whenever you feel like dropping by. As always, I hope you do. Have a wonderful weekend, and say hello to your mom for me. :)
xoxo xo (extra) Nicole
Pam Cotterman on Facebook says
thank you so much…doesn’t look too complicated <3 and they look like they'd be GONE in one minute!
Linda says
You too, sweetie. You have a wonderful weekend–xoxLin
Nicole says
Thanks, Linda. Likewise. :)
xo Nicole
Linda says
You’re such a tease! Here I am At Work Thank You Very Much and all I want to do is run home and make these scrumptious little filled pastries. What would we do without you???xoxLin
Nicole says
Hi, Linda,
Oh have you no idea how right you are! ;) It’s always nice to hear from you, Linda. If I could, I’d whisk you away from work and ply you with custard-filled pastries.
xoxo Nicole