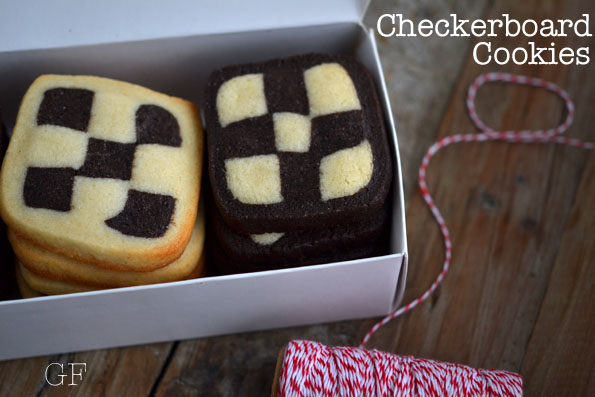
Checkerboard cookies are not hard. They're not. There are some secrets, though, to getting them to look right. Almost no matter what, they'll taste right. Light and buttery, they're like a cross between sugar cookies and butter cookies. And the dough is really quite nice to work with. But now hear this: These cookies take their sweet time. Try to rush them, and your cookies (the checkerboard pattern in particular) will pay the price. No mercy!
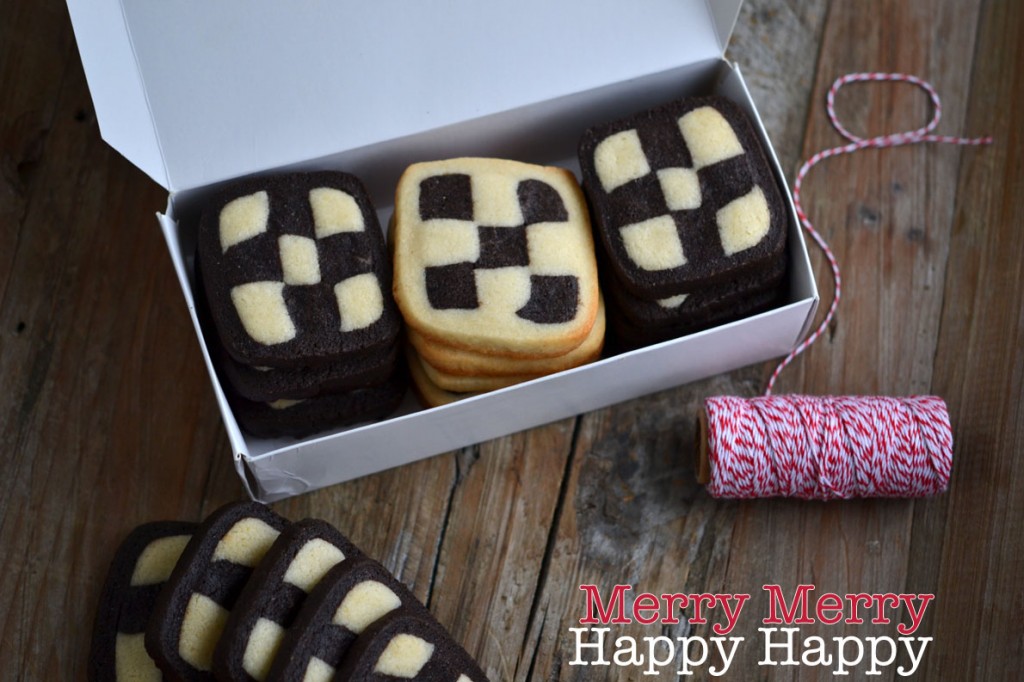
These cookies are for impressing. They are for gifting. For saying thank you. They are what you bring to your mother-in-law who still hasn't given you credit for all the wonderful things you do for her son, but seems like she might be ready to give you an inch. Or to your boss who sang your praises in that big meeting where his boss stood up and took notice of your always stellar work. Or to your mom, who always tells you that you're so, so pretty, even when you have a pimple. Or your husband, who shushed the kids in vain all Saturday morning so you could sleep in just this once. This time of year, as my mind plays an endless game of Tetris to puzzle out how all the different cookie shapes will fit together in their gift boxes, these cookies are the ones the others must learn to work around. Here's how it's done.
Semi-Pro Tip #1: When you are shaping the dough, keep it at room temperature. It will be super easy to roll out, or to shape into a 3-D rectangle. Then, when you want it to set in shape, so you can square the corners and slice the layers, place it in the freezer until it's firm (between 5 and 10 minutes).
Semi-Pro Tip #2: For the prettiest cookies, resist the urge to cut the recipe in half so you can skip the step of wrapping the checkerboard like a present in rolled out dough. Wrapping the checkerboard rectangle in a piece of rolled-out dough that is the opposite color of the four corners of the checkerboard serves two purposes. It helps keep the checkerboard in place, and the contrasting colors give a more professional appearance.
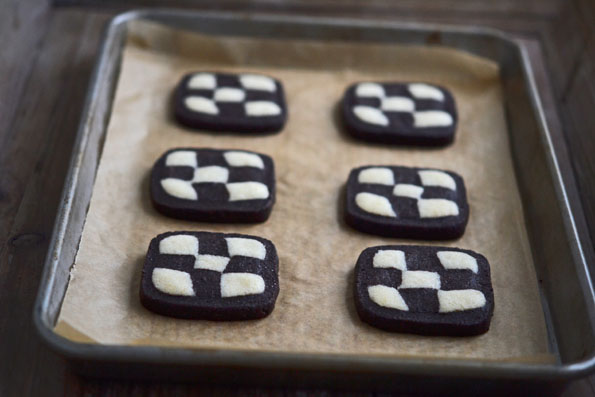
Semi-Pro Tip #3: Here's the final tip. As you slice the pieces that will become the checkerboard, remember that you are seeking 3-dimensional rectangles that are 1-inch tall x 1-inch wide. That will help guide you through the instructions. Don't worry. I explain it all, in plain language (mostly because that's the only language I speak, except for the unspoken language of l-o-v-e).
Checkerboard Cookies
Ingredients
For the basic dough
4 1/4 cups (595 g) high-quality all-purpose gluten-free flour
2 teaspoons xanthan gum (omit if your blend already contains it)
3/4 teaspoon baking powder
1 teaspoon kosher salt
2 cups (400 g) sugar
3 sticks + 2 tablespoons (364 g) unsalted butter, at room temperature
2 extra-large eggs (120 g out of the shell) at room temperature, beaten
1 1/2 teaspoons pure vanilla extract
For the vanilla dough
1/4 cup (35 g) high-quality all-purpose gluten-free flour
For the chocolate dough
7 tablespoons (35 g) Dutch-processed cocoa powder (Rodelle brand is gluten-free)
Instructions
Make the basic dough. In a large bowl, place the flour, xanthan gum, baking powder, salt and sugar and whisk to combine. Add the butter, eggs and vanilla, mixing to combine after each addition. Knead the dough with your hands until it is thick, smooth and well-integrated. Divide the dough in half, and place one half in another medium-sized bowl.
Make & prepare the vanilla dough. In the original bowl, add 1/4 cup flour to that half of the dough, and knead until the flour is well-incorporated into the dough. The dough will be thicker and stronger. Divide the vanilla dough in half, and place one half (now a quarter of the total dough) on a piece of unbleached parchment paper. With your hands, shape that piece of the vanilla dough into a 3-dimensional rectangle that is 1 1/2 inches tall, 1 1/2 inches wide and about 10 inches long. Square the edges as best you can. Wrap the rectangle in the parchment paper and place it in the freezer until firm (about 7 minutes). Cover the remaining piece of vanilla dough with plastic wrap and set it aside at room temperature.
Make & prepare the chocolate dough. To the medium-sized bowl, add the cocoa powder, and knead until the powder is well-incorporated into the dough. The dough will be a bit thicker, and will be dark brown. Divide the chocolate dough in half, and place one half (now a quarter of the total dough) on a piece of unbleached parchment paper. With your hands, shape that piece of the chocolate dough into a 3-dimensional rectangle that is 1 1/2 inches tall, 1 1/2 inches wide and about 10 inches long. Square the edges as best you can. Wrap the rectangle in the parchment paper and place it in the freezer until firm (about 7 minutes). Cover the remaining piece of chocolate dough with plastic wrap and set it aside at room temperature.
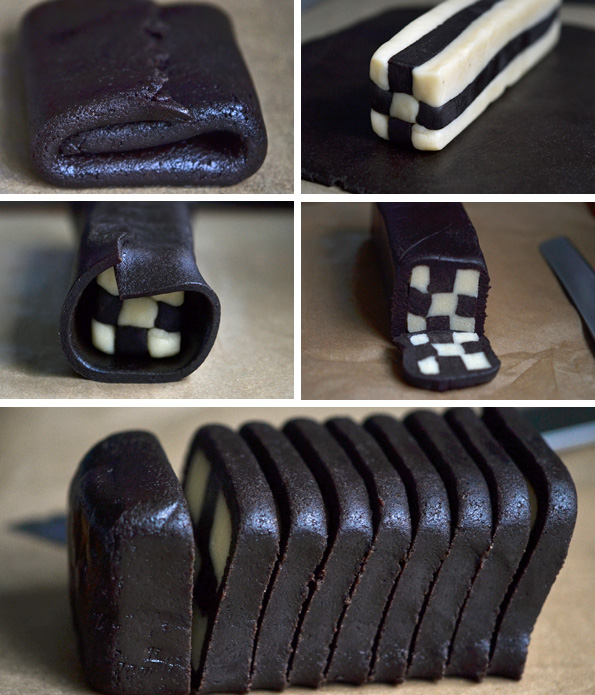
Assemble the checkerboard dough. Remove the 3-dimensional rectangle of vanilla dough from the freezer and square the edges fully by pressing each flat edge against a cutting board. Unwrap the dough from the parchment paper, and, with a very sharp knife, slice the rectangle along the length into 3 equal pieces, each 1/2 inch wide. Lay each piece flat on the cutting board, and slice once again along the length into 3 equal pieces. You should have 9 strips of vanilla dough. Repeat the process with the 3-dimensional rectangle of chocolate dough. You should have 9 strips of chocolate dough. Create 2 new rectangles in a checkerboard pattern by laying 3 alternating strips of dough side-by-side, another 3 on top, and finally another 3 on top of that (see photos). Make sure each strip of dough touches the ones next to, above and below it, all along the length of the new rectangles. One checkerboard rectangle should have vanilla dough on the 4 outside corners. The other checkerboard rectangle should have chocolate dough on the 4 outside corners. Wrap each checkerboard rectangle carefully in plastic wrap and place in the freezer until firm (about 10 minutes).
Preheat your oven to 350°F. Line rimmed baking sheets with unbleached parchment paper and set them aside.
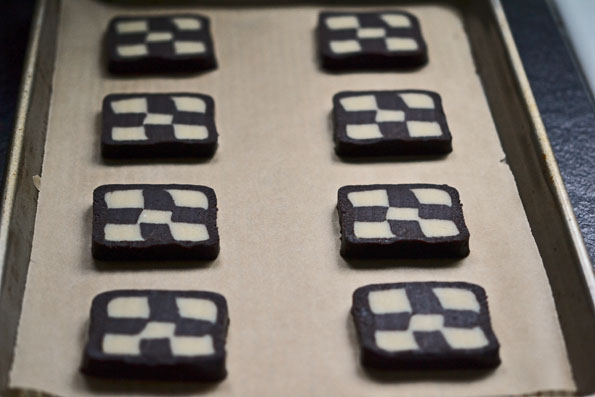
Wrap the vanilla checkerboard rectangle & prepare the cookies. Remove the plastic wrap from the remaining piece of chocolate dough, and place it between two pieces of unbleached parchment paper. Roll out the dough into a rectangle about 12 inches by 6 inches. Remove the top piece of parchment paper. Remove from the freezer & unwrap the checkerboard rectangle with vanilla dough on the 4 outside corners, and place it in the center of flat rectangle of rolled out chocolate dough. Wrap the chocolate dough around the checkerboard rectangle like a present, trimming it if it overlaps significantly. Square the corners. With a very sharp knife, slice the wrapped rectangle into cross-sections every 1/4 inch. Place the slices about 2 inches apart on the prepared baking sheets. Place the baking sheets in the freezer until firm (about 5 minutes).
Wrap the chocolate checkerboard rectangle & prepare the cookies. Repeat the process with the remaining piece of vanilla dough, and the checkerboard rectangle with chocolate dough on the outside 4 corners.
Bake the cookies. One baking sheet at a time, place the cookies in the preheated oven and bake until set (and, for the vanilla-edged cookies, the edges just begin to brown), about 8 minutes. Remove the cookies from the oven and allow to cool on the baking sheet for 5 minutes, or until firm. Transfer to a wire rack to cool completely.

Ben. says
I made these last night. They didn’t look quite as perfect as the photos but worked well. Used Red Bob’s Mill flour from Sprouts. I didn’t quite freeze the pieces long enough and had one fall apart a little. Froze the other a bit longer and it was much easier to work with.
Nicole Hunn says
Hi, Ben,
I explain in my FAQs here on the blog that Bob’s Red Mill is not a “high-quality all-purpose gluten-free flour” and generally will not work in my recipes. It is sticky and generally smells bad. As a bean flour blend, it is not, in fact, an all-purpose gluten-free flour at all.
Nicole
Ben. says
I made these last night. They didn’t look quite as perfect as the photos but worked well. Used Red Bob’s Mill flour from Sprouts. I didn’t quite freeze the pieces long enough and had one fall apart a little. Froze the other a bit longer and it was much easier to work with.
gfshoestring says
Hi, Ben,
I explain in my FAQs here on the blog that Bob’s Red Mill is not a “high-quality all-purpose gluten-free flour” and generally will not work in my recipes. It is sticky and generally smells bad. As a bean flour blend, it is not, in fact, an all-purpose gluten-free flour at all.
Nicole
Katie says
My only question is… How do I cut a 1 inch wide rectangle into 1/2 inch thirds?
Nicole Hunn says
So sorry! I made the correction, Katie. Each rectangle should be 1 1/2 inches tall and 1 1/2 inches wide.
Nicole
Kristy B. says
So impressive! These look beautiful. I’ve had quite a busy time baking the past week. We turned your red velvet cupcake recipe into a snake shaped cupcake cake for my nephews 3rd birthday and they were a huge hit :) and I’ve made 5 loaves of Japanese milk bread because I just cannot believe it. You’re awesome.
Katie says
My only question is… How do I cut a 1 inch wide rectangle into 1/2 inch thirds?
gfshoestring says
So sorry! I made the correction, Katie. Each rectangle should be 1 1/2 inches tall and 1 1/2 inches wide.
Nicole
Katie says
I hate to be the blog correction police (is that a thing? sign me up!) but it’s still wrong in the Semi-Pro Tip # 3 of the post. :D
I got myself your second book as a Christmas present and am waiting patiently (excruciatingly?) to open it. Looking forward to trying these Checkerboards and the Andes Mints cookies this weekend (along with a couple family recipes I adapted).
Sherry L says
These are gorgeous Nicole! I was wondering if you are familiar with Pizzelles, Italian waffle cookies. I have many fond memories of my Aunt & Uncle bringing us Pizzelles on Christmas Eve, and want to make some for my family. I have a Pizzelle iron, but have not attempted a gf version. You are already my hero, but I would be ever so grateful if you developed a recipe for them. Thank you.
XOXO
GClark says
Impressive! Must try these someday!
GClark says
Impressive! Must try these someday!
Sherry L says
These are gorgeous Nicole! I was wondering if you are familiar with Pizzelles, Italian waffle cookies. I have many fond memories of my Aunt & Uncle bringing us Pizzelles on Christmas Eve, and want to make some for my family. I have a Pizzelle iron, but have not attempted a gf version. You are already my hero, but I would be ever so grateful if you developed a recipe for them. Thank you.
XOXO
anna says
Would it make much of a difference making these with a bit of food coloring instead of cocoa powder? Or anything else that could differentiate the checks? I have some friends who shockingly dont like chocolate but would otherwise love these cookies.
Linda says
You’ve outdone yourself again! One question are the eggs used for binding or leavening? I would need to figure out an egg substitute since we are also an egg free household as of recent news from the naturalpath about my daughter’s intolerances.
Anneke says
I love you, you are awesome, and these look beautiful and delicious! I, however, won’t be making them until all of my children leave home. Anytime I see the words “these cookies take their sweet time,” I know they are not for me! You could gift them to me, though . . .
Lots of cookie love . . .
Anneke
gfshoestring says
Aw, come on, Anneke! I bet your girls could make these cookies, without your help thankyouverymuch. Or just keep baking bread and file these in the way back of the cabinet. ;)
xoxo Nicole
Anneke says
The way way way back . . .
Nicole Hunn says
Aw, come on, Anneke! I bet your girls could make these cookies, without your help thankyouverymuch. Or just keep baking bread and file these in the way back of the cabinet. ;)
xoxo Nicole
Anneke says
The way way way back . . .
Sandra Elsner says
WoW Nicole, these would be awesome for an Alice in Wonderland themed birthday party too! Luckily my Alice doesn’t have a birthday until April so I can have plenty of time to get up the confidence to bake these. Your superb!
gfshoestring says
I wouldn’t mind an Alice in Wonderland themed party myself, Sandra. Unbirthdays and all. You really don’t need much practice to make these. Just patience. :)
xoxo Nicole
Nicole Hunn says
I wouldn’t mind an Alice in Wonderland themed party myself, Sandra. Unbirthdays and all. You really don’t need much practice to make these. Just patience. :)
xoxo Nicole