Gluten Free Angel Food Cake | Light and Fluffy
Indulge in this divine Gluten Free Angel Food Cake recipe – a light, airy, and scrumptious dessert that's perfect for any occasion.
Yield: 1 10-inch tube cake
Equipment
- 10-inch cast aluminum nonstick tube pan
Ingredients
- 1 cup (140 g) gluten free cake flour (115 grams all purpose gluten free flour blend + 25 grams cornstarch; please see the Recipe Notes for full information)
- ½ teaspoon xanthan gum omit if your blend already contains it
- 1½ cups (173 g) confectioner’s sugar (divided into two equal parts)
- ½ teaspoon kosher salt
- 1 ¾ cups (430 g) egg whites (whites of about 12 eggs), at room temperature
- ⅓ cup (2 ⅔ fluid ounces) warm water
- 1½ teaspoons cream of tartar
- ¼ teaspoon almond extract (can substitute 1 teaspoon pure vanilla extract)
- Berries and whipped cream for serving (optional)
Instructions
- Preheat your oven to 350°F. Set a 10-inch nonstick tube pan (preferably a two-piece tube pan that has a removable bottom) to the side. Don’t grease or otherwise prepare it.
- Sift flour mixture 4 times. This is an essential step. Set a medium-size bowl and a piece of parchment paper side by side on a flat surface, along with a sifter.
- Sift the gluten free cake flour, xanthan gum, and ¾ cup (86 grams) of the confectioner’s sugar into the bowl. Remove the sifter, and sift the mixture again onto the parchment paper.
- Sift 2 more times for a total of 4 times between the bowl and the parchment. Add the salt, and whisk to combine.
- In the bowl of a stand mixer fitted with the whisk attachment or a large bowl with a handheld mixer, beat the egg whites, warm water, cream of tartar and almond (or vanilla) extract until begging to foam (about 30 seconds).
- With the mixer on medium-high speed, add the remaining 3/4 cup (86 g) confectioner’s sugar in 3 or 4 batches, until soft peaks form (3 to 4 minutes).
- Once all the sugar has been added, increase the speed to high and beat until peaks become stiff and glossy, about another 2 minutes. The beater will begin to leave a trail in the whites. Remove the mixing bowl from the mixer.
- In 4 batches, add the sifted flour mixture to the meringue, gently folding it into the meringue with a silicone spatula after each addition. Work quickly but carefully, so as not to deflate the egg whites. The mixture should be fluffy but relatively stable.
- Carefully transfer the cake batter to the ungreased tube pan. Run a butter knife or small offset spatula carefully through the batter in a careful circular motion to release any trapped pockets of air. Smooth the top with a silicone spatula. The pan will be nearly full.
- Place the pan in the center of the preheated oven, and bake until a cake tester inserted near the center comes out clean, the top is lightly browned, and it springs back when pushed gently, about 35 minutes. Don’t overbake.
- Invert the pan over a long-neck bottle if your pan doesn’t have legs to elevate it from the counter when inverted. Allow the cake to cool in the pan for at least 1 hour.
- Re-invert the cake so it’s right-side up. Coax the cake away from the sides and neck of the pan with a butter knife or offset spatula (ideally, plastic, so you don’t scratch the pan).
- If your pan is in two parts, with removable sides, press upward on the cake bottom and remove it from the rest of the pan. Run a straight edge along the bottom of the cake to separate it from the bottom of the pan.
- Place a wire rack on top of the cake, then invert both onto a wire rack. Remove the bottom of the cake pan. Allow the cake to finish cooling to cool to room temperature.
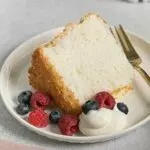
- Slice the cooled cake with a large serrated knife. For a clean cut, move the knife in one direction only, rather than sawing back and forth. Plate each slice with the optional berries and whipped cream and serve.
- Angel food cake freezes very well. You can wrap the whole, cooled cake tightly in freezer-safe wrap and freeze whole. You can also wrap individual slices tightly and freeze. Defrost at room temperature before serving.
Notes
About the cake flour blend.
To make cake flour, I used 115 grams of Better Batter + 25 grams cornstarch. You can make this cake with a full cup of Better Batter (cake flour just makes for a lighter cake), or a full cup of Cup4Cup (or my mock Cup4Cup) for cake flour-like results.
Please see the all purpose gluten free flour blends page on the blog for full information on appropriate blends. This is a very simple recipe, and the flour blend you choose is extremely important.
Recipe originally published on this blog in 2012. In 2021, more photos and video new. In 2023, more text resources added.
Nutrition information is approximate, at best, and calculated for the entire cake. Divide by the number of slices into which you slice the cake.
Nutrition information is approximate, at best, and calculated for the entire cake. Divide by the number of slices into which you slice the cake.
Nutrition
Calories: 741kcal | Carbohydrates: 305g | Protein: 51g | Fat: 1g | Sodium: 1993mg | Potassium: 1442mg | Fiber: 6g | Sugar: 3g | Calcium: 33mg | Iron: 1mg