Expandex modified tapioca starch is a chemically, not genetically, modified tapioca starch. Use it to build my gluten free bread flour blend and make the best breads of your life.
Search Results for: expandex
Caputo Gluten Free Flour | A Review
I tested Caputo gluten free flour in my gluten free recipes. The results are sometimes amazing, sometimes disappointing.
I have a lot of experience with gluten free flour blends, but so far I have only recommended 3 blends for my recipes: Better Batter, Cup4Cup, and now my own blend called Nicole's Best Multipurpose Gluten Free Flour. I have tested my gluten free recipes extensively with these blends, and they will work anywhere a recipe calls for an all purpose gluten free flour blend as an ingredient.
I recommend against most other blends on the market for being unbalanced, containing gritty rice flour, or simply of inconsistent quality. Any of these qualities mean that they won't work in my recipes.
When you leave a comment on the blog saying that you “followed the recipe to a T” and it didn't work, it's almost always an issue with the flour blend you've chosen.
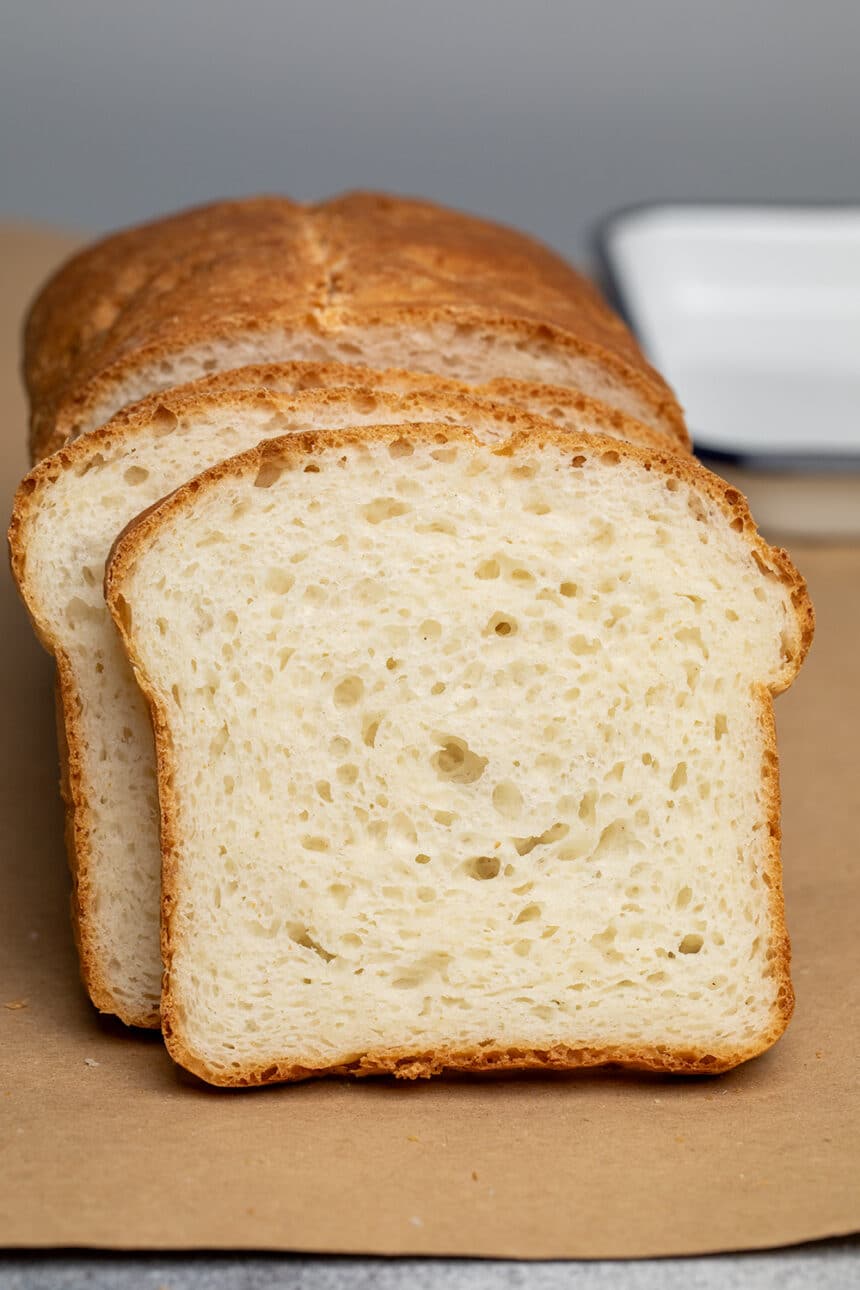
Table of Contents
- Why review this flour blend?
- Important facts about the blend
- How does the blend perform in baking and taste?
- How versatile is this blend?
- Where to buy Caputo gluten free flour in the U.S.
- Should you try Caputo gluten free flour?
Why review this flour blend?
I've begun to seen an increase in the number of comments referring to the gluten free Caputo flour. Some readers were asking if it would work in one of my recipes. Others were stating that they had used it and either did, or didn't, like their results.
I had been aware of the Caputo Fioreglut gluten free flour blend for some time. But I hadn't tested it because it contains psyllium husk, a gluten free baking ingredient that I generally don't like.
There's also an Italian restaurant near my home that makes incredible gluten free pizza in a dedicated gf pizza oven. I tried it for the first time in 2023, and I really enjoyed it.
For these reasons, I decided to see for myself how well this flour blend performed in my recipes. I have only tested the flour blend in 3 types of recipes: gf pizza, gf sandwich bread, and gf cookies. These are my results!
What's special about gluten free Caputo flour?
Caputo Fioreglut is unique because it contains wheat starch as its first, and most dominant ingredient. I had seen increasing claims on social media and from readers that this blend makes the best gluten free pizza and bread that people have ever had.
Is this a sponsored review of the flour?
No! I purchased the flour to test with my own money. Since I do so few sponsored posts and haven't done a single one in years, companies never even approach me any more.
The link below to purchase this blend from Amazon.com is an affiliate link. I encourage you to shop around for the deal that is best for you.

Important facts about the blend
What are the ingredients?
These are the ingredients listed on the package of flour that I purchased. All facts are according to the company:
- gluten free wheat starch (This meets FDA requirements for Gluten-Free Foods)
- dextrose
- maize starch
- buckwheat flour
- rice starch
- psyllium seed fibre
- thickener: guar;
- flavoring
The FDA requirements for gluten free food labeling that the company is referring to “define the term “gluten-free” for voluntary use in the labeling of foods.” (Source)
The final rule states specifically that products that contain wheat starch as an ingredient and states, in part:
The final rule defines the term “gluten-free” to mean that the food bearing the claim does not contain … an ingredient that is derived from a gluten-containing grain and that has been processed to remove gluten (e.g., wheat starch), if the use of that ingredient results in the presence of 20 parts per million (ppm) or more gluten in the food (i.e., 20 milligrams (mg) or more gluten per kilogram (kg) of food)
78 Federal Register 47154
Should I add xanthan gum or guar gum to this blend?
No! This blend already has psyllium husk and guar gum as binders. Plus, it's very sticky and somewhat stiff. Those
Is Caputo gluten free flour really gluten-free?
Yes, Caputo gluten free flour is properly labeled gluten free as defined by the United States FDA. However, the presence of wheat starch as the most plentiful ingredient in the mix may make you uncomfortable, and I respect that.
Is wheat starch safe to eat for celiacs?
Yes, wheat starch that has been properly tested for being free of gluten is gluten free. However, like all decisions about your diet, you must make a personal decision about whether it has a place in your life. This is not medical advice, as I'm not a doctor and would never pretend to give that sort of advice.
It seems like a similar decision to deciding whether oats are safely gluten free, or whether Cheerios are gluten free. Please do keep in mind that wheat starch is not safe for anyone who is actually allergic to wheat, as it is gluten free, but not wheat free.
How does the blend perform in baking and taste?
I encourage you toward or against any particular blend, even my own blend, to ensure that you have success when you use my recipes. Specialized gluten free ingredients like a flour blend are very expensive, and I want you to have success in baking the first time, and every time.
The bottom line: Caputo gf is good for yeast breads
The Caputo gluten free flour blend performs very well in yeast-risen baked goods like gluten free pizza and bread. I don't like its performance at all in cookies, and although I haven't tested this, I believe it would make cake with a stiff, unpleasant crumb.
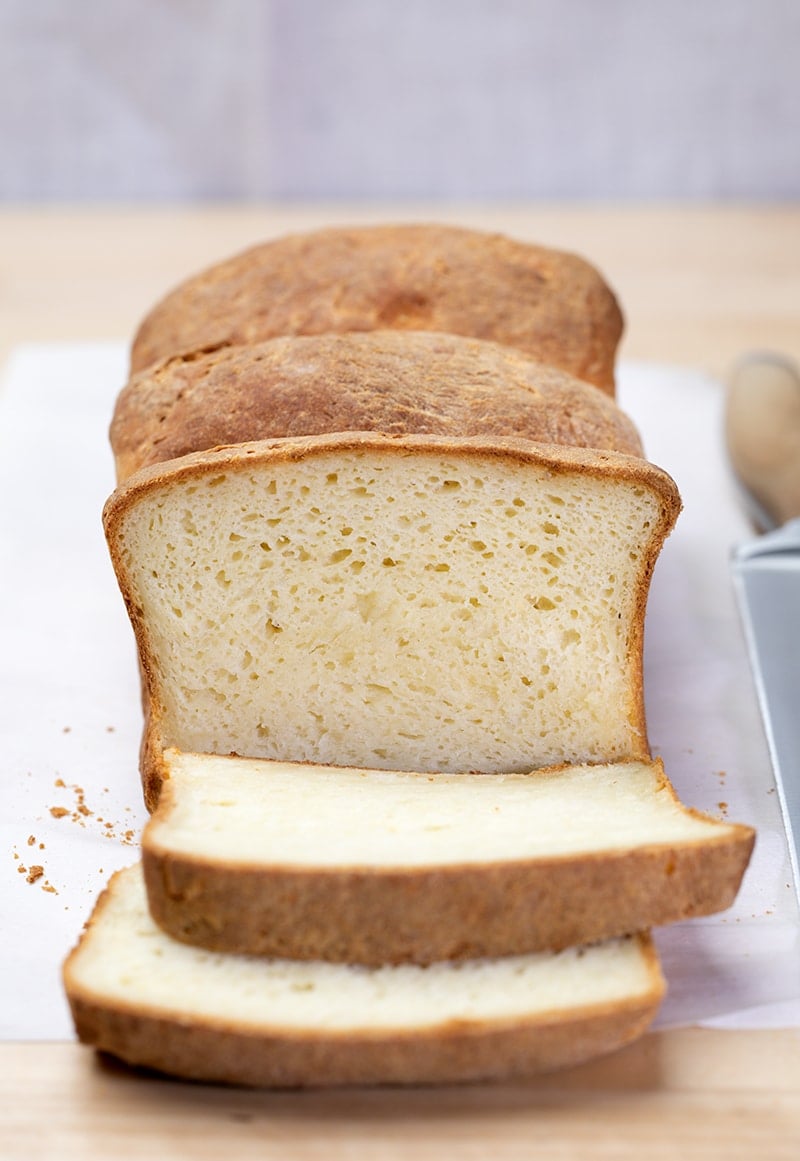
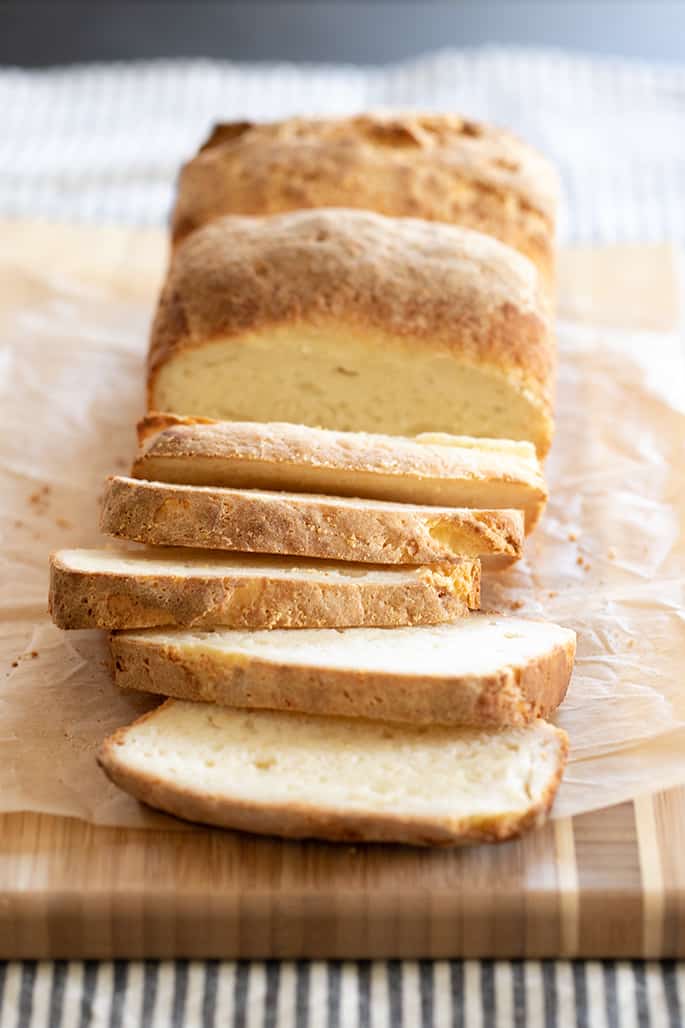
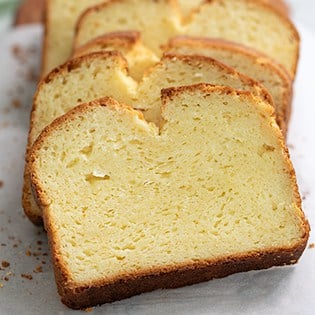
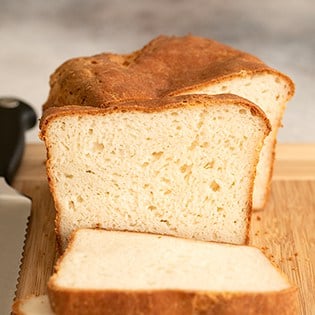
The rise in yeast-risen baked goods is better than anything else I have tried. The rise is truly excellent, which you can see in the photos of bread here on this page.
The crumb structure looks perfect, the texture of the pizza is crispy outside and well-risen inside. However, the bread that I baked with Caputo Fioreglut tasted somewhat dry, and certainly more dry than what I've made with my other recommended gluten free flour blends. It's not enough of a problem to make me not want to use this flour again, though!
How to use Caputo flour in gluten free pizza
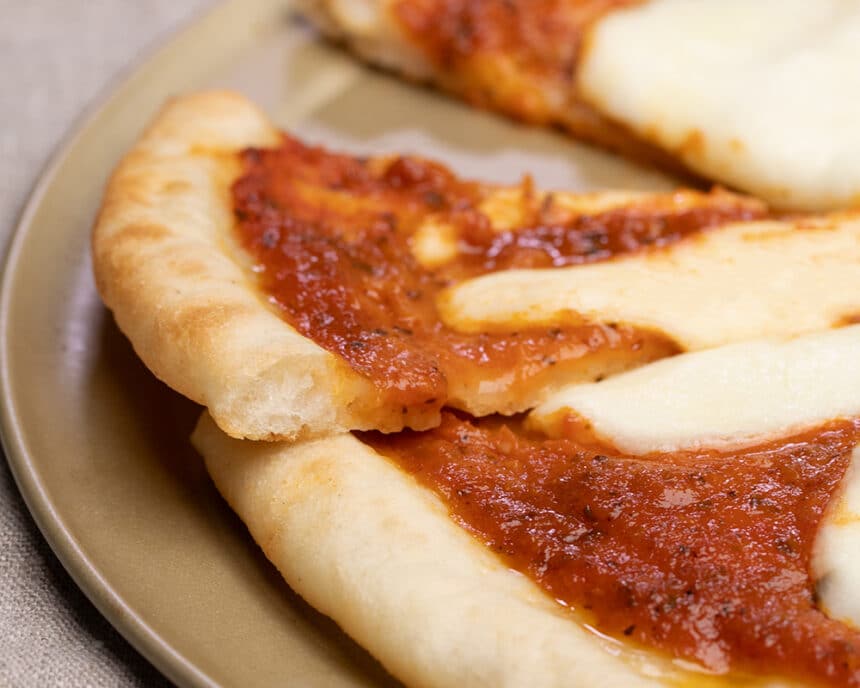
I first made my recipe for NY-style gluten free pizza, as written. That pizza has an 84% hydration ratio, and the pizza bends and folds when made with my regular recommended flour blend.
When I made the same recipe using Caputo, the pizza was good, but did not bend. I increased the hydration ratio to 93% by increasing the water, and the pizza bent and folded well. You'll find my Caputo Fioreglut pizza recipe on the blog.
Results of Caputo in gluten free bread
I made my recipe for gluten free bread without any changes. You can see the results in the photos on this page.
The rise was truly amazing, and the loaf maintained its shape perfectly as it cooled. However, the mouthfeel was a bit drier in my throat than normal. It felt moist to the touch, but felt somewhat drier when I swallowed it.
It's rare that yeast bread will rise so well, and maintain its shape after baking, but without also feeling moist in your mouth. The wheat starch, in particular, is able to trap so much of the carbon dioxide released by the yeast. But the starchiness of the blend means it absorbs a ton of water.
How versatile is this blend?
This blend is not very versatile, even though the bag states that it's “gluten free flour for all your baking needs.” So far, I'm only willing to recommend that you use it in pizza and breads.
I haven't tried it in gluten free pasta, but I believe it would work well in my recipe in place of both the all purpose gluten free flour blend and the Expandex modified tapioca starch. For a single batch, that would be 325 grams of gf Caputo.
I don't have a formula for how to use it in my recipes without any changes, since it works better in some recipes, and worse in others. I haven't yet tried it in shaped breads, only the batter-style gluten free breads.
This blend most definitely cannot be used in place of traditional flour in a “regular” non-gf recipe. It absorbs a lot of moisture, even more than usual for gf flour blends, so each recipe must be considered individually.
Where to buy Caputo gluten free flour in the U.S.
I purchased gluten free Caputo on Amazon.com. That's an affiliate link to the precise product I purchased. As of this writing, the price on Amazon Prime is $1.98 per ounce.
You can also purchase the flour on the Caputo website, but the shipping costs make Amazon a better value, particularly if you have a subscription to Amazon Prime.
There are other online retailers that also offer this flour blend for sale in the U.S., but the shipping costs add up to a much higher price than Amazon Prime. Please do shop around for the best value!
How does the price of Caputo compare to Better Batter or Nicole's Best?
As of this writing, the cost of a 5 pound bag of Better Batter's original blend on Amazon Prime is $1.96 per ounce. That's 2¢ less than Caputo as described above. Both of these purchases assume Amazon Prime membership. The price of Nicole's Best right now is $1.91 an ounce, as shipped.

Should you try Caputo gluten free flour?
Yes—but only if you're willing to experiment with adding more moisture to some of my bread recipes, or to just use the blend to make my gluten free sandwich bread and this Caputo Fioreglut pizza recipe.
If you're looking for an all purpose gluten free flour blend, this isn't it. And, of course, if you're allergic to wheat or any of the other ingredients in the blend, please don't purchase this flour.
Gluten Free Flour Blends & Information
Should you buy a gluten free flour for baking, or make your own?
When it comes to Gluten Free Flour Blends there are two primary options to consider — making your own flour blend (from one of my recipes), or purchasing a pre-mixed blend that's been battle-tested for Cookies, Cakes, Breads, and more.
Making your own blend will require some speciality ingredients, time, and math. I've done the math for you in the Excel-based calculator linked below. Buying a pre-mixed flour blend for baking will save you time and wasting ingredients, with the biggest bonus being that all the guess work is removed from your gluten free baking.
Make your own blend
If you'd like to take the DIY approach, here's a downloadable Excel file with a calculator for each blend! All the information explaining the blends, their usefulness, etc. is on this webpage. The link below is only to an Excel spreadsheet to do the math for you.
Download the Calculator →
Buy a Blend
You can purchase Nicole’s Best multipurpose gluten free flour only on our new Nicole’s Best sales website, Bestgfflour.com. It’s the best blend available, but it’s not yet widely available. Don’t worry, Better Batter (linked below) works in all my recipes that call for an all purpose gluten free flour blend!
Buy Nicole's Best Blend →
Everything you need for making Gluten Free Flour blends
Table of Contents
- Everything you need for making Gluten Free Flour blends
- Don’t Want To Build Your Own Blend?
- What If I Only Want To Use One Blend?
- How Do I Use the Infographics Below?
- Mock Better Batter Gluten Free Flour Blend
- Mock Cup4Cup Gluten Free Flour Blend
- Better Than Cup4Cup Gluten Free Flour Blend
- Basic Gum Free Gluten Free Flour Blend
- The Myth of a Cup-For-Cup Gluten-Free Flour Blend
- Better Batter as Cup4Cup Hack
- Gluten Free Cake Flour
- Gluten Free Bread Flour
This article has all the information you need to know about gluten free flour blends. From simple, easy-to-use step by step instructions for how to build your own all purpose gluten free flour blend from scratch for baking at home, to copycat versions of popular ready made blends. It’s all here!
Before we begin, let's answer a few common questions
1. Can I just use gluten free flour instead of “regular” flour in conventional recipes?
The answer is no! Gluten free baking requires gluten free recipes (See 8. The Myth of a Cup-For-Cup Gluten-Free Flour Blend below).
2. Is gluten free flour better for you than regular flour?
No! Not unless you have to avoid gluten for other health reasons. Gluten free flour isn’t naturally better for you than wheat flour.
3. Can you buy gluten free flour?
Yes, you can! I recommend my new flour blend, Nicole's Best, Better Batter classic blend all purpose gluten free flour, or Cup4Cup gluten free flour. (See 1. Don’t Want To Make Your Own Flour Blend? below).
4. What types of gluten free flour are there?
Well, I’m glad you asked. That’s what we’re talking about. Read on!
5. How do I make your Gluten Free Bread Flour blend to make the bread recipes in Gluten Free on a Shoestring Bakes Bread?
Per 140 gram cup, it’s just 100 grams Better Batter all purpose gluten free flour + 25 grams whey protein isolate + 15 grams Expandex modified tapioca starch. Scroll to the very bottom for more information!
It all starts with rice flour
Rice is one of the most basic staples in the gluten free diet (yes! rice is gluten free). All of my all purpose gluten free flour blends are rice flour-based blends.
It’s incredibly important to use a very finely-milled rice flour, or your baked goods will be gritty and the flours will not blend into the other ingredients properly.
Typically, I recommend purchasing Authentic Foods superfine rice flours. Recently, I have discovered that it is possible to mill finely ground rice flour at home with some special equipment.
Please see the full discussion of making your own rice flour here on the blog, including price comparisons. You decide what’s right for your family and budget!
Choosing an All Purpose Gluten Free Flour Blend
Choosing an all purpose gluten free flour recipe blend can be pretty intimidating. Don’t worry!
Each all purpose gluten free flour recipe below can be used in any of the gluten free recipes here on my blog and in my cookbooks that call for an “all purpose gluten free flour.”
They’re easy to make. All you need is a simple digital food scale and the simplest calculator you can find.
The recipes are expressed in percentages, and you cannot make these blends accurately with volume (cups, tablespoons, teaspoons) measurements, as measuring by volume is incredibly imprecise, and each flour has a different weight/volume.
NOTE: There are affiliate links on this page. If you click one of the links and purchase products, I earn a very small commission on your purchase, at no extra cost to you. Thank you for making this blog possible!
Don’t Want To Build Your Own Blend?
 Don’t Want To Build Your Own Blend?
1
What Gluten free flour blends to use for & for what purposes
Use Nicole’s Best multipurpose gluten free flour for all of my recipes, except those that call specifically for my “gluten free bread flour” blend. Use it without adding xanthan gum when a recipe calls for my “gum-free gluten free blend,” and with the designated amount of xanthan gum when a recipe calls for an “all purpose gluten free flour blend.”
Use Better Batter gluten free flour everywhere my recipes call for an “all purpose gluten free flour.” You can purchase it on their website (betterbatter.org), and you’ll get the best price when you buy in bulk. I'm afraid you'll have to find it in stock, though, and sometimes it goes out of stock.
You can also use Cup4Cup gluten free flour blend anywhere my recipes call for an “all purpose gluten free flour.” It's relatively high in starch, though, which is why I have a “Better Than Cup4Cup” flour blend, which I believe it the best there is. Cup4Cup won’t produce ideal results in every category of my recipes, but it will still work in everything other than gluten free bread.
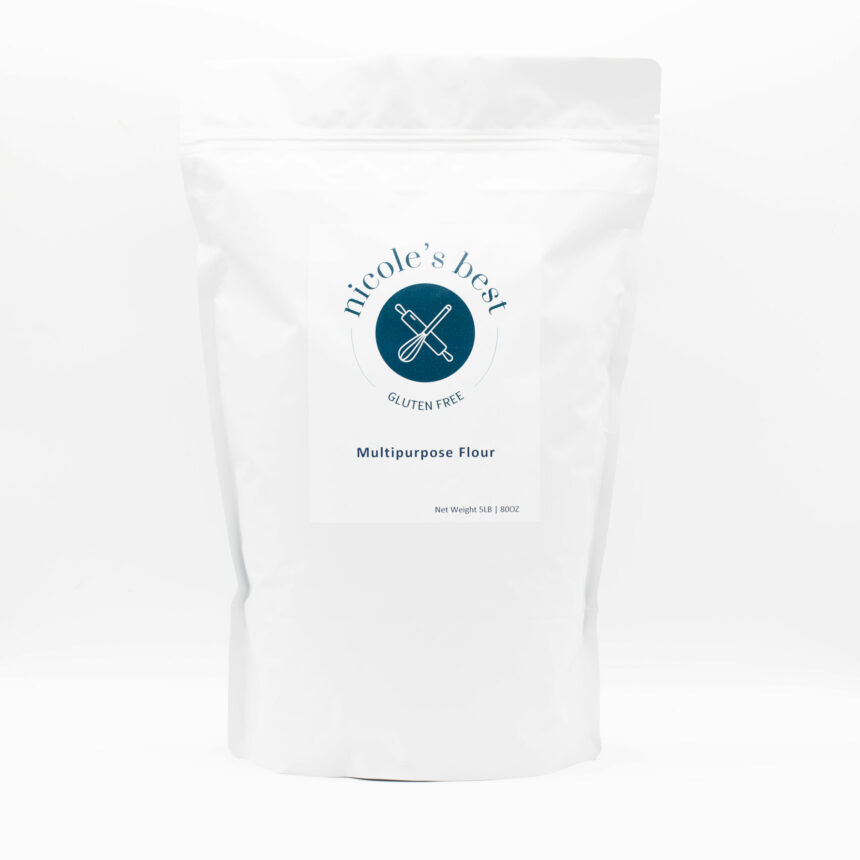
Nicole's Best Multipurpose Gluten Free Flour
Simply the best. This is my own blend, newly for sale. Made with premium ingredients, it has a smooth-flowing texture that can be used in breads, pastries, sauces, and pancakes.
Shop Now →
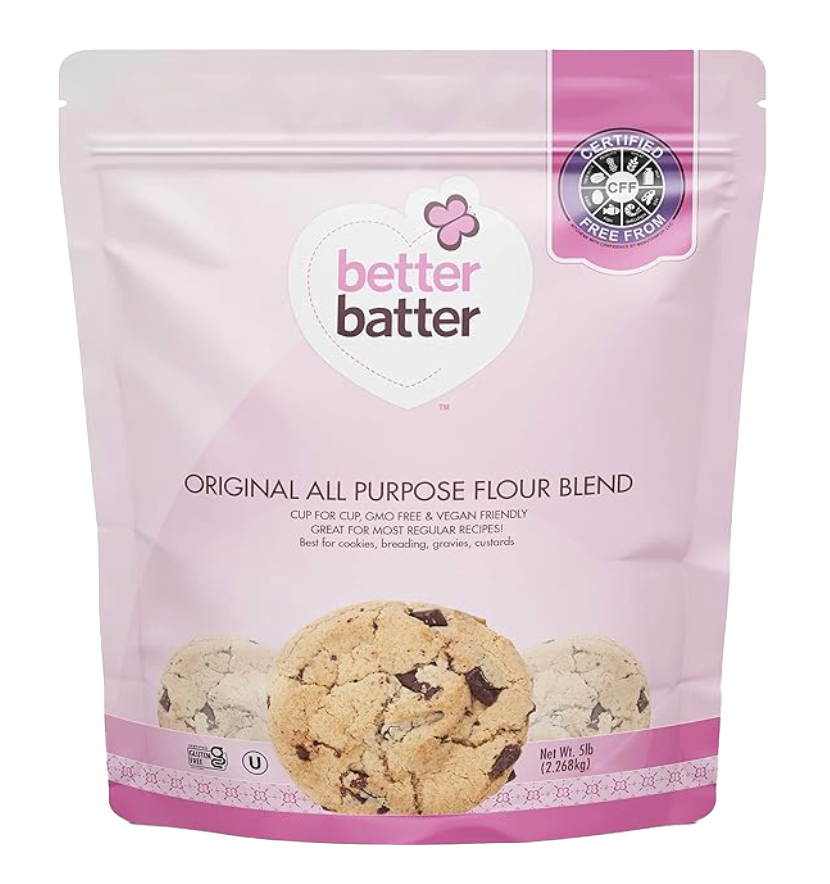
Better Batter Original All Purpose Gluten Free Flour Blend
Perfect for gluten intolerant, vegetarian, and vegan lifestyles. Make sure you purchase the “classic” blend only!
Shop Now →
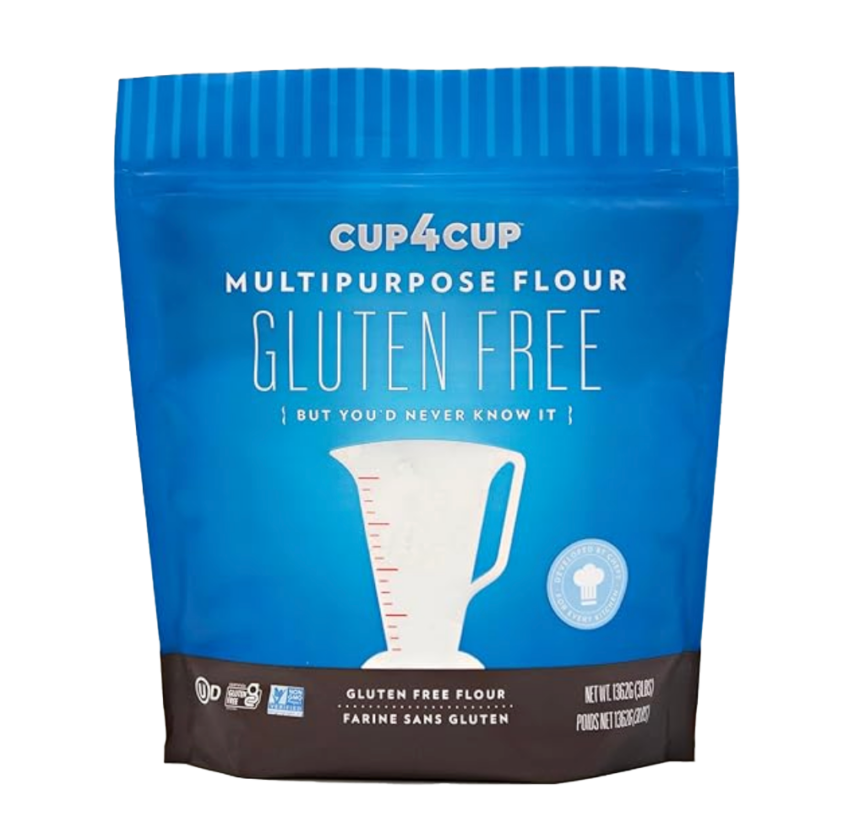
Cup4Cup Multipurpose Gluten Free Flour
Neutral flavor that won’t change the taste of your favorite recipes. This blend is lighter than Better Batter and has more starch, but it also has milk powder which adds great texture and some additional structure. It’s best as a pastry flour, but it works in all my recipes that call for an all purpose gluten free flour blend. Just some better than others!
Shop Now →
1
Other packaged gf blends that I’m afraid I don’t care for:
- King Arthur Gluten Free Flour Blends: Their rice flour is relatively grainy, and the blend is simply too high in starch; avoid their blends at all costs when making gluten free yeast bread! I haven’t tried their new “bread flour” blend, but it’s made with psyllium husk and I don’t use or recommend that ingredient.
- Jules Gluten Free (it’s made with a very, very high percentage of Expandex modified tapioca starch, so it’s very starchy and also rather gummy);
- Tom Sawyer blend (too starchy);
- Namaste (unbalanced);
- Krusteaz (unbalanced);
- Bob’s Red Mill (their bean flour blend is simply unpleasant; their 1:1 rice flour blend is unbalanced, grainy, and of inconsistent quality);
- Pillsbury (grainy);
- Betty Crocker Rice Flour Blend (grainy);
- Trader Joe’s Blend (I reviewed it here);
- Better Batter’s “Artisan Blend” (it does not work properly in my recipes as it’s rice-free and contains psyllium husk, and ingredient I don’t bake with and don’t recommend).
If you use any of these blends, especially Bob’s Red Mill or Namaste, your recipe simply will NOT turn out.
King Arthur Flour multi-purpose gluten free flour blend is perhaps the most widely available blend, and I would give anything (a bit of an exaggeration) to be able to use and recommend it. Unfortunately, it’s very high in starch so it’s unbalanced, and the rice flour in it is grainy. *whomp whomp whomp*
What If I Only Want To Use One Blend?
 What If I Only Want To Use One Blend?
1
If you only want to use one blend, I’d purchase my newly available Nicole’s Best Multipurpose Gluten Free Flour that you can learn about and later purchase on the Nicole’s Best website. It doesn’t contain xanthan gum, so it’s appropriate for everything, even pancakes, with varying amounts of xanthan gum, which you can also purchase on the site.
If you only want to use one blend that you can make yourself, for everything but bread, I’d make it my Better Than Cup4Cup.
You’ll still need a Gum-Free Gluten Free Flour Blend, though, for some applications. So … two blends? Oh, and to make bread flour, I suggest you buy Better Batter. So … just 3. That’s all. :)
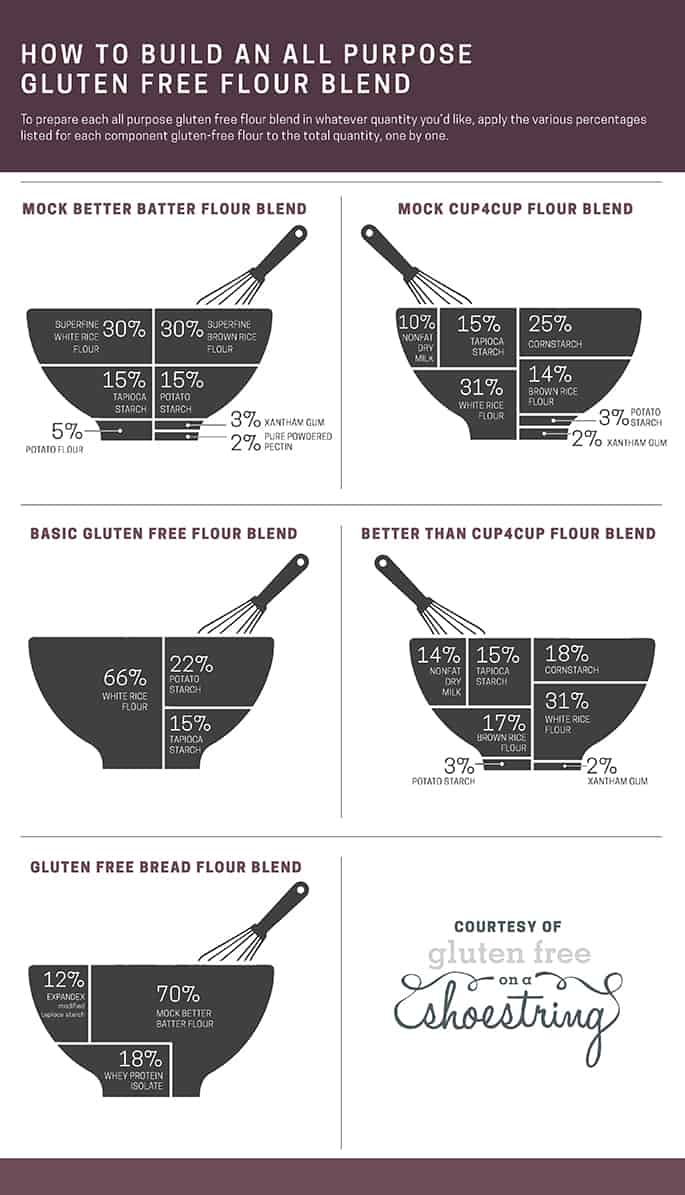
How Do I Use the Infographics Below?
How Do I Use the Infographics Below?
To prepare each all purpose gluten free flour blend below in whatever quantity you’d like, simply apply the various percentages listed for each component gluten-free flour to the total quantity, one by one.
For example, if you wanted to put together 140 grams of flour (which is the proper measurement for “1 cup” of an all-purpose flour blend by volume in my recipes), using the Mock Better Batter Blend, here’s the math:
30% BRF = 30% (or 0.30) x 140 grams = 42 grams Superfine Brown Rice Flour
30% WRF = 30% (or 0.30) x 140 grams = 42 grams Superfine White Rice Flour
15% TS/F = 15% (or 0.15) x 140 grams = 21 grams good quality Tapioca Starch/Flour
15% PS = 15% (or 0.15) x 140 grams = 21 grams Potato Starch
5% PF = 5% (or 0.05) x 140 grams = 7 grams Potato Flour
3% XG = 3% (or 0.03) x 140 grams = 4 grams Xanthan Gum
2% PPP = 2% (or 0.02) x 140 grams = 3 grams Pure Powdered Pectin
If you add up all of the numbers, it will equal 140 grams (go ahead and check!). So make as much or as little as you like. I generally make 10 cups at a time of my favorite blend (which at this point is the “Better Than Cup4Cup Flour Blend”).
For the math-phobic: Reader Ryan Hunt also provided us with this handy Excel document that does the calculations for you for most of the following blends!
Click “download” and save it to your own computer, then use it to do the calculations for you: DOWNLOAD HERE
Mock Better Batter Gluten Free Flour Blend
Mock Better Batter Gluten Free Flour Blend
This blend behaves just like Better Batter itself in recipes:

What’s in the blend?
This mock Better Batter flour blend is a dairy free, gluten free blend made of equal amounts superfine white rice flour and brown rice flour (30% each), equal parts tapioca starch and potato starch (15% each), less potato flour (5%), 3% xanthan gum, and finally 2% pure powdered pectin.
It’s super important to use superfine rice flours, as otherwise your blend will be gritty. The rice flours, potato flour, tapioca starch and powdered pectin simply cannot be substituted for anything else.
The potato starch can be replaced with corn starch or arrowroot, and the xanthan gum with an equal amount of guar gum.
What is the blend good for?
Better Batter is what I use when I need a bit more structure (like cut out sugar cookies since it’s a very simple doughs and I don’t want it to fall apart at all) and/or a bit more chew (like gingerbread cake and morning glory muffins).
Mock Better Batter is also good for recipes like the devil’s food cake since I want them to rise evenly, and a lower starch blend is very helpful in that endeavor. Higher starch blends don’t usually hold together as well or rise as evenly.
Finally, with sturdy cookie recipes like the soft batch chocolate chip cookies, the butter in the blends tenderizes the heavier Better Batter flour perfectly. This is my go-to blend for standard drop cookies.
One more important thing about (Mock) Better Batter: It is the flour that I use to build my High Quality Gluten Free Bread Flour for alllll the amazing breads in Gluten Free on a Shoestring Bakes Bread.
But when I make that bread flour, I use Better Batter itself. I don’t build a mock Better Batter for that.
It’s actually more economical to buy Better Batter than to blend it yourself, and way easier. It cuts the bread flour down to 3 components: Better Batter, whey protein isolate, and Expandex.
Mock Cup4Cup Gluten Free Flour Blend
Mock Cup4Cup Gluten Free Flour Blend
This blend behaves just like Cup4Cup in recipes.

What’s in the blend?
Cup4Cup has much more white rice flour than brown rice flour, it’s quite high in starch and it contains nonfat dry milk. The two ingredients present in the largest quantities are superfine white rice flour (31%) and cornstarch (25%).
It has almost equal amounts of tapioca starch (15%) and superfine brown rice flour (14%), with 10% nonfat dry milk, a wee bit of potato starch (3%) and finally, and 2% xanthan gum (slightly less than Better Batter has). The rice flours, tapioca starch and nonfat dry milk simply cannot be substituted for anything else in this blend.
Although I haven’t tried this, the cornstarch and/or potato starch may be able to be replaced with arrowroot, and the xanthan gum with an equal amount of guar gum.
What’s the blend good for?
Cup4Cup is really a pastry flour. High in starch, lower in protein, it’s just a dream for pastry. Light and airy, it does just what pastry flour is meant to do: surround the cold butter in a recipe smoothly, and then puff effortlessly when the cold butter hits the heat of the oven and gives off steam.
Cup4Cup does have enough protein and structure to trap the steam given off in the oven, which is important. If you just use a high-starch blend that doesn’t have the other attributes of Cup4Cup (notably, dry milk powder and xanthan gum), it won’t trap steam and you won’t get the flaky goodness of the beautiful biscuits, scones, pie crusts and puff pastry.
Better Than Cup4Cup Gluten Free Flour Blend
Better Than Cup4Cup Gluten Free Flour Blend
This is a tweaked version of Cup4Cup, which I affectionately call the Better Than Cup4Cup Flour:

What’s in the blend?
As the name implies, I think it’s even better than Cup4Cup, as it corrects what I believe to be the imbalances in that blend. It contains almost 1/3 superfine white rice flour, similar amounts of cornstarch (18%), superfine brown rice flour (17%), tapioca starch (15%) and nonfat dry milk (14%).
A small amount of potato starch (3%) and even less xanthan gum (2%) round out the blend. Like the mock Cup4Cup blend, the rice flours, tapioca starch and nonfat dry milk simply cannot be substituted for anything else in this blend.
Although I haven’t tried this, the cornstarch and/or potato starch may be able to be replaced with arrowroot, and the xanthan gum with an equal amount of guar gum.
What’s the blend good for?
This is generally my favorite all purpose gluten free blend. It’s just light enough without being too starchy, never tough, and it’s particularly good for doughs that you have to roll out since it rolls out really smooth (like pierogi). It’s not my favorite for pastry, since my mock Cup4Cup is just the perfect pastry flour—low in protein, high in starch.
Better Than Cup4Cup is great for recipes that are a little bit more delicate, but not fragile (like churros), and recipes that I want to lighten up a little (like chocolate pound cake). I also really like it for lighter cookies, like snickerdoodles, chewy sugar cookies and drop sugar cookies. It’s just a great all-around blend. Love it!
Basic Gum Free Gluten Free Flour Blend
Basic Gum Free Gluten Free Flour Blend
Finally, my basic, xanthan gum free gluten free flour blend, for recipes that do best without any xanthan gum at all, or a reduced amount:
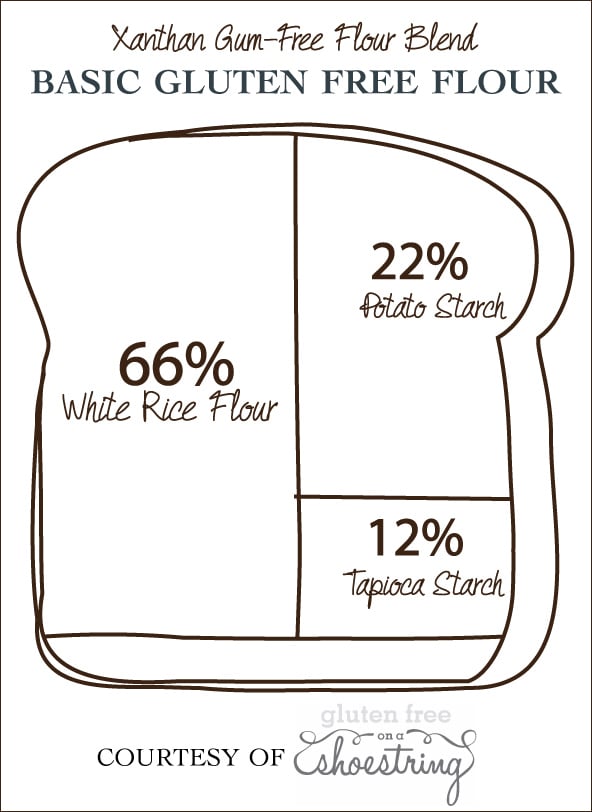
What’s in the blend?
This blend has only 3 simple ingredients: two-thirds superfine white rice flour (66%), nearly one-quarter potato starch (22%), and the remaining 12% is tapioca starch. The white rice flour cannot be substituted with brown rice flour, or anything else. It is essential to the blend.
The tapioca starch cannot be substituted either, but the potato starch can likely be substituted with corn starch or even arrowroot.
What’s the blend good for?
I like to use this blend in delicate things like and gluten free pancakes. This gum free gluten free blend serves two really, really important purposes: (1) allows us to make the lightest most delicate recipes like crêpes, pancakes, puddings (without resorting to using cornstarch as a thickener, since that ‘leaks’ liquid as it cools) and super crispy cookies), and (2) equally important, it allows us to really control the amount of xanthan gum in a more delicate cake recipe, like sponge cake or champagne cake.
You do need some xanthan gum even in cakes, though. They will rise and hold together reasonably well without xanthan gum, but they will crumble too easily (do we really want to perpetuate the myth that gluten free baked goods are crumbly?!) and they will get stale really fast.
One more thing a gum-free blend is necessary for that isn’t pictured here is gravies and sauces. You cannot make a good roux with xanthan gum, so don’t even try.
Trust me, you want to stock these 3 component flours to have this blend for when you need it. It isn’t needed all the time, but it’s important to a complete gluten free pantry. I usually keep a few cups of it already blended, but since it’s so simple that really isn’t strictly necessary.
The Myth of a Cup-For-Cup Gluten-Free Flour Blend
The Myth of a Cup-For-Cup Gluten-Free Flour Blend
Gluten-free baking calls for gluten-free recipes. Plain and simple. There is no such thing as a cup-for-cup gluten-free flour blend that mimics conventional flour enough to be used in all of your conventional recipes.
Even though some commercial blends may call themselves a cup-for-cup replacement for all-purpose wheat flour, a cup for cup replacement for all purpose flour is a myth. I’ve tested so many gluten free flour blends. I took note of each flour blend’s cup for cup claim – and then ignored it.
That’s why I have been using my gluten-free recipes for the each test, rather than using conventional recipes. You see, they’re different.
Gluten-free recipes and conventional recipes are different from one another. Gluten-free food should taste so great it makes your toes curl.
It shouldn’t be “good, for gluten-free.” And I will not rest until not a single soul ever again tells us to “c’mon,” since “no gluten-free pizza is going to be any good.” The heck with that!
But that doesn’t mean that our path to excellent is exactly the same. We have to get there another way. We have to make our own way. Gluten-free baking is still relatively new. No one can claim to know everything about it.
Most gluten-free flour companies that make an all-purpose gluten-free flour tell you that all you have to do is just replace an equal amount of their flour in your favorite recipes, and that’s that. Some of those companies sell amazing gluten-free flour blends, and I’m a fan of from way back. But that claim? It’s not even interesting to me.
We took out gluten! When we did that, we removed the essential protein in wheat-based flours that gives baked goods their texture and mouth feel.
No matter what we replace it with, it’s just not going to behave exactly the same in the process of baking. Same result, different route.
What I’m expecting is an all purpose gluten free flour. One that performs well for all purposes. But that doesn’t mean it performs the same as gluten-containing flour. And it doesn’t have to.
For some recipes, like any dough that must be rolled out, the ingredients in a recipe are going to be different (more moisture, more and varied protein sources, sometimes more fat). Even more importantly, the process is going to be different.
To make Gluten Free Puff Pastry, both the ingredient proportions and the instructions in a conventional recipe just aren’t going to cut it. To make Gluten Free Rainbow Cookies, a conventional recipe would probably get you a cookie that looks just about right, in many ways.
But it would probably be a bit dry, maybe not hold together like it should. I don’t know about you, but for me? That’s not good enough. That’s how we end up hearing “it’s good—for gluten-free.”
My most basic advice? Go into gluten free baking with your eyes wide open. It takes experience to know how to modify a conventional recipe to make it a gluten free one.
Start with good gluten-free recipes, and move on from there. Don’t expect magic from an all purpose gluten free flour blend. Expect great food, made just a bit differently. But don’t worry. I’ll be there with you, every single step of the way.
Better Batter as Cup4Cup Hack
Better Batter as Cup4Cup Hack
Nothing compares to the light and flaky pastry that you can make with that Cup4Cup makes. Since it’s such a spendy blend, I found a way to hack Better Batter gluten-free flour into a pastry flour, as another Cup4Cup alternative:
- 113 grams Better Batter Gluten-Free Flour
- 12 grams gluten free nonfat dry milk
- 15 grams gluten free cornstarch
Since Cup4Cup is a dairy-containing flour, I also created a dairy-free way to hack Better Batter into pastry flour:
- 104 grams Better Batter Gluten Free Flour
- 18 grams gluten free blanched almond flour
- 18 grams gluten free cornstarch
Gluten Free Cake Flour
Gluten Free Cake Flour
Gluten Free Cake Flour can be made by combining an all purpose gluten free flour and cornstarch in specific proportions. Those proportions are:
- 82% all purpose gluten free flour (I like Better Batter best here)
- 18% cornstarch
If you cannot use cornstarch, try using arrowroot as a substitute.
Gluten Free Bread Flour
Gluten Free Bread Flour
Gluten Free Bread Flour can be made by combining all purpose gluten free flour (which contains superfine white rice flour, superfine brown rice flour, tapioca starch/flour, potato starch, potato flour, xanthan gum, and pure powdered pectin) with whey protein isolate and Expandex modified tapioca starch in specific proportions.
We do have a complete discussion of gluten free bread flour for you to read. Here are the highlights. The proportions are:
- 100 grams all purpose gluten free flour (I like Better Batter best here)
- 25 grams whey protein isolate
- 15 grams Expandex modified tapioca starch
Expandex modified tapioca starch can be replaced with Ultratex, another type of modified tapioca starch that is sold online at amazon.com in two strengths: Ultratex 3 and Ultratex 8.
Ultratex 3 is not as strong as Ultratex 8, but both are considerably stronger than Expandex modified tapioca starch. You can also try purchasing the same product, Ultratex 3, here.
Since Ultratex 3 is approximately 3 times as strong as Expandex, I’ve arrived at a formula for building Gluten Free Bread Flour to use in the recipes in Bakes Bread. It is as follows (please pay careful attention, as all 3 percentages have been changed):
1 cup (140 g) Gluten Free Bread Flour Using Ultratex3
105 grams Mock Better Batter all purpose blend (or Better Batter itself)
30 grams unflavored whey protein isolate
5 grams Ultratex 3
For comprehensive information about the elements of this bread flour, please see our Bread FAQs.
For more information on how to begin baking with your gluten free flour blends, see our Beginner’s Guide to Gluten Free Baking. You’ll be baking in no time!
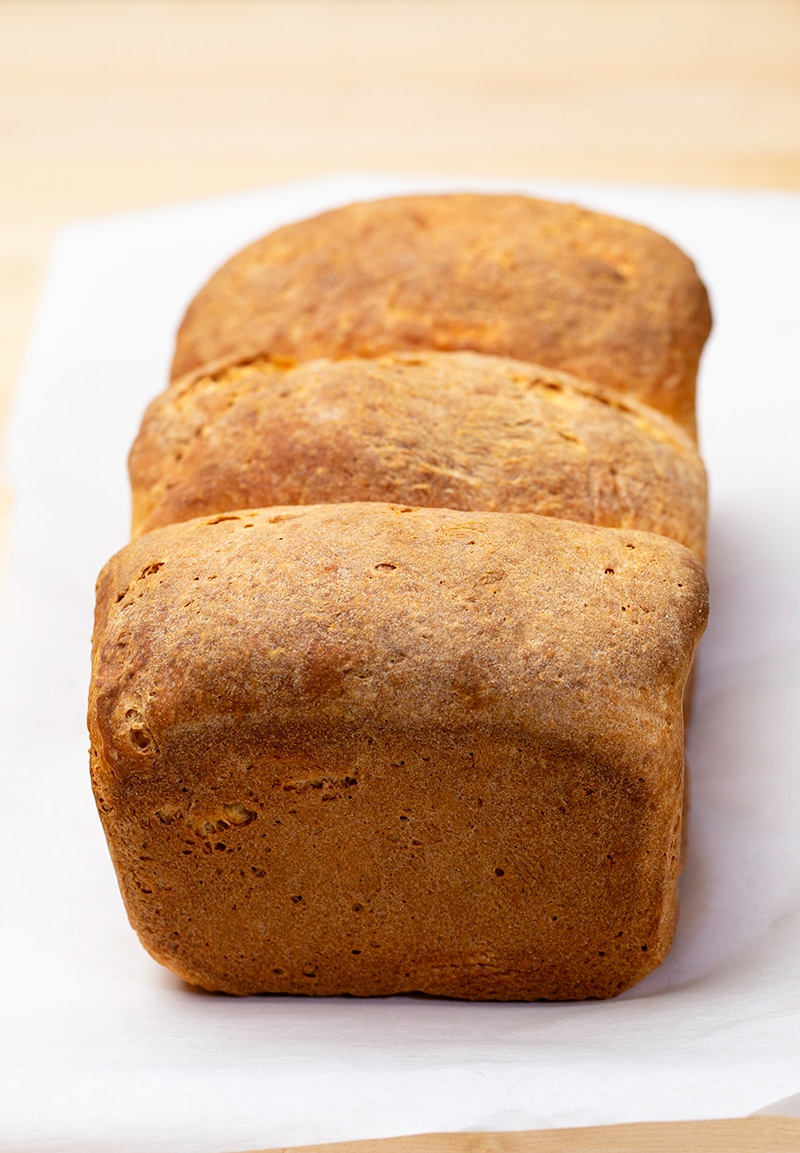
Gluten Free Japanese Milk Bread | The Softest GF Bread Ever
This super simple recipe for gluten free Japanese milk bread makes the softest recipe for batter-style gluten free bread you've ever seen, or tasted!
Imagine biting into a piece of bread that's incredibly soft, tender, and fluffy, with a thin, crisp, yet chewy crust that leaves you craving for more. Welcome to the world of gluten free Japanese milk bread, a delightful culinary experience that will redefine your expectations of gluten free bread.
This amazing recipe combines a simple cooked gluten free flour and water mixture and batter-style bread to create an unbelievably soft and pillowy texture that will leave you in awe.
Say goodbye to the dry, crumbly gluten free breads of the past and hello to the softest, most delicious, stay-fresh gluten free bread you've ever tasted!

Why you'll love this gluten free Japanese milk bread recipe
This loaf of bread is soft and tender without being super airy, like an English muffin bread. The crust is thin and crisp, but still tender and chewy.
It's basically the softest bread you'll ever eat—and it's simple to make, too. The simple method we use for this gf bread locks in moisture without making the dough difficult to handle or resulting in a soggy bread.
If you've never heard of a Japanese “water roux,” it's just a mixture of gluten free flour and water that's briefly cooked on the stovetop until it thickens. It's also known as tangzhong, which is designed to pre-gel the starches and help the bread stay fresher, longer.
A gluten free water roux is simple to make with just these 2 simple gluten free pantry ingredients, and you can even make it ahead of time. After making the roux, you'll let it cool and then add it to the rest of the gf bread ingredients and make the softest gf bread of your life!
How to work with batter-style bread recipes
I began making homemade gf bread way back in 2005, only my second year of baking gluten free at all. Those first breads were all in the “batter-style,” which simply means that the bread dough appears more like a cookie dough batter than what you would expect from yeast bread dough.
Since then, I've learned so much about gf yeast bread baking, much of which you can find in this post on how to make gluten free bread. Even though I've moved on to develop other methods, recipes like this gluten free Japanese milk bread and our old-style white gluten free bread still work beautifully—and have a special place in my kitchen (and my heart ❤️).
The raw bread dough itself in batter-style bread baking is wet and remains that way all the way through shaping since it doesn't “stretch” when raw. Gluten free flours are typically water-loving, and the original successes in gluten free yeast bread baking called for adding more liquid to the bread to enable the yeast to thrive.
If any yeast bread dough is too dry or becomes that way during its rising time, the yeast will not thrive and the bread dough will not rise. My bread recipes made with gluten free bread flour have something different (whey protein isolate and Expandex modified tapioca starch) added to them.
Without that, all purpose gluten free flours will absorb tons of the water in the recipe and dry out the dough without more moisture. And that leads to an underwhelming (or completely absent) rise.
These batter-style bread recipes aren't as easy to shape as conventional bread recipes, and the rise isn't as smooth. That's why you'll see pockmarks in the bread both before and after baking.
But they require fewer unfamiliar ingredients as my newer recipes, and they are much easier to adapt to accommodate additional allergies (please scroll down to the Ingredients and substitutions section for more detail on that).
Baking gluten free isn't quite as simple as switching conventional flour for gluten free.
How to handle the raw dough
Since this batter-style bread dough is quite wet and must stay that way, keep in mind that the dough will be tacky to the touch both before, during and after shaping. It also will not rise as smoothly as we might like, taking on something of a cratered appearance.
You can smooth out the dough after its rise, if you like, with wet fingers but don't expect a tight rise. Even though the dough is wet, though, the moisture is still in balance with the other ingredients in the recipe. If you add too much moisture, the bread won't ever bake all the way through to the center and you'll end up with gummy spots.
You can sprinkle this dough very lightly with more flour as you're shaping it, but use as little as you possibly can. Try flouring your fingers a bit, rather than the dough very often, and use a light touch so the dough stays wet.
Remember that you won't be able to get the dough to be completely smooth on the outside since you're not making conventional bread, so let go of that goal!
You're using gluten free flour, not wheat bread flour, and you're making gluten free milk bread, not yeasted wheat bread. Let go of your preconceptions of how to make yeast bread and enjoy this recipe just as it is!
What is a water roux and how does it help the bread?
Our batter-style gluten free white sandwich bread develops a thick bakery-style crust on the outside. But this loaf of bread stays soft all the way through the end of its baking.
The water roux that you make at the start of the recipe helps lock in moisture. It's just a simple cooked mixture of gluten free flour and water.
The water roux can be made days ahead of time (and even doubled, then divided for each loaf), and stored in a sealed container in the refrigerator. That way, you can dump all the ingredients into your mixer whenever you're ready to make some bread without having to engage in that extra step of making the roux.
GF Japanese Milk Bread Ingredients and Substitution Suggestions
Dairy free Japanese milk bread
This recipe contains dairy in the form of butter and milk, both of which are generally not that difficult to replace. Instead of cow's milk, you can easily use unsweetened almond milk or coconut milk in the carton. Just be sure not to use anything nonfat (dairy or otherwise) since it has less richness and more additives.
Instead of the butter, try using Earth Balance buttery sticks in both the bread dough and for brushing the top of the bread. You might actually even be able to use a mild-tasting extra virgin olive oil in place of butter as well, but I haven't tested any fats in this recipe that are liquid at room temperature.
Can you make it without eggs?
Since there is only one egg in this recipe, you can try using a “chia egg” (1 tablespoon ground white chia seeds + 1 tablespoon lukewarm water, mixed and allowed to gel) in its place. Since this is a batter-style bread, you need a fair amount of help getting it to rise. Without the egg, even with an egg replacer, the bread will likely be denser.
Can you make this gluten free bread recipe without yeast?
No, you cannot make this yeasted bread without yeast as there is no proper substitute for bread-making yeast. Try my yeast free gluten free sandwich bread instead!
Replacing instant yeast with active dry yeast
If you only have active dry yeast, you can use that to replace instant yeast. Just use 25% more yeast (here, that would be a total of 10 grams for one loaf). You'll also have to hydrate the yeast in a few tablespoons of the recipe's milk volume before adding it to the dough at the same time as the rest of the milk.

Gluten Free Japanese Milk Bread
For the softest gluten free Japanese milk bread, begin with a simple cooked water roux of water and gf flour. It's easier than you think, and you'll be amazed at how tender, chewy, and delicious this gf bread is!
Yield: 12 slices bread
Ingredients
For the water Roux
- 3 tablespoons (26 g) all purpose gluten free flour blend (I used Better Batter)
- ½ cup (4 fluid ounces) water
For the gf bread dough
- 3 cups (420 g) all purpose gluten free flour blend (I used Better Batter), plus more for sprinkling
- 1 ½ teaspoons xanthan gum omit if your blend already contains it
- ¼ teaspoon cream of tartar
- ¼ cup (50 g) granulated sugar
- 2 ½ teaspoons (8 g) instant yeast (also called rapid-rise or breadmaker yeast)
- ½ teaspoon kosher salt
- 1 teaspoon apple cider vinegar
- 1 (50 g (weighed out of shell)) egg at room temperature
- 1 ¼ cups (10 fluid ounces) warm milk (about 100°F)
- 4 tablespoons (56 g) unsalted butter melted and cooled
- Water roux at room temperature
- Melted butter for brushing (optional)
Instructions
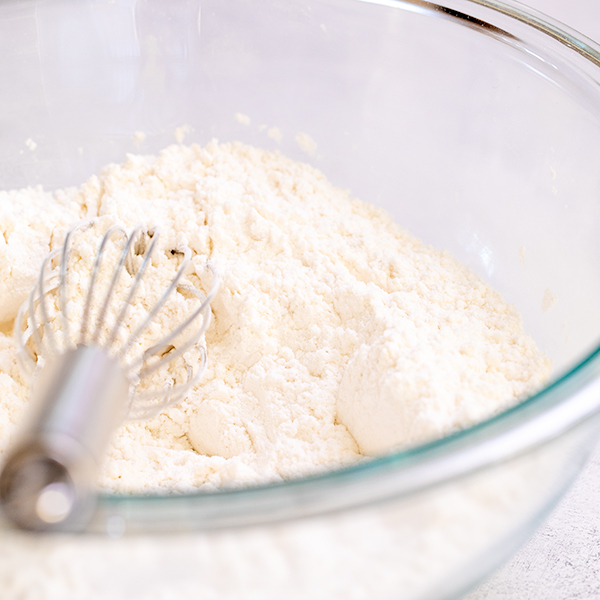
First, make the water roux.
- In a small saucepan, place the roux ingredients and whisk to combine well. Cook the roux over medium-high heat, whisking constantly, until thickened enough that the whisk leaves a visible trail.
- Remove it from the heat immediately and allow to cool to at least warm room temperature. The roux can be made ahead of time and stored in a sealed container in the refrigerator. Just allow it to come to room temperature before baking with it.
Make the bread dough.
- Grease and line a standard 9-inch x 5-inch loaf pan and set it aside.
- In the bowl of a stand mixer fitted with the paddle attachment, place 3 cups of the flour, xanthan gum, cream of tartar, sugar and yeast, and whisk with a separate handheld whisk to combine well. Add the kosher salt, and whisk once again to combine.
- Add the vinegar, egg, milk, butter, and water roux, and mix well on low speed. Once the dry ingredients have been incorporated into the wet ingredients, turn the mixer up to high speed and allow to mix for about 3 minutes. The dough should be shaggy and tacky to the touch.
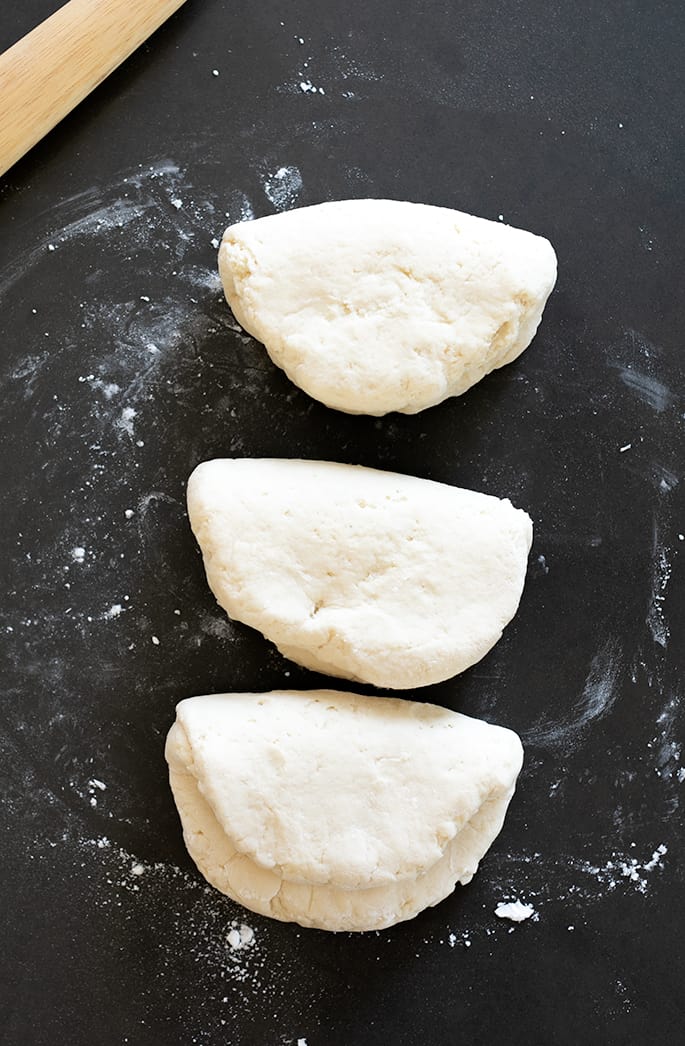
- Turn the dough out onto a very lightly floured surface, and divide into 3 equal portions (each about 350 grams). Work with one piece of dough at a time.
- Pat out the first piece of dough into a flat disk about 3/4-inch thick. Fold the disk loosely in half from one short end to the other. Repeat with the remaining pieces of dough.
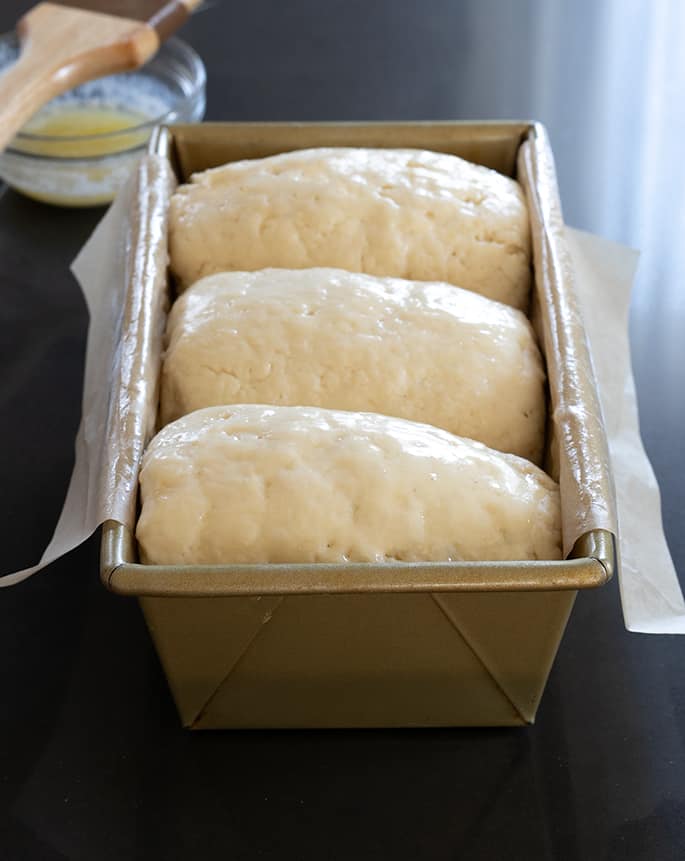
- Stack the folded pieces of dough one behind the other, the rounded (folded) part facing up. The shaped pieces of dough should fit snugly in the pan from end to end, and will rise up, not out.
- Spray the dough lightly with warm water, and cover the pan loosely with plastic wrap. Place in a warm, draft-free location to rise until it has reached about 150% of its original volume.
- While the dough is rising, preheat your oven to 350°F.
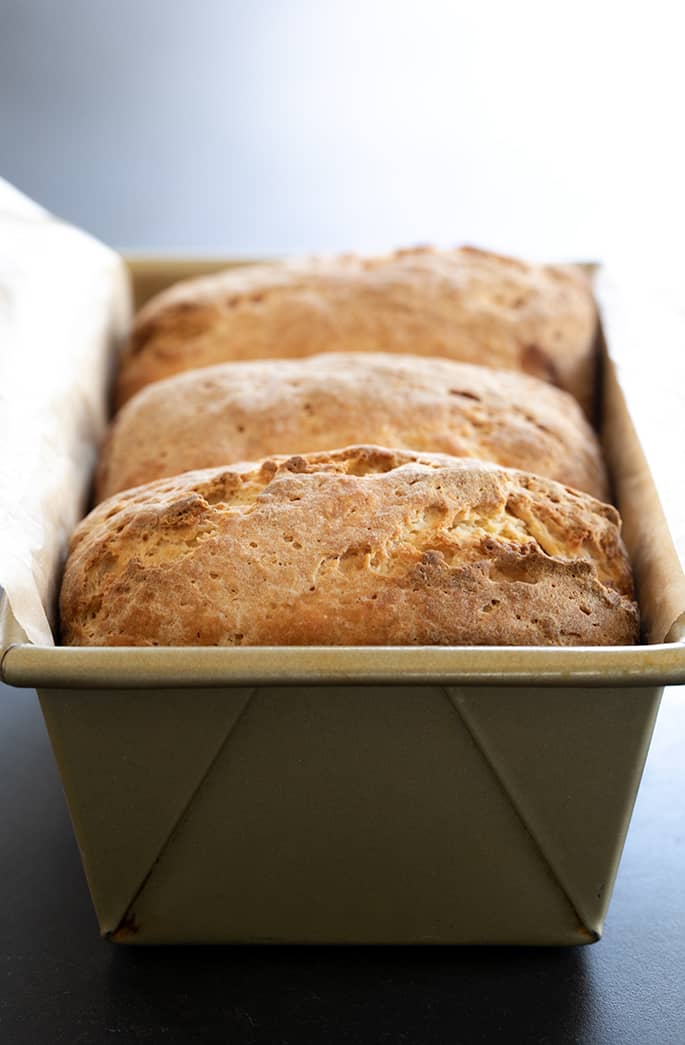
- Once the dough has finished rising, remove the plastic wrap, brush lightly with the optional melted butter, and place in the center of the preheated oven. Bake for 45 minutes.
- Remove the bread from the loaf pan and transfer to a rimmed baking sheet. Return the bread on the baking sheet to the oven.
- Continue to bake until the loaf sounds hollow when thumped on the side and reads about 190°F when an instant-read thermometer is inserted in the center of the loaf and is lightly golden brown all over (about another 10 minutes). Remove the loaf from the oven and transfer it to a wire rack to cool completely before slicing and serving.
Notes
Adapted heavily from The 350 Degree Oven: Adventures in Mika’s Kitchen.
Originally posted on the blog in 2012. In 2019, recipe adapted slightly, photos, video, all new. In 2023, some photos new, more text resources added.


How to make gluten free bread | 10 rules
Once you learn how to make gluten free bread with yeast, you’ll be ready to select your first bread recipe and get started with confidence. Follow me as we tackle the science of gluten free baking, so you can produce the best gf bread.
Rule # 1: Don't stray from tried and true gluten free bread recipes
Try to avoid making any substitutions the first time you make a gluten free bread recipe, especially one which is unfamiliar to you. If you have chosen a recipe that you can only make with substitutions, select another recipe.
Whenever a reader tells me that they are having trouble with a recipe, my first question is always whether they have made any substitutions. Some may work, but many will not. And early failure will make it very hard to stay motivated.
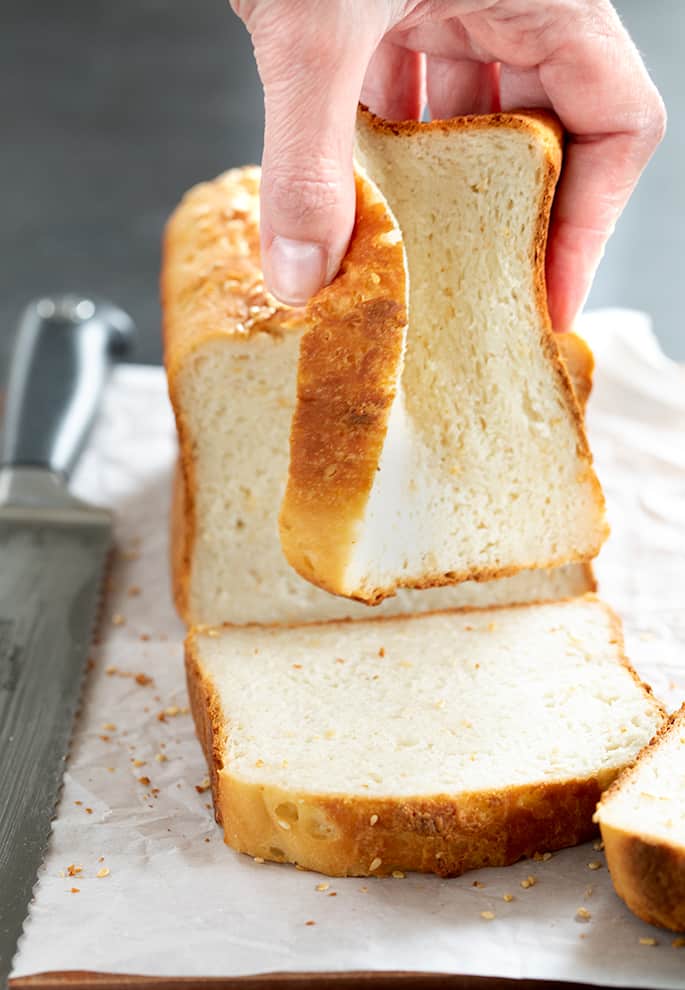
The easiest gluten free bread recipe to begin with is the recipe for the white gluten free bread recipe from my first cookbook. It's a super simple recipe, and there's a detailed video that allows you to watch over my shoulder as I make the bread. It's pictured right below this paragraph.
Rule # 2: Measure your dry ingredients by weight, not volume
Bake by weight (grams and pounds), not volume (cups). Proper proportions make the difference between success and failure. A serviceable scale is totally cheap, and easy to use. I recommend this one (affiliate link).
To use a digital scale, simply finish measuring one ingredient, and hit “tare.” It zeroes out the scale. Ready for the next ingredient, in the same bowl. Precision, easily.
In all of my recipes, 1 cup of all purpose gluten free flour weighs 140 grams. Don’t bother trying to see if the measuring cups you have in your kitchen match their volume to my weight measurements.
A common misunderstanding is that you can “test” my weight measurements by comparing them to the corresponding volume. I provide volume measurements as a courtesy, since we Americans tend to resist baking by weight, but I hope you will ignore them.
Volume measurements are prone to human error and are inherently imprecise. Ignore the volumes, and focus only on the weight of each ingredient.
Rule # 3: Make sure all ingredients are thoroughly blended
Gluten-free bread dough needs to be mixed vigorously until smooth with a stand mixer. If you don't have a stand mixer, you can try using a food processor fitted with the steel blade, and pulsing just until the dough is smooth.
Avoid using a hand mixer with balloon whisk attachments, since the bread dough will get caught in the whisks and not worked into a smooth dough properly. The most important thing is that the ingredients get incorporated fully and that the dough is smooth.
And don't worry about over-mixing. There's no gluten to ‘overwork.' If your end result has a really tight crumb and seems crumbly, it's not that you overworked the dough. Your hydration level was likely too low.
If you don't have any appropriate mixing appliance, try my recipe for gluten free artisan bread. It's a rustic bread that is made with dough that's especially wet, which allows you to mix the dough by hand in one bowl. It's a great everyday gluten free bread recipe.
The yeast bread recipes that I've developed to be made with my gluten free bread flour, on the other hand, require an electric mixer with the dough hook attachment, and for that you can use a stand mixer or a 5-speed handheld mixer, with dough hook attachments.
Rule # 4: Gluten substitutes are vital for making gluten free bread that holds together
Don’t try to bake bread without any gluten substitutes, like xanthan gum. When yeast gives off carbon dioxide during the baking process, gluten acts like a cloak and suspends the bubbles.
When gluten traps the rise, it allows the bread to bake around the air pockets. Without gluten and without a gluten substitute, there's nothing to “hold” the rise. Xanthan gum also keeps baked goods fresher longer.
Some people find that they react poorly to “the gums,” which generally refers to xanthan gum and guar gum, and prefer not to bake with them. Xanthan gum is better suited to heated applications like bread baking, and guar gum to cold applications like making ice cream. However, my gluten free bread recipes are developed to require baking with xanthan gum.
What about psyllium husk for gluten free bread?
Psyllium husk is a form of fiber (think: Metamucil) that has become relatively popular in gluten free bread baking as a replacement for xanthan gum. I’ve tried it, and I simply haven’t found a way to use it that produces a bread product that I like to eat.
Psyllium husk does add significant flexibility to raw gluten free bread dough, makes gluten free loaf bread that looks great, and is easy to handle. But I find it adds both an unpleasant taste, aftertaste, and mouth feel. Since bread’s highest and best use is eating, those are deal-breakers for me.
When America’s Test Kitchen came out with their first gluten free bread recipes, they asked me to endorse them. I worked my way through some of their basics, which included a heavy reliance on psyllium husk.
It does behave similarly to xanthan gum, and is even more effective for breads because it’s even more hydrophilic (water-loving). And yes, I used the brand of psyllium husk that they recommend.
I promise you'll be the first to know if I change my opinion of baking bread with ground psyllium husk. I wonder if I might prefer it used in smaller amounts, and with whey protein isolate, which I use in my gluten free bread flour.
Rule # 5: Don't bake gluten free bread without an oven thermometer
Use a simple oven thermometer to gauge your oven's baking temperature properly. Most ovens are calibrated improperly, and off by around 50°F. Yup. That much. My oven is typically off by about 75°F!
I don't bother having the oven calibrated, since it will just drift out of calibration again. Instead, I use a simple analog oven thermometer that's easy, cheap, essential. I just replace it at least twice a year, and never worry whether my oven temperature is accurate.
When you bake bread in a too-hot oven, the outside will bake before the inside has a chance to develop enough structure to support it. The bread will then cave in on itself as it cools.
Rule # 6: Use the right gluten free flour blend to bake gluten free bread
Personally, I most often bake my gluten free bread with Better Batter's classic gluten free flour blend. It's such a versatile blend, and it's always worked beautifully for any recipe that's called for an all purpose gf flour.
Better Batter is made with a blend of brown rice flour, white rice flour, tapioca starch, potato flour, potato starch, xanthan gum, and powdered pectin.
Curious about whether I know the exact ratio of these ingredients? It turns out I actually do, so if you can't find Better Batter locally or simply prefer to make your own, all you need to do is follow my recipe for Mock Better Batter.
My DIY gluten free flour blend works exactly like the original version, so you can use it anywhere that calls for Better Batter — including most of my gluten free bread recipes.
Some of my bread recipes call for a very specialized gluten free bread flour blend that adds whey protein isolate and Expandex modified tapioca starch to Better Batter, but those recipes will call out the gluten free bread flour blend specifically.
Those breads that call for our gluten free bread flour blend will require fewer enrichments like eggs and butter, and the dough will be handled more like conventional yeast bread. But the recipe will be very specific about the requirement to use the bread flour, and that isn't most of the bread recipes here on the blog.
Your flour choice matters. A lot.
For starters, you have to use the right gluten free flour mix, as discussed above. If you use a blend like, for example, King Arthur gluten free flour, your yeast bread will not turn out. Even that company suggests avoiding their flour blend for yeast breads!
There are a lot of gluten free flour options out there, including but not limited to, brown rice flour, potato flour, millet flour, coconut flour, oat flour, buckwheat flour, sorghum flour, and almond meal.
But just because a certain flour is gluten free does not mean you can throw it into a gluten free bread recipe and expect good results. Or any meaningful results, for that matter.
Use the gluten free flour mix that each particular recipe calls for. In most cases, it will be Better Batter, but it could be different depending on the type of bread.
Rule # 7: Yeast bread rises slower in cool, dry environments
Create the right environment for bread proofing. If you can swing it, consider a Brod & Taylor bread proofer. It's amazing the even rise you can get in this little box of heaven. I got mine for free (I was a ‘tester'), but I would have bought it.
If you can't swing it, use my tried and true microwave-as-bread-proofer method. I used it for years and years, with good results. It creates a contained warm, moist environment for your yeast bread to rise.
Rule # 8: Make sure your bread dough doesn't dry out
Yeast won't rise without enough moisture. If the recipe you're following calls for a first rise in the refrigerator, be sure that it is in a container like a Cambro bucket that seals properly, or moisture will evaporate, drying out the dough and preventing rise.
Rule # 9: Set your yeast up for success
Yeast can generally survive the cold of my refrigerator at 40°F/4°C, and water as hot as 120°F/49°C will likely kill yeast. Anything in between and your yeast should survive.
But surviving is different from thriving. Yeast in bread dough needs a few conditions to thrive:
- Enough moisture (without enough moisture, or if your raw dough loses too much moisture, the yeast won't be active)
- Enough time (yeast will rise more slowly at lower temperatures, but it will rise given enough time)
- Freshness (check the date on your yeast and don't use anything past its freshness date)
There are a few conditions that will inhibit the growth of your yeast:
- Too much salt (don't add yeast and salt in at the same time, and don't overmeasure your salt, which inhibits yeast growth)
- Too much sugar (which will absorb liquid in the dough; a proper sweet yeast bread recipe will already have accounted for that by adding more yeast)
- Too much heat (I do not recommend setting your bread dough to rise in an oven that's on, even if you're certain it's only set to 100°F; most ovens won't retain a temperature setting that low and your yeast will probably die)
Rule # 10: Don't let a boxed gluten free bread mix discourage you
You'll notice a lot of gluten free bread mixes at the grocery store. These pre-packaged mixes promise delicious gf baked goods with minimal effort, but they usually fall flat.
If you've tried one of these mixes with disastrous results and think that all gluten free baking is destined for the same bland, dry, and crumbling outcome, please don't!
I promise that if you follow one (or several, or all) of my gluten free bread recipes, you'll enjoy bread that is better than anything you can find in a box.
Don't always have the time to bake fresh? I can totally relate. Check out my review of the best gluten free bread brands that you'll find at local markets and online for the tastiest packaged options.

My best gluten free bread recipes
I've got lots of recipes for gluten free bread, but I think these are some of my best. Take a look to find a new favorite or five, and then keep reading for even more gluten free baking tips.
Tender, Rich Gluten Free Brioche Bread | Bakery-Style GF Bread
This sweet, rich bread is so delicious, you'll be reaching for it all day long. I love having it at breakfast… and lunch… and dinner… and dessert!
Click for the recipe
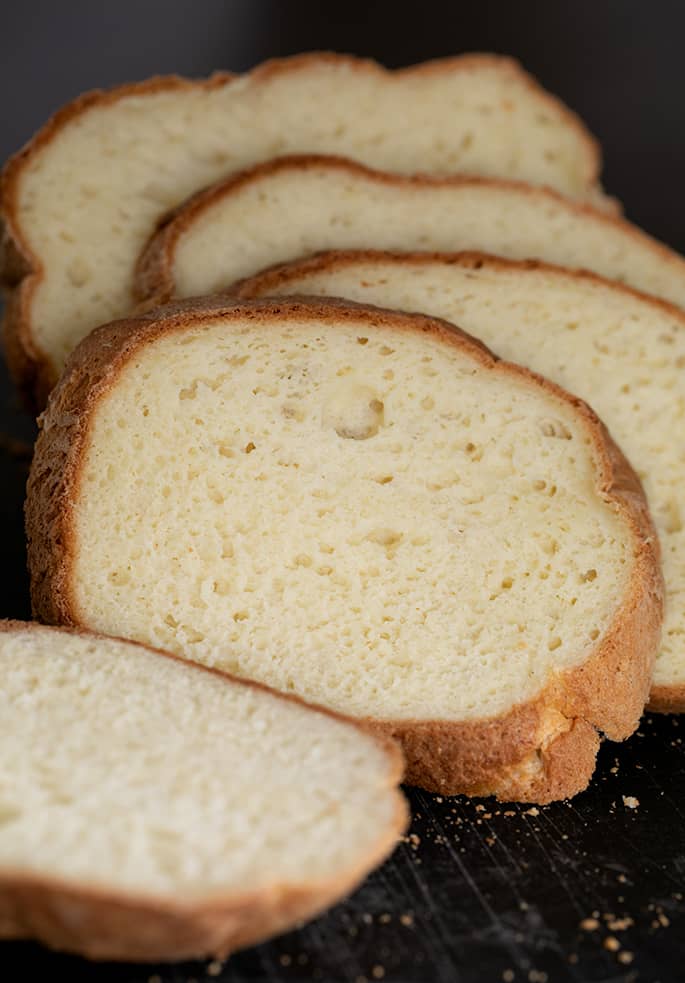
Easy Gluten Free White Sandwich Bread Recipe | Tender and Springy
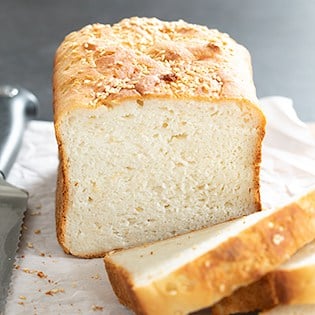
This gluten free white sandwich bread recipe is the original, game-changing, batter-style gf bread recipe that delivers big on taste and texture, even for total beginners. Follow the tips in this post, and you will be successful!
Click for the recipe
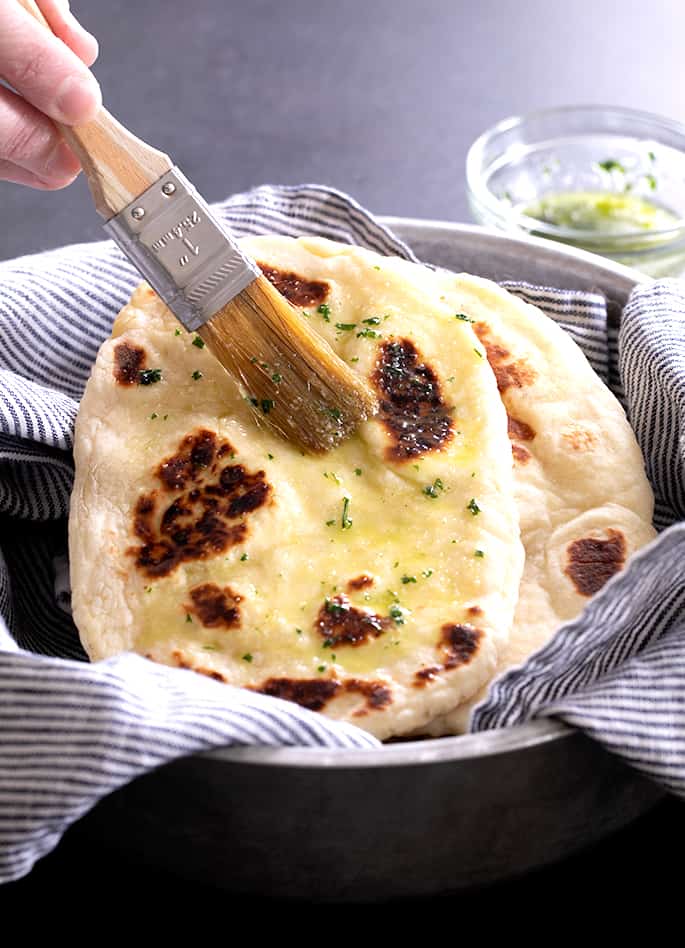
Easy Gluten Free Naan Bread | Soft, Tender & Quick
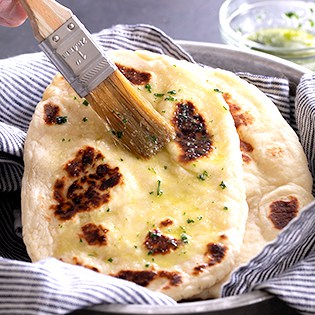
Made with traditional ingredients, this gluten free naan recipe is quick and easy to put together. I love having it with huge helping of curry.
Click for the recipe
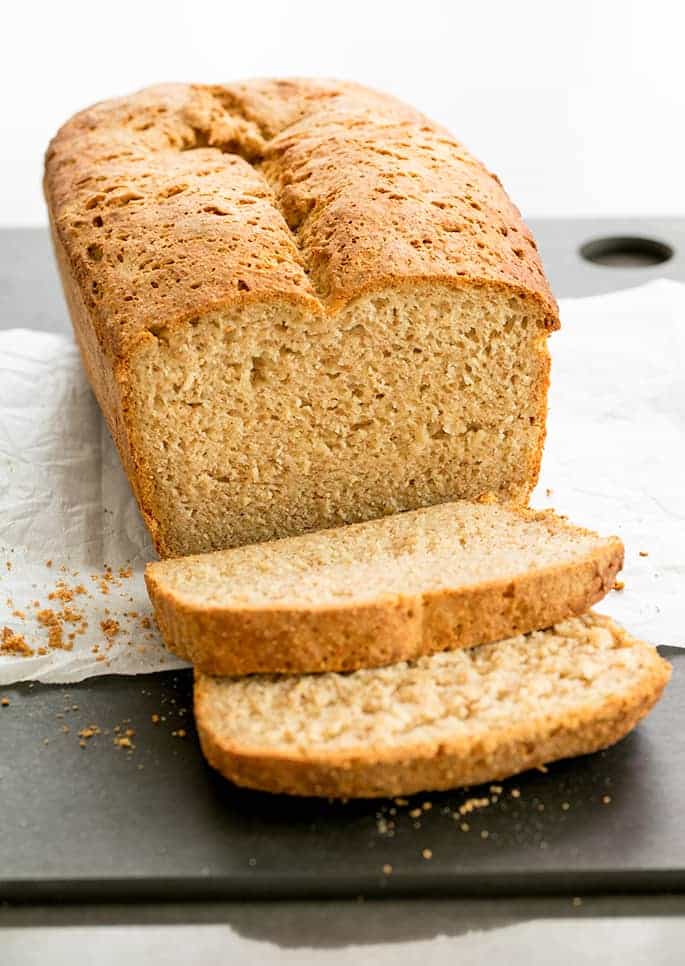
Gluten Free Brown Bread —Wheat Free with a Hearty, Wheaty Taste
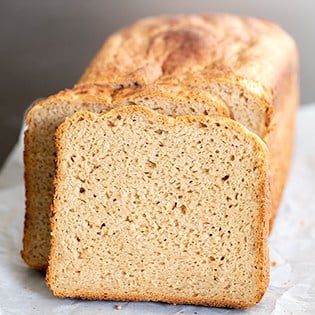
My brown bread gives you the hearty taste of wheat bread, without any of the wheat. It has tons of flavor and will elevate any sandwich experience.
Click for the recipe
Basic Gluten Free Pizza Dough | bring back pizza night
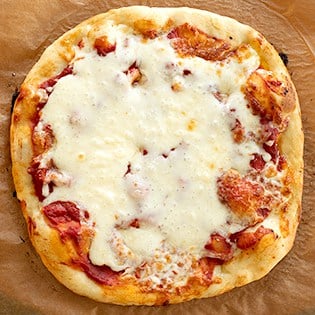
This gluten free dough lets you bring pizza night right into your kitchen. Homemade pizza just tastes better, especially when it's got a chewy, crispy-edged crust.
Click for the recipe
Gluten Free English Muffin Bread – Easy Gluten Free Sandwich Bread
A delicious gluten free sandwich bread, my English muffin bread is a white bread that's ready from start to finish is just a couple of hours.
Click for the recipe
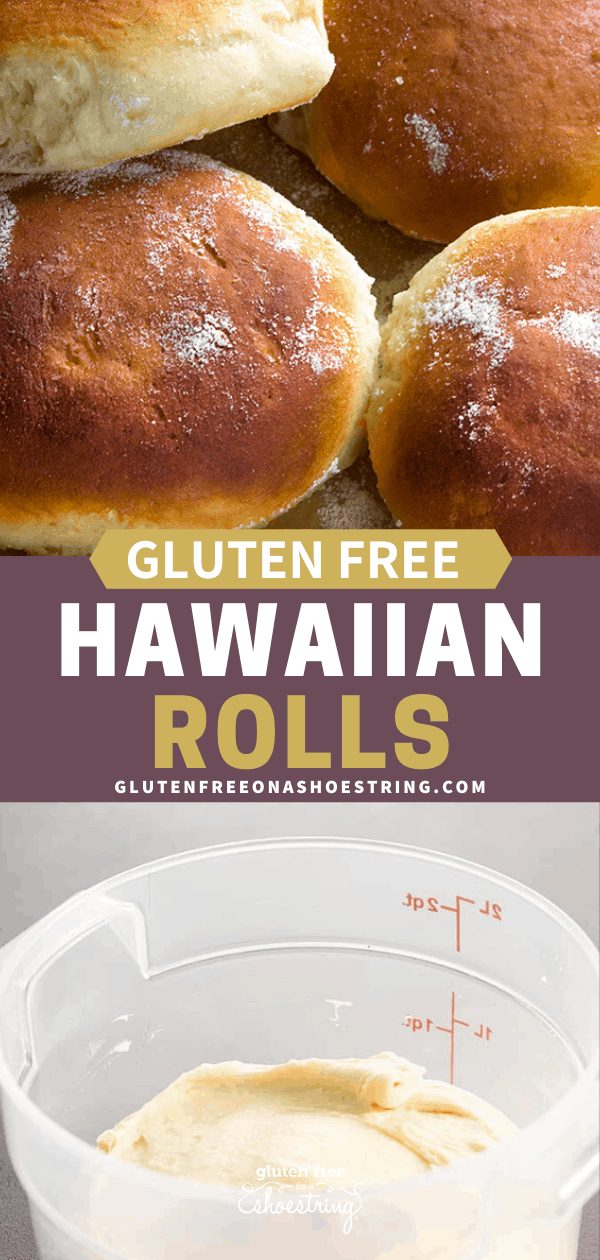
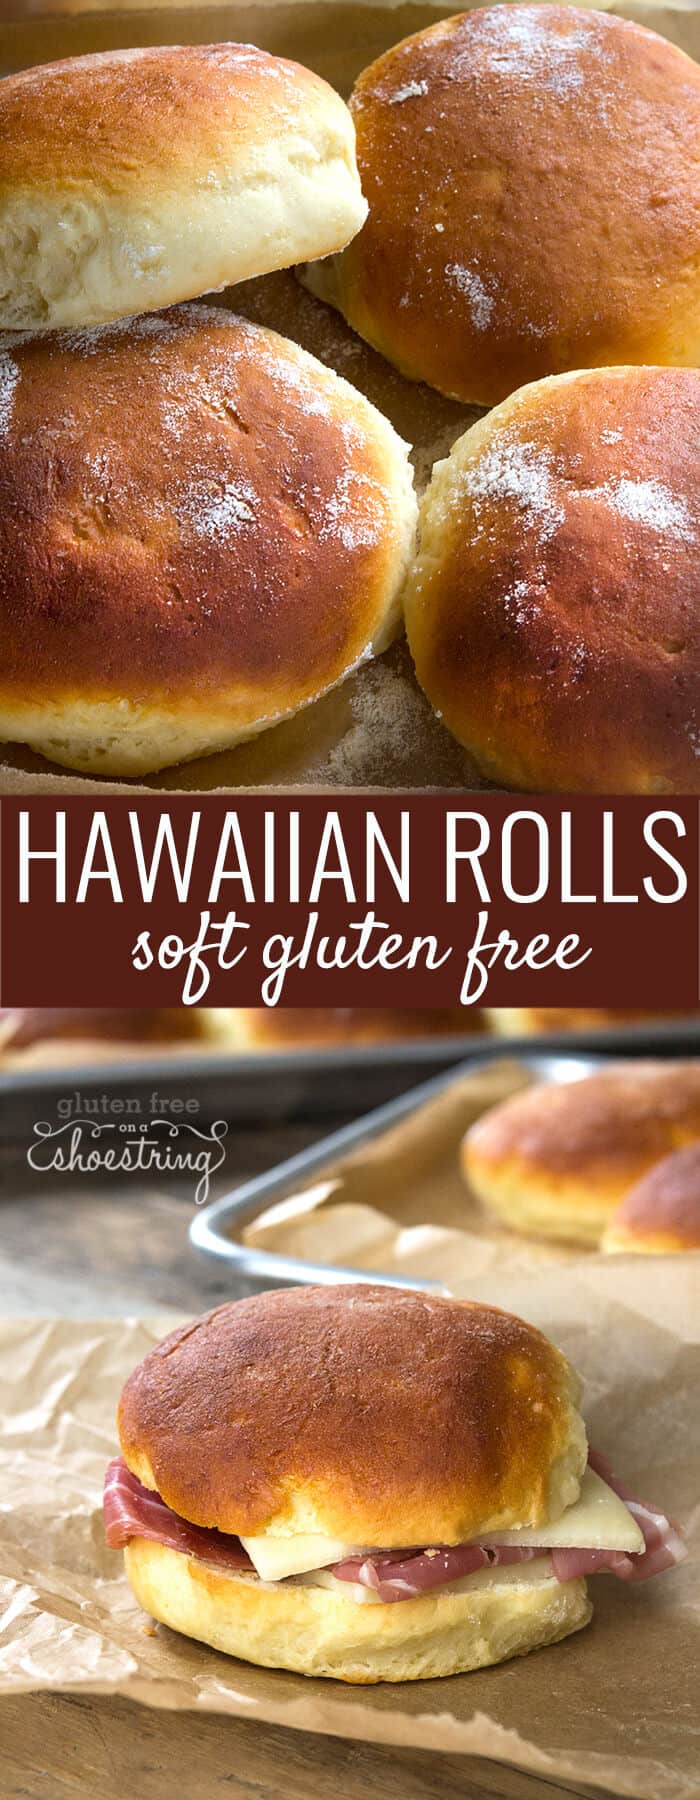
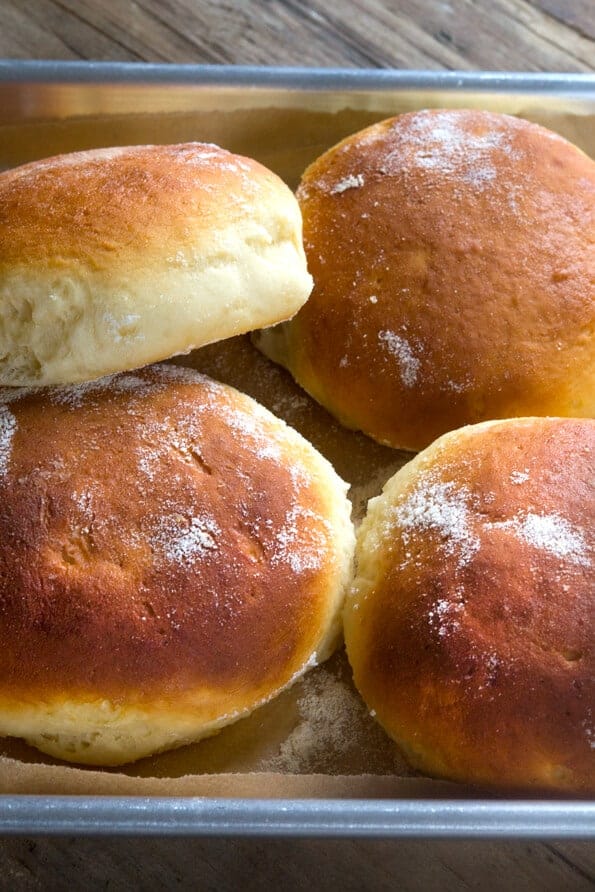
Gluten Free Dinner Rolls | Pillow Soft Recipe | GF Shoestring
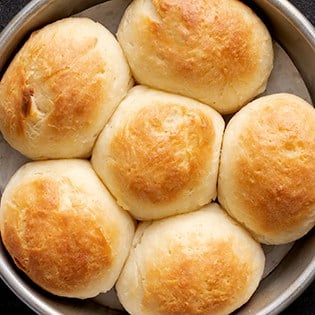
These gf dinner rolls are so squishy and buttery that you'll be pulling this recipe out for all types of occasions, from pasta night to Christmas dinner.
Click for the recipe
Gluten Free Buns for Hamburgers and Sandwiches
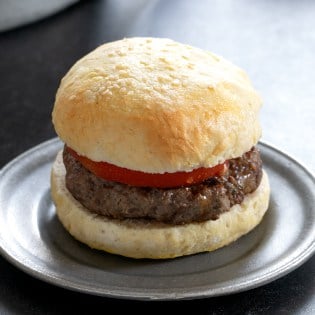
Say goodbye to "lettuce" hamburger buns — I've brought bread back to the table with this quick recipe. These buns come out like those fancy ones at the bakery.
Click for the recipe
Gluten Free Sourdough Bread | Made with Wild Yeast Starter

If you're craving a more flavorful sandwich bread, you won't go wrong with this sourdough recipe. Rather than conventional yeast, it uses a wild yeast sourdough starter.
Click for the recipe
Crusty Gluten Free French Bread | Baguettes
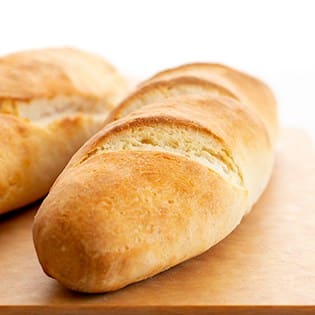
These classic loaves of gluten free French bread are just as crusty outside, soft and tender inside, as you remember. They're even quick and easy enough to make on a weeknight!
Click for the recipe
The Best Homemade Gluten Free Garlic Bread | Fresh Bread, Tons of Flavor
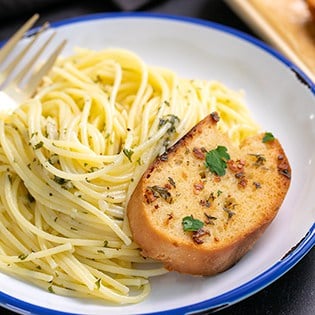
With a soft center, crunchy crust, and tons of garlicky goodness, this recipe for gf garlic bread is a must for those nights when you're making spaghetti, lasagna, and other pasta dishes.
Click for the recipe
Super Easy Gluten Free Monkey Bread | A Fun Snack and Activity
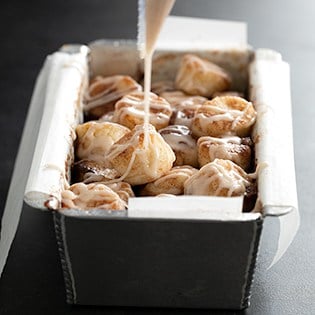
This incredibly delicious monkey bread recipe is perfect for making with little helpers. The result is an ooey, gooey treat that the whole family will love.
Click for the recipe
Authentic Gluten Free Calzones
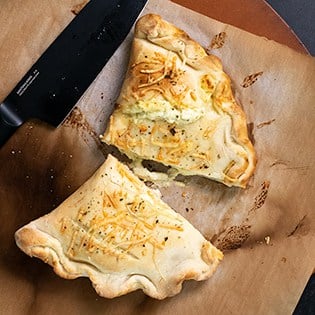
Make and shape all the shaped breads from your favorite pizza place with this recipe for gluten free calzone dough. Fill it with your favorites and shape it as a calzone, or roll it up into stromboli!
Click for the recipe
Paleo Pizza. Gluten free, grain free, dairy free, full of flavor!
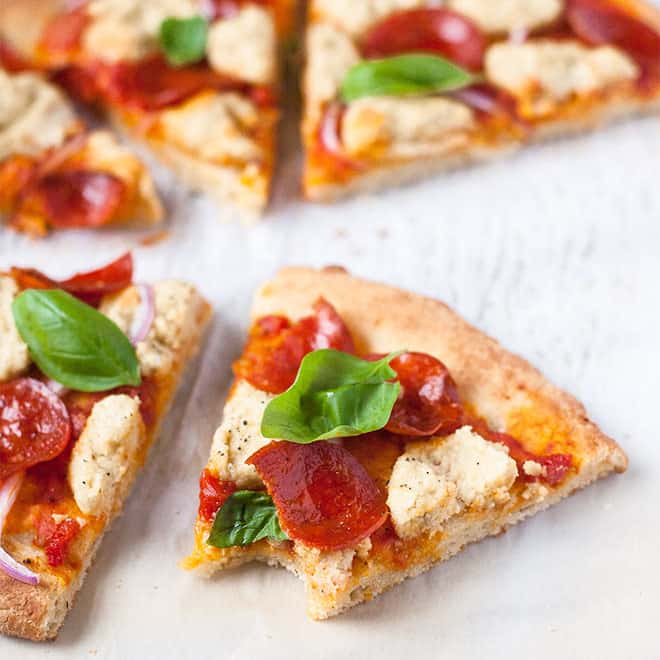
Just because you can't have grains or dairy doesn't mean you can't have yeasted pizza! This paleo pizza crust tastes just like the "real" thing, and might just become your new favorite pizza of all.
Click for the recipe
Easy Gluten Free Plain Bagels | Authentic Taste and Texture
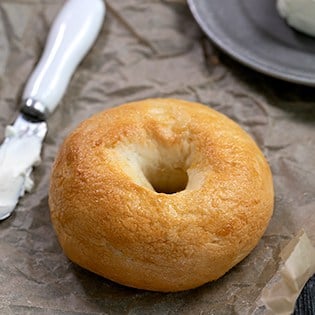
These plain gluten free bagels have the authentic chew inside, and thin, crisp shell of a real, NY-style boiled bagel. Enjoy them with a schmear of cream cheese, or make the best sandwich of your life!
Click for the recipe
Gluten Free Steamed Chinese Meat Buns

These gluten free steamed Chinese meat buns have a simple savory meat mixture wrapped in pillow-soft steamed dough. Cook in a steamer basket or in soup!
Click for the recipe
More tips for baking with gluten free flour and making gluten free bread
Common gluten free bread ingredients
Each of my gf bread recipes contains different ingredients that I've carefully tested time after time. But most of the recipes do share a few common ingredients. These include:
- All purpose gluten free flour blend – In most cases, I use Better Batter's classic gluten free flour blend. It offers just the right ratio of ingredients and really helps replicate the taste and texture of “real bread”. I don't care for their “rice-free blend,” which uses psyllium husk, at all, I'm afraid.
- Tapioca starch/flour – Even when you use Better Batter, which contains tapioca starch/flour, many of my bread recipes call for more tapioca starch as an added ingredient. Don't skip it! It helps make the dough much easier to handle, and gives it significantly more chew when baked.
- Xanthan gum – You only need to include xanthan gum if your gluten free flour blend doesn't already contain it. Xanthan gum is essential for maintaining your bread's rise and structure.
- Yeast – As the yeast feeds off the sugars in your bread dough, it releases carbon monoxide, which creates bubbles as it escapes. This causes the dough to swell and rise, resulting in airy bread rather than a dense clump. My recipes typically call for “instant yeast,” also called rapid-rise or breadmaker yeast, which isn't soaked first. If you must use active dry yeast, you'll need 25% more yeast, by weight, and to soak it in some of the liquid from the recipe first.
- Sugar – Sugar feeds yeast, but it also tenderizes your bread, helps with moisture retention, and adds flavor.
- Salt – Salt is an obvious flavor enhancer (your gf bread would taste rather bland without it), but it also helps regulate your bread's rise, keeping it from rising too fast, only to sink later.
- Milk – Adding milk to a gf bread recipe that calls for it helps produce a softer crumb.
- Butter – Like milk, butter contributes to a softer bread. The fats in butter keep the bread chewy and tender, and give it flavor in enriched breads.
- Eggs – Eggs acts as a binder and leavening agent, helping your bread come together and stay together.
Gluten free bread ingredient substitutions
I know that many of my readers try to avoid other potential allergens, so whenever possible, I offer substitution ideas in my recipes. As I explain in my recipes, I haven't always tried these substitutions so you may have to experiment a bit, but I'll let you know why I think they work.
Every bread recipe is different, but here are some common substitutions you can make to avoid typical allergens:
Gluten free, dairy free bread recipes
You can typically replace milk with dairy free alternatives like soy milk, almond milk, coconut milk, and oat milk. Just make sure to use a non-sweetened variety, so it doesn't affect the bread's flavor.
In most cases, you can substitute traditional butter with a vegan butter. I particularly like the offerings from Melt and Miyoko’s Kitchen, but Earth Balance Buttery Sticks may work in some instances too.
Gluten free, egg free bread recipes
For those wheat free bread recipes that call for 1 or 2 eggs, you may be able to use chia eggs instead. The recipe for each chia egg is 1 tablespoon ground chia seeds + 1 tablespoon lukewarm water, mixed and allowed to gel.
I've not used chia eggs in my gluten free baking, but I have lots of readers who've had great success. In place of egg whites, you may sometimes be able to use aquafaba (the brine from a can of chickpeas).
Gluten free, vegan bread recipes
In most cases, you can follow my substitutions for dairy and eggs to make vegan bread. Plus, select your granulated sugar carefully to ensure it's not made with bone char.
However, some recipes may call for other non-vegan ingredients that we haven't discussed here, so be sure to carefully review the recipe that you'd like to try for the most relevant info.
Gluten free bread internal temperature
In each of my recipes, I advise you on how long it typically takes to bake a loaf of gluten free bread. Unfortunately, these figures might not always work for you.
This is because ovens can vary widely in operating temperature — the thermostat may say it's 350 degrees in your oven, but it could easily be off by 50°F to 75°F.
As most ovens fall out of calibration, here's how to tell if bread is done:
- Use a stand-alone oven thermometer to gauge oven temperature, and replace it frequently (they're super cheap)
- Insert an instant-read thermometer in the middle of your loaf, reaching down to the bottom of the loaf, but don't touch the pan.
- If you're not certain whether your loaf bread is baked all the way to the center, you can usually remove it from the pan, place it on a small baking sheet, reduce the oven temperature, and continue to bake it until it sounds hollow when thumped on the bottom or side.
Using a bread machine for gluten free bread
I don't really recommend using a bread machine to make gluten free bread. I'm not saying that it's not possible, but I don't really see the point: Mixing and baking gf bread is simple enough as it is, and bread machines differ so significantly from brand to brand that you'd need a different recipe for each.
But if you do want to use a bread maker to help with mixing and/or baking, here's what I suggest.
For mixing, look for the bread machine setting that offers just one mixing cycle as that's all that your bread needs. If you can't find that setting, see if you can manually set the bread machine to mix for about 20 minutes.
Once your bread batter or dough is mixed, you can remove it from the bread machine and continue baking as per recipe instructions.
If you'd like to bake your bread in the bread maker, look for the gluten free setting. Many modern machines have it, which offers appropriate rise and baking times.
If your bread machine doesn't have a gluten free setting, look for a rapid or quick rise setting, or set it manually to do a one-hour rise and one-hour bake.
Cooling and slicing your gluten free bread
As with most bread, gluten free bread is a bit delicate straight out of the oven. For this reason, as tempting as it may be, you should not immediately cut into it. (And yes, it's very tempting, I know!)
Instead, remove your bread from the oven and allow it to cool for at least 10 minutes. Then, take your gf bread from the loaf pan and allow it to cool completely on a wire rack.
Removing your gluten free bread from the loaf pan will prevent it from getting soggy by allowing steam to escape. Letting it cool completely will ensure it retains it shape for neat and easy slicing.
How to store gluten free bread
Because my best gluten free bread recipes don't contain preservatives, your bread won't last as long as store-bought bread. That's okay, though, because bread tends to disappear into bellies faster than I can keep up with.
To store your gf bread for everyday use, keep it at room temperature on your countertop, covered tightly, and it should last the day. For longer storage, I recommend against the refrigerator, as it is very drying.
Instead, freeze your gluten free bread for use in the future. Make sure it has completely cooled, then slice it, wrap it in freezer safe wrap like Glad Press ‘n' Seal, and then put it inside a freezer safe, zip top bag.
Your gluten free loaf bread will last up to three months with proper storage. Defrosting your bread is as easy as pulling out a bagel or a slice of bread, letting it defrost a bit at room temperature or in the microwave, sprinkling it with a bit of water, and refreshing it in a toaster oven.
Gluten free baking troubleshooting and FAQs
What is in gluten free bread?
Every gluten free bread recipe is different, but you'll find many of the same ingredients in a gluten free version as you will in a traditional one.
For example, my gluten free potato bread recipe uses all purpose gf flour, tapioca starch/flour, potatoes, milk, sugar, eggs, and yeast like most bread recipes.
Is yeast gluten free?
Yes, bread-making yeast is naturally gluten free. Brewer's yeast is typically gluten-containing, though, so select your yeast carefully.
What gluten free flour is best for yeast bread?
My favorite gluten free flour for yeast bread is Better Batter. It offers the perfect ratio of several gluten free flours to create gf bread that looks and tastes just like “the real thing”.
What can replace gluten in flour for making bread?
Nothing is a one to one replacement for gluten in yeast bread, but xanthan gum as part of a well balanced all purpose gluten free flour blend goes a long way to making gluten free bread that stretches and bends.
What gluten free bread is closest to regular bread?
If you're looking to buy packaged gluten free bread, I really like Schar brand and Canyon Bakehouse brands are some of the best. Here is a complete list of my favorite packaged gluten free bread.
Is all gluten free bread wheat free?
No. Wheat is one of the main gluten-containing grains, so if something is gluten free then it is probably also wheat free. Some bread may be gluten free but contain gluten free wheat starch, which may be appropriate for someone with celiac disease or gluten sensitivity but could trigger an allergic reaction in someone who is allergic to wheat.
What is the secret to getting gluten free bread to rise?
My favorite way to get gluten free bread to rise is to turn on my oven to its lowest setting (usually less than 200°F), cover the bread dough well with either a lid or oiled plastic wrap, and place it on top of the oven. The oven will give off enough ambient heat to help speed up the bread's rise, but not so much that it will kill the yeast.
Does gluten free bread taste different?
When you pick a gluten free bread recipe from my extensive collection, there's one thing I can promise you: It won't taste bad.
In most cases, I would even say that these wonderful recipes don't taste all that different from their gluten-containing counterparts.
And in a few magical cases, I'll say that my gluten free bread recipes actually taste better than “the real thing”.
Do I have to knead gluten free bread?
No, you usually do not need to knead gluten free bread dough, at least not in the same style you might be used to from conventional bread. When making gluten free loaf bread, you simply have to vigorously mix ingredients to be sure they're well incorporated.
Although you will often shape the bread into rolls, buns, loaves, or even gluten free soft pretzels, there are no gluten proteins to stretch, so no kneading is necessary.
Why is my gluten free bread not rising?
There are several reasons why your gluten free bread may not be rising. Here are a few of the most common reasons:
- You're not using the correct gf flour blend or you're not using the correct amount
- Your yeast is not fresh or it's not activating due to use of cold ingredients
- You didn't allow enough time or the proper conditions for proofing
- You didn't measure your ingredients by weight, including water, so the hydration ratio is wrong
Why is gluten free bread so dry?
GF flours are very absorbent, so if you don't include the right ratio of dry and wet ingredients, you'll end up with a gluten free bread loaf that's dry and crumbly.
Honestly, if you want to know how to make gluten free bread fluffy, the best thing you can do is follow your chosen recipe's instructions very carefully.
Also remember that the more substitutions you make, the more likely you'll end up with something different than the intended result.
Why is my gluten free bread so crumbly?
Lack of moisture will make gluten free bread dry and crumbly, but so will inadequate amounts of xanthan gum. Look at this important ingredient as a type of binder or glue that holds gluten free bread together.
Why is my gluten free bread gummy?
While it's possible to include too little liquid in your gluten free bread recipe and end up with dry bread, you'll experience the opposite if you add too much liquid, don't let the dough rise enough before baking, or don't bake the loaf for long enough until it's baked all the way to the bottom.
Another reason you may pull gummy bread from the oven is that the bread wasn't baked at a high enough temperature, so you don't get any “oven spring.” If your oven runs too hot, the outside may bake too quickly and you can't bake it long enough to bake all the way to the center. Finally, altitude, humidity, or temperature may affect final results.
How to tell if bread is done? Make sure your internal bread temp is between 205°F to 210°F.
Why did my gluten free bread sink while it was cooling?
The most common reasons for gluten free bread sinking after cooling include:
- Too much proofing; the bread rose higher than it could support itself. Raw gf bread dough tends to take on a pock-marked appearance when it's overproofed, so watch carefully.
- Too much yeast; the bread rose too quickly and couldn't support itself
- Too much liquid; steam couldn't dissipate quickly enough
- A too-hot oven that baked the outside to burning long before the inside of the loaf was cooked through enough to support the structure.
Does gluten free bread need to be refrigerated?
No, gluten free loaf bread does not need to be refrigerated. In fact, you should avoid refrigerating bread as it will speed up the drying process.
Does homemade gluten free bread last as long as store-bought bread?
Many store-bought breads are loaded with preservatives to make them last longer than homemade baked goods.
As my bread recipes don't contain preservatives, they won't technically last as long as store-bought — but it's typically not a problem because bread gets eaten quickly and freezes very well. Plus, xanthan gum is a necessary ingredient in gluten free bread and it helps keep baked goods fresher, longer.
Where can I find an easy gluten free bread recipe?
I've got a few of my best gluten free bread recipes above, but you can find more at my gluten free bread archive.
I consider most of my gf bread recipes to be easy gluten free bread recipes because I don't use complicated ingredients or require specialized equipment. Even if you're new to gf baking, I'm sure you'll find these recipes simple enough (and I'd love to hear about how your bread turned out!
[These links contain affiliate codes that help me earn a small commission, at no additional cost to you. Every single product I recommend is one I truly believe in and, where appropriate, have purchased myself!]
Originally published on the blog in 2012. Lots of textual resources added in 2023.
The Best Tools For Gluten Free Baking
This post contains affiliate links. Please read my disclosure policy.
I've been baking gluten free since 2004, and over the years I've gathered a complete set of the best tools for gluten free baking. If you're going to be baking along, here's a peek into the small appliances, mixing bowls, utensils, tools, and pans you'll find me using as I go along. I try to explain why I have each piece, or whether I have something very, very similar that's just not available any longer.
At the top of this post, you'll find a Table of Contents with jump links to each of the individual sections, so you can skip right to the part you find most engaging. Within each section, you'll find a separate Table of Contents for an at-a-glance summary of what's below it.
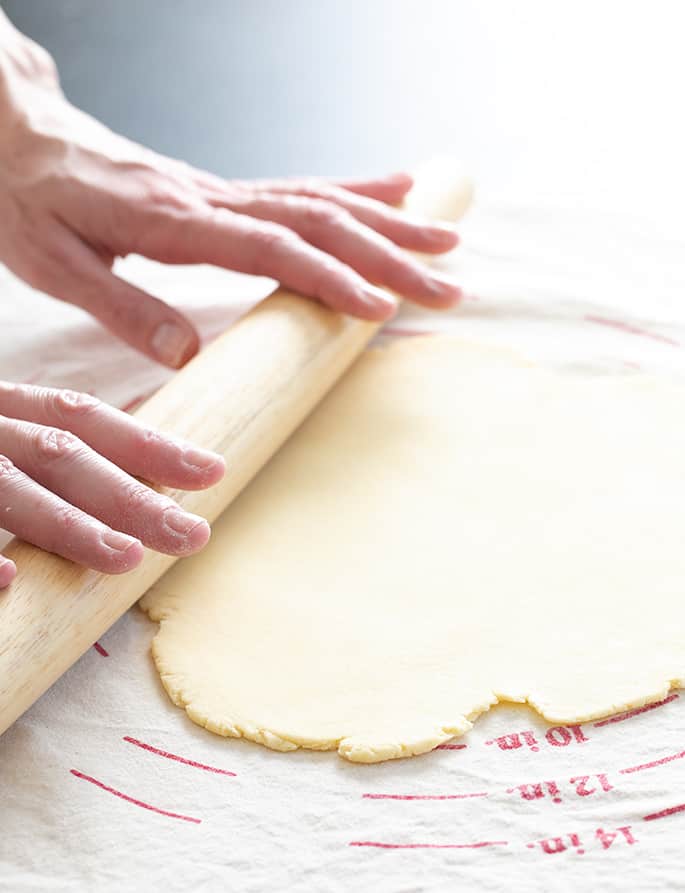
Table of Contents
The best small appliances for gluten free baking
Table of Contents
KitchenAid Stand Mixer stand mixer
Cuinsinart Handheld Mixer hand mixer
KitchenAid Immersion Blender immersion blender
Ninja Nutri-Pro Blender blender
Full Size Cuisinart Food Processor 8 cup food processor
Small Food Processor 3 cup food processor
Chefman Tabletop Deep Fryer electric fryer
OXO Digital Food Scale kitchen scale
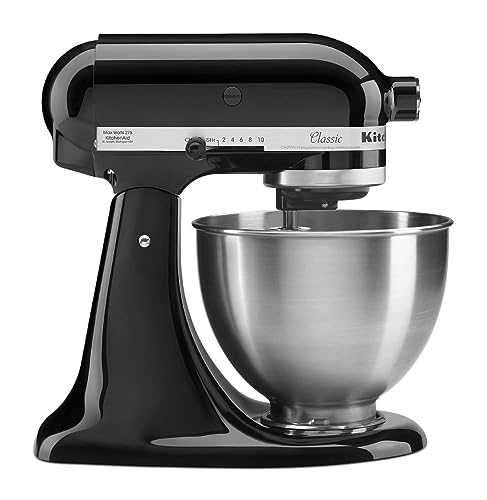
This tilt-head KitchenAid 4.5 quart stand mixer is the most economical stand mixer there is, and you can even use a 5 quart tilt-head metal mixing bowl in place of the 4.5 quart bowl. The total price should still be less than what you'd pay for a KitchenAid 5-quart stand mixer.
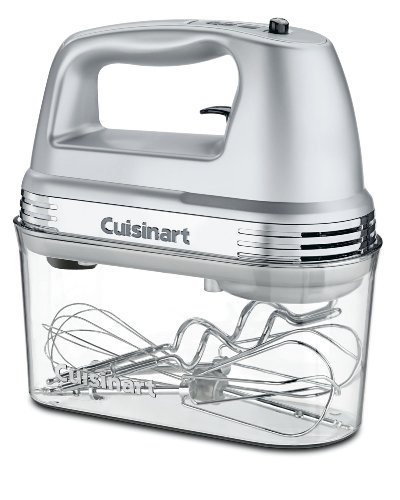
A handheld mixer is so useful, whether you have a stand mixer or not. This Cuisinart handheld mixer has 9 speeds, and comes with a storage case that carries regular beater attachments, and dough hooks. If you want to use your handheld mixer in place of a stand mixer for bread recipes using our gluten free bread flour, you'll need those dough hooks.
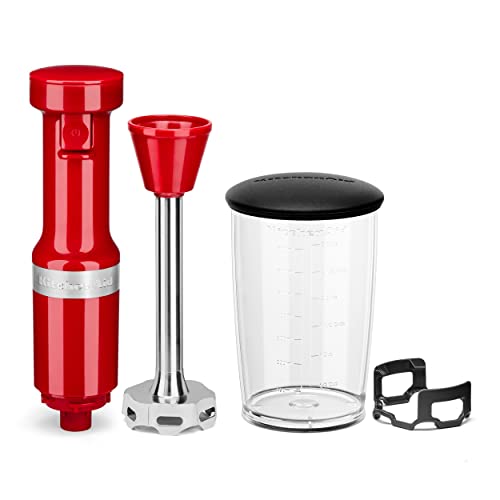
An immersion blender like this KitchenAid hand blender makes quick work of blending up tomato soup right in the pot, and is so easy to clean. One or more colors is always on sale, too, so choose frugally. A cleaning tip for you: when you clean the blades, use a sponge not your fingers for safety, of course, but avoid getting the part of the mechanism that inserts into the other half wet since it's hard to dry and never gets dirty so doesn't need cleaning, anyway.
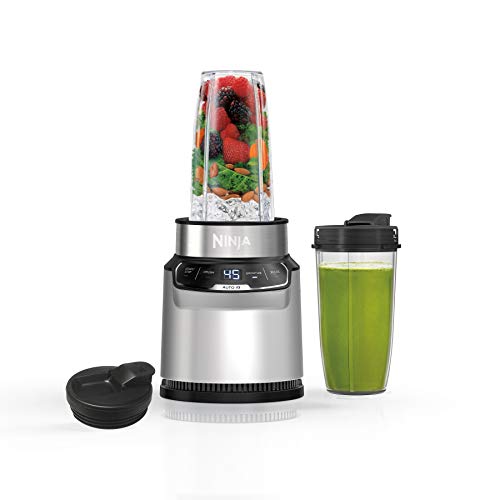
I don't have a fancy schmancy Vitamix or a Blendtec blender and I don't think that you need one, either. This Ninja Nutri-Pro blender is powerful enough to do everything I need it to do, even if every once in a while I need to do it in batches if the canister isn't quite large enough to do it all at once. Every time I think I need a Vitamix, I remind myself of the price tag, choke on my coffee, and give my workhorse Ninja a friendly tap.

This Cuisinart 8-Cup food processor is large enough to make our homemade protein bars, and still small enough that it isn't too much of a pain to store in the kitchen cabinet. This one has fewer seams in the plastic canister than some, so it's a little easier to clean. But no full-sized food processor is easy to clean.

A miniature 3-cup food processor from Cuisinart is a tiny little friend in the kitchen that takes care of small chopping tasks, is easy to store, much less expensive than its 8-cup counterpart above, and is actually relatively easy to clean. Keep in mind that it won't fit a full-sized batch of protein bars, and doesn't have the other blades of its big sister, but I find it comes in handy quite often.

A tabletop electric fryer isn't an essential kitchen tool in your well-run gluten free kitchen, but it is incredibly useful if you want to make everything from gluten free donuts and gluten free apple fritters to authentic gluten free egg rolls and gluten free fried chicken. You can keep the smell and mess contained, maintain a steady, even oil temperature during frying, and make cleanup significantly easier. This isn't the model I have, which is a Cuisinart, but that suddenly went missing and this one has great reviews. It's what I plan to buy next, since the fryer I've had for a full 10 years is finally starting to show signs of age.
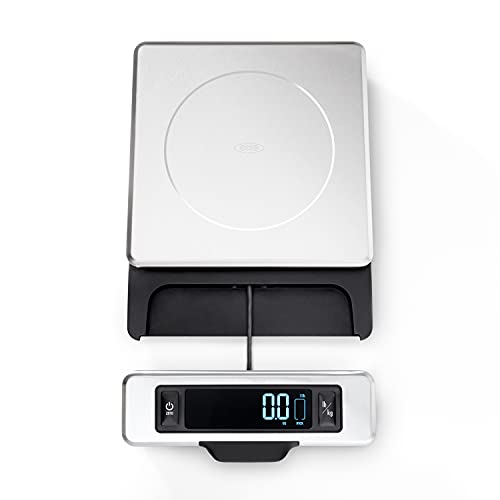
I rely on my OXO digital kitchen scale every day for accurately measuring the weight of pretty much anything. It has a pull-out display, and you can remove the metal tray for easy cleaning. You simply can't build a gluten free flour blend without a digital kitchen scale, but you can use a cheaper one. If you want to spend less but still get the job done with a little less ease, try the ever-reliable, pared down Escali brand kitchen scale. I have one of those, too.
Mixing and measuring tools for your gluten free kitchen
Not every ingredient can be measured by weight or mixed by machine, so even with our digital kitchen scale and machines, we're going to need some volume measurement tools like liquid measuring cups of different sizes and materials, measuring spoons, and mixing bowls. Here are my favorite tools to mix and measure.
Table of Contents
One quart Pyrex bowl 1 quart bowl
Full set of measuring spoons spoons
Set of silicone measuring cups silicone measuring
4 Cup Pyrex Measuring Cup big Pyrex measuring
Set of 3 Metal Mixing Bowls metal mixing bowls

A one quart Pyrex bowl is important for making gluten free artisan bread. Generally, the mixing bowls you choose to use are low priority for buying recommendations. This one is an exception, though, since it's oven-safe, encourages proper rising, and creates the perfect shape for that particular recipe. It's also a nice size for a Big Salad.
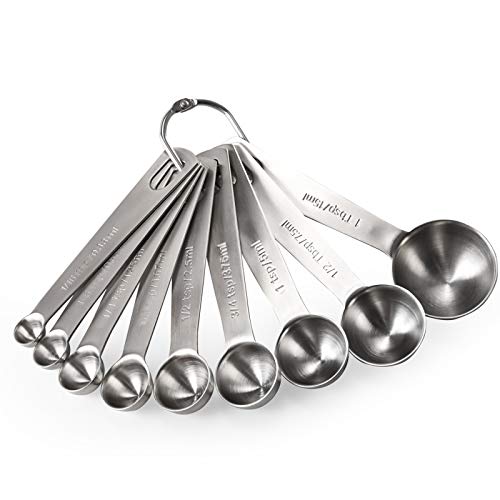
Not everything can be measured by weight, since we aren't getting a scientific scale that measures accurately to less than 1 gram. That means you need something like this 9-piece set of stainless steel measuring spoons. If you're feeling expansive, try also picking up this set with unusual sizes like 3/4 teaspoon.

Silicone liquid measuring cups in 4 cup, 2 cup and 1 cup volume capacities are really handy when measuring liquids, which don't lend themselves to being measured by weight. Here's a general tip about measuring liquids, just for fun: water is the only liquid with an equivalency between U.S. fluid ounces (a volume measurement) and ounces (a weighted measurement). 1 fluid ounce of water = 1 weighted ounce of water. All other liquids are variable.
It's always important to have at least one 4-cup Pyrex measuring cup with a pour spout and lots of markings. It's heat-safe and has a nice wide opening, so you can use it to make things like custards and puddings.

If you're looking for recommendations for mixing bowls, I present this 3-piece set of stainless steel mixing bowls with lids: 1-1/2-Quart, 3-Quart and 5-Quart bowls. They're steady but not heavy, so you can whisk and mix vigorously, but still lift the bowl easily to transfer batter to a pan.
The best utensils for gluten free cooking and baking
In this section, we're covering my favorite brand of silicone spoonula (it's a kind of concave spatula), metal spatulas for smoothing and spreading, all the types of whisks I use regularly, plus the simple tools I use for grating.
Table of Contents
Silicone Spoonula Spatula by GIR spoonula
Small Ateco Offset Spatula small offset
Large Ateco Straight Spatula larger spatula
OXO Large Spring-Loaded Cookie Scoop large scoop
#50 Spring-Loaded Ice Cream Scoop small scoop
Large Metal Balloon Whisk big whisk
Small Metal Balloon Whisk small whisk
Large Metal Flat Whisk flat whisk
Large Danish Dough Whisk Danish whisk
OXO Handheld Coarse Grater grater
Metal Zester/Microplane Grater microplane

My favorite silicone spatula is actually the GIR brand silicone spoonula spatula. It does everything a spatula can do, but is a bit concave toward the center, which allows you to scoop, not just scrape. GIR has lots of different colors and sizes, too, and they generally don't stain, either, and are dishwasher safe.

I use a small offset spatula so often to smooth the tops of everything from raw cake batters and pie fillings to frosting on something small, like a frosted sugar cookie or cupcake. A small spatula like this is much more sturdy than the long ones, giving you a lot of control.

Instead of a long offset spatula, I usually turn to this straight metal spatula, since the farther from the handle you go, the less stability a long offset spatula has. Ateco is a great brand for all sorts of cake and cookie baking supplies, but Wilton's products work well, too, if that's what you prefer.

Whether I'm portioning drop cookies, muffin, or cupcake batter, or this large spring-loaded OXO cookie scoop (3 tablespoon volume capacity) is truly indispensable in my kitchen. It keeps portions consistent, and comes clean in the dishwasher.
Sometimes you need a smaller portion, like if you're making energy bites, and this 50 cookie scoop comes in really handy. The number designation refers to the fact that it takes 50 scoops to make a quart of ice cream.
This is nothing more than a standard 12-inch large metal balloon whisk. The wires are sturdy enough to whisk even something thicker, like raw pancake batter.

This 8-inch small balloon whisk is also sturdy, so the tines never bend, and is ideal for mixing smaller quantities in smaller containers, where you can't fit a 12-inch whisk.

This 10-inch flat whisk is ideal for getting into edges when you're deglazing a pan or making a roux for something like gf gravy or even just the beginnings of a sauce. A balloon whisk is great for aerating things, but isn't the right shape to reach those nooks.

A Danish dough whisk is a really sturdy whisk that makes it surprisingly easy to mix heavier, stiffer, dough together with much less effort.

I do have a standard box grater, but I find that I reach for this OXO coarse grater with a handle much more frequently. It's much easier to clean since the design is so simple, and it has the standard size hole that I'm usually looking for. If I want a different size grater, I usually want a microplane.
This microplane grater/zester is essential for zesting citrus peel, finely grating hard cheese like Parmigiano-Reggiano, grating nutmeg, making fine chocolate shavings, and even grating ginger root.
Essential tools for gluten free cooking and baking
These aren't the bowls, and they aren't the utensils that we use to manipulate the dough. Instead, these tools are the ones I use to roll gf dough, shape it, and cut it in every way imaginable. Intriguing, right?
Table of Contents
Wooden French tapered rolling pin rolling pin
Double-Sided Wooden Pastry Roller pastry roller
Plain Round Cookie Cutter Set round cutters
Set of 3 Metal Biscuit Cutters biscuit cutter
Stand-Alone Analog Oven Thermometer oven thermometer
Simple Deep-Fry or Candy Thermometer candy thermometer
Metal Handheld Flour Sifter With Squeeze Handle sifter
Epicurean Standard Cutting Board cutting board
Bethany Pastry Board & Cloth Bethany board
Metal Bench Scraper scraper
Plastic Bowl Scrapers plastic scraper
8-Inch Metal Cake Cutter cake cutter
OXO Metal Cut & Serve Turner turner
Fox Run Aluminum Tortilla Press tortilla press

I always use a French rolling pin, rather than a classic rolling pin with handles since I find that it gives me a much better feel for the amount of pressure I'm putting on whatever I'm rolling. This one is 18-inches long, which is the perfect length since you hold the tapered ends, and roll with the middle section.
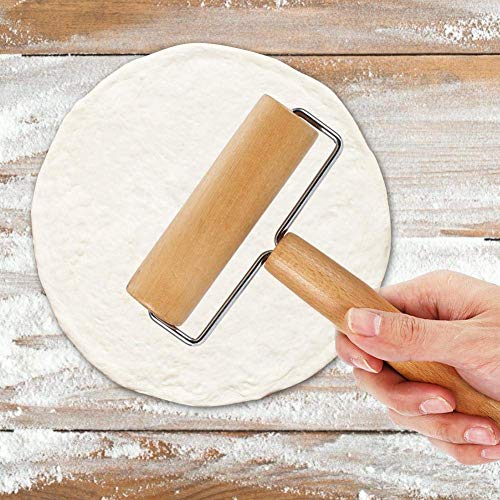
A small, double-sided pastry roller makes it easy to roll out smaller pieces of dough, and get into tight spaces (the roller you see in the image here is the wider of the two sides). It's far from essential, but once you use one to roll out pie crust, ravioli, tortillas, and won ton wrappers, you won't want to be without one in your kitchen.

A plain round cookie cutter set, with smooth metal cutters ranging from 3/4-inch to 3 5/8-inches in diameter in a small, compact tin, will help you cut perfect circles in everything from cut-out cookies to tortellini. They're not quite tall enough to cut out biscuits, but they'll do in a pinch!

For the perfect sharp edges on your round biscuits, you'll never need another if you buy this set of 3 metal biscuit cutters: 3.2-inch, 2.8-inch, 2.4-inch. Unlike cookie cutters, they're all 1.4-inches high, so you can cut rounds out of a thick rectangle of dough for mile-high biscuits.
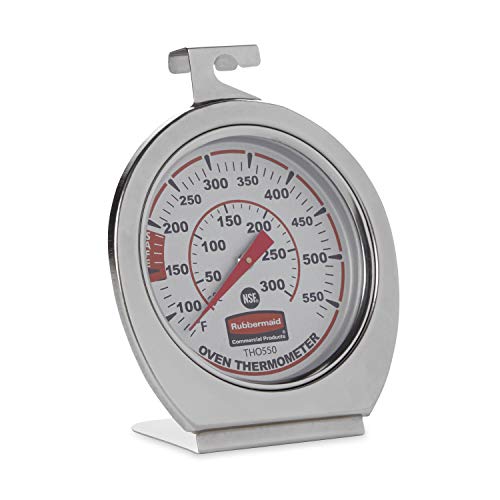
Most ovens run hot, and nearly all ovens are out of calibration even if you're really diligent about keeping them tuned up (are you really?). An instant read oven thermometer is a much more reliable source of information on what the actual temperature is in your oven, and it's cheap and easy enough to replace frequently. As soon as mine gets dirty, I know it's probably time to replace it. Stock up!
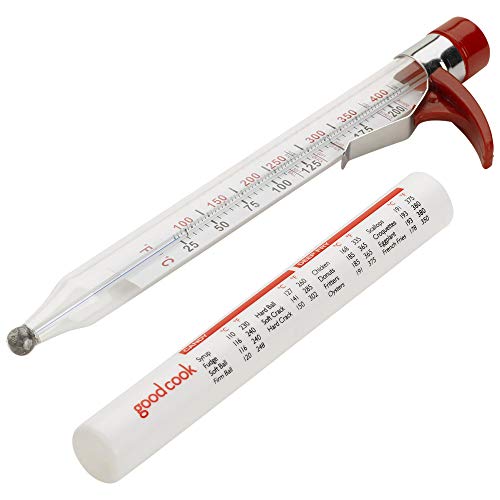
Even if you buy the tabletop electric fryer we discussed above, it's good to have at least one classic candy/deep-fry thermometer for cooking sugar to just the right temperature to make marshmallow ice cream or marshmallow fudge.

If you're making angel food cake, there's no way around it: you're going to need this simple metal sifter with squeeze handle (not rotary) to sift your flour. It's not often that we need to sift flours, but when you must, you must. Of course, you can always use a fine mesh strainer, which has other uses as well. I prefer one of these handheld sifters for sifting flour, though, since a strainer is a messier, less-contained way of sifting.

I love every Epicurean cutting board I've ever bought. They don't dull your knives, they stay in place as you're cutting, are dishwasher safe, and don't stain. This one is 11.5-inches tall x 9-inches wide, which is a nice standard size.

As much as I hate to admit it, shaping raw gluten free bread dough is a bit trickier than conventional dough, even with my very best recipes. This 20-inch Bethany pastry board and cloth is one you've seen me using in many how-to videos here on the blog. It's a simple wooden board covered in a canvas cloth, and it creates a semi-nonstick surface for shaping all manner of dough, allowing you to use much less additional gluten free flour during shaping. The canvas is removable and washable, and you can also purchase a replacement canvas if yours wears out.

To help you divide and cut raw dough, scrape down your surfaces, and even measure the length and width of your dough, this 6-inch long metal bench scraper is extremely useful.
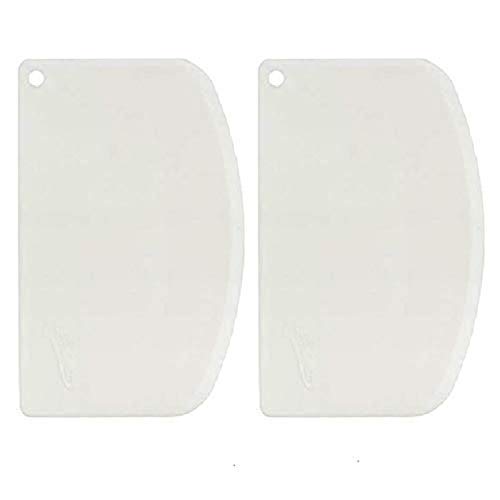
A rigid plastic bowl scraper is also useful for cutting dough into portions, scraping down a sticky surface, and transferring dough from one surface to another safely.

This 8-inch stainless steel cake cutter is intended to be used to cut cake rounds out of a rectangle or square, but I use it to create clean edges on homemade tortillas. You'd be shocked how often it comes in handy!
This is a small (the dimensions are 1.85 x 1.65 x 9 inches) metal cut and serve turner from OXO. It's just thick enough to be sturdy, narrow enough on the edge to cut a pan of brownies, and short enough to get up under that corner piece without disturbing the next one.

Every time I post a recipe for any sort of gf tortillas, someone asks if they can use a tortilla press to make the rounds. The answer is usually ‘yes,' but you'll usually have to finish up with some sort of rolling pin afterward since a tortilla press is a great start but it doesn't make your wrap thin enough to bend without breaking.
The essential gluten free baking pans
Finally, here are the pans that I bake nearly everything on that goes in my ovens: every shape of cake pan, pie plate or pan, loaf pan, muffin tin, donut pan, and finally my favorite nonstick wire rack for cooling all those beautiful pies, cakes, cookies, and baked donuts.
I have tried to find a single pan manufacturer that has every sort of pan I could ever need. I dreamed of a completely uniform-looking set of beautiful pans! It wasn't meant to be, though, since some brands do many things right, but none of them do everything right. Here's the best of the best!
Table of Contents
8-Inch Round Baking Pan from Fat Daddio 8 inch round
9-Inch Round Baking Pan from Fat Daddio 9 inch round
8-Inch Square Baking Pan from Fat Daddio 8-inch square
9-Inch Square Baking Pan from Fat Daddio 9-inch square
13-Inch x 9-Inch Rectangular Baking Pan from OXO 13 x 9 rectangle
9-Inch Square English Shortbread Pan from NordicWare shortbread pan
Classic Nonstick Baked Donut Pans from Wilton donut pans
Classic 10-Cup Nonstick Bundt Pan from NordicWare bundt pan
10-Cup Brilliance Nonstick Bundt Pan from NordicWare brilliant bundt pan
Classic Nonstick 2-Piece Tube Pan from Chicago Metallic tube pan
Nonstick Jelly Roll 10-Inch x 15-Inch x 1-Inch Pan from OXO jelly roll pan
Aluminum Quarter Sheet Pans from NordicWare quarter sheet pans
Aluminum Half Sheet Pans from NordicWare half sheet pans
Nonstick 12-Cup Standard Muffin Tins from Wilton standard muffin tins
Nonstick 24-Cup Miniature Muffin Tins from USA Pans mini muffin tin
Nonstick Standard 9-Inch Pie Dish from USA Pans 9-inch pie plate
10.5 Inch Round Ruffled Deep Dish Pie Pan from Sweese deep dish pie pan
9-Inch Nonstick Springform Pan from Cuisinart springform pan
Nonstick 8.5-Inch x 4.5-Inch Loaf Pan from OXO 1 pound loaf pan
Nonstick 9-Inch x 5-Inch Loaf Pan from WilliamsSonoma's Goldtouch Line 1.25 pound loaf pan
1 Pound Nonstick Pullman Loaf Pan with Lid from Chefmade 1 pound pullman pan
2 Pound Nonstick Pullman Loaf Pan with Lid from USA Pans 2 pound pullman pan
Nonstick Wire Cooling Rack from OXO wire rack
No products found.
I really love Fat Daddio brand cast aluminum pans, since they're lightweight but sturdy, have no seams where anything can get stuck, and bake cakes very evenly. Let's begin with this No products found., since that's the pan I use more often than others.

Almost anything that can be made in an 8-inch round cake pan can also be made in a 9-inch x 2-inch round baking pan, and baked for less time. A larger pan with the same amount of batter means a thinner layer of batter, which bakes more quickly.

The Fat Daddio square baking pans have nicely shaped corners (not too sharp, not too round), and a simple overhanging edge for grabbing with your potholders without disturbing the baked goods in the pan. We're starting with this 8-inch x 2-inch square baking pan.

Next up is the same square pan, but with 9-inch x 2-inch square baking pan dimensions. Same cast aluminum, so be sure not to ever put it in the dishwasher, or you'll ruin your pans. They clean up so easy in the sink, though.

I don't often bake in this 13-inch x 9-inch nonstick baking pan from OXO, since I find that it can be tricky to get baked goods of this size to bake evenly all the way through without burning on the bottom toward the center, where the pan tends to get hottest. If I do, this is the pan I use, though. It's also useful as a roasting pan, too.

You don't really need this 9-inch square English shortbread pan—unless you want to make beautiful gf English shortbread during the holiday season. Then, you need this pan because it's beautiful, and it's the best weight and quality, and has the most beautiful, tasteful pattern.
I'm very, very particular about my donut pans, and this two-pack of 6 cavity nonstick Wilton donut pans is just the best. To make baked donuts, you need a pan with donut wells that have a prominent center column. Otherwise, as the donut batter rises, it seals up the hole. These are nonstick, and have lovely center columns.
A classic 10-cup bundt pan is essential for making, well, a gf bundt cake, and this cast aluminum pan from NordicWare is solid, well-constructed, bakes evenly, releases cleanly, and is made to last.

For a fancier look like we used in our gluten free marble bundt cake, use this beautiful, gold-colored 10-cup brilliance bundt pan from NordicWare. Like its classic cousin above, it's the right material for the job.
If you ever want to make a classic gf angel food cake, you'll need a tube pan. This one from Chicago Metallic is nonstick, since you can't grease the pan, with the little feet that allow you to turn it over and allow the cake to cool upside down once it's finished baking. It has about a 16-cup capacity, which is standard for fluffy angel food cake batter.
My favorite size rimmed baking sheet is this 10-inch x 15-inch x 1-inch jelly roll pan. This one is nonstick from OXO brand, and you'll reach for it again and again, even when you're not making a gf Texas sheet cake or gf pumpkin slab pie.

I bake cookies, biscuits and everything in between in sheet pans, and a quarter sheet pan like this aluminum 2-pack from NordicWare is a good basic option that's easy to store in your kitchen, or even in your oven. Remember that it's not made of stainless steel, so it will stain and can't go in the dishwasher. Stainless steel sheet pans are much more expensive, though, so I stick with aluminum and line my pans.

For larger batches, this 2-pack of aluminum half sheet pans from NordicWare aluminum is really useful. You can usually fit a dozen drop cookies on here, with plenty of space in between for spreading.
Finding the right standard 12-cup muffin tin is trickier than it sounds. These are nonstick tins from Wilton's Recipe Right line, and come in a 2-pack. No matter what you do, they'll stain, but these tins are the right size, the right shape and size wells for beautiful muffins, and they're light in color. If your baking pans are dark in color, they attract too much heat too fast and the outside is likely to burn before the inside is baked all the way through.
This miniature nonstick 24-cup muffin tin from USA Pans isn't perfect but it's the best there is. The wells are just the right depth, the sides are slightly angled which makes a prettier shape, the pan is light in color and heats evenly. The nonstick coating is also quite durable.
This classic 9-inch nonstick pie plate from USA Pans brand with sloped sides is made from nonstick-coated aluminized steel is durable, easy to clean, and I find that it never needs to be greased, making it much less likely to stain or discolor.

When you need a deeper pie pan, I love this 9-inch deep dish pie pan with a ruffled edge from Sweese. The ruffled edge makes it easy to produce a beautiful edge on your gf pie crust, and the cleanup couldn't be easier. It looks just like the Emile Henry pie dish, but it's less expensive.

I've tried so many springform pans for the best gluten free cheesecake, and this 9-inch springform pan from Cuisinart is one of the best. It's reliably nonstick, easy to assemble, and has the light color that you need if you don't want to burn your baked goods.

This OXO nonstick 8.5-inch x 4.5-inch 1 pound loaf pan is light-colored, so your bread doesn't burn on the outside before the inside is baked through. Plus, it has no seams, so your bread doesn't get stuck in any crevices. You can line it with parchment if you like, but it really isn't necessary.
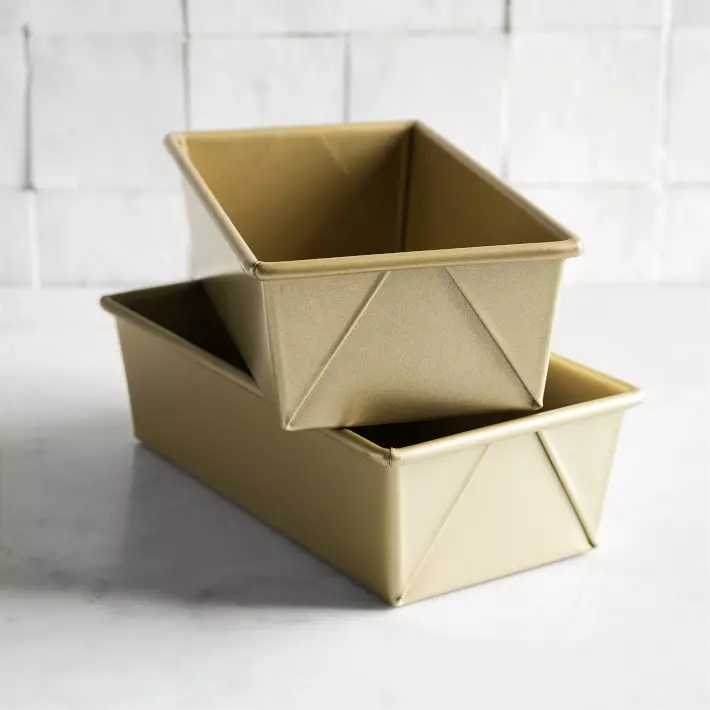
If you'd prefer a loaf that's slightly longer, this 9-inch x 5-inch 1.25 pound loaf pan from Williams Sonoma's Goldtouch line is the way to go. I've had these pans for the better part of a decade, and they're a tiny bit discolored, but perform just as well as the day I bought them!

Chefmade's nonstick Pullman .99 pound loaf pan with lid is my go-to pan for making my everyday gluten free sandwich bread these days, since I love how it makes a tall loaf. You can use the lid to cover the dough as it rises, and then keep it in place for baking, or remove it entirely.

This Pullman 2 pound loaf pan with lid from USA Pans is the best standard double-recipe loaf pan. Don't forget to double the ingredients for a 1-pound or 0.75 pound recipe
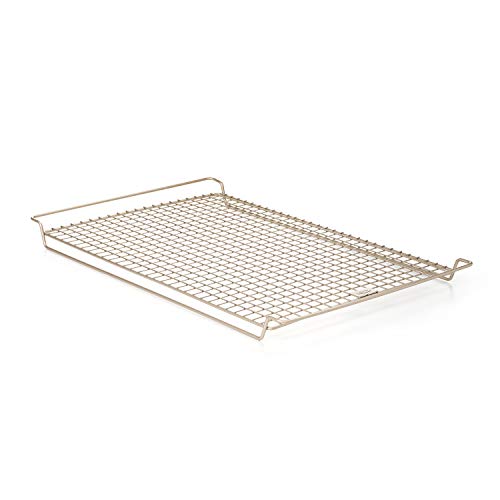
Almost every baking recipe on this blog ends with an instruction to remove the cookies, bread, or cake from the baking pan and turn it out onto something like this wire cooling rack from OXO to cool completely. I really like the modest size of this rack (11.5-inches depth x 18.5-inches width x 1.5-inches height), the fact that it's nonstick, and heat-safe up to 450°F/232°C.
Tips for buying gluten free kitchen tools
There's no such thing as gluten free products when it comes to kitchen tools, appliances, and other essentials. Instead, this is a name we give those kitchen must-haves that we take extra care to keep safe from contamination.
Now that we've discussed my favorite specific baking tools for all the gf baking I do, here are some tips for how to choose and maintain the safety of all the utensils, tools, small appliances, cooking aids, and everything else you'll find in the kitchen.
Since my son went on a gluten free diet when he was very small, there was no question that we were going to make our whole home gluten free. I wanted his home to be a haven for him, where he didn't have to think or wonder if anything was safe to eat or use.
If I or another adult had been the gluten free person in my house, I'm certain that my house would only be partially, but not wholly, gluten free. If you're like me, and you find the idea of having any gluten in the home to be really stressful, I'd like to offer some possible suggestions for how to keep the gluten free eater as safe as possible from cross-contamination. After all, when my gluten free son eats out of the home, he is eating food prepared in shared spaces.
Invest in shields and protectors
If there are members of your family that don't follow a gluten free diet, and you're not willing or able to keep your home environment completely free from gluten, there are a number of items in the kitchen that simply can't do double duty. But it doesn’t necessarily have to apply to absolutely everything.
We live in a wonderful time when those with celiac disease or a gluten intolerance can take advantage of products that have been developed for those who like easy cleanup. Specifically, I’m talking about shields, covers, and other barriers for keeping food from contacting pans, bowls, and other items in the kitchen.
Here are some relatively simple solutions that can keep your gluten free eater safe without buying 2 of everything. Please keep in mind that there is a significantly greater risk of cross-contamination with gluten when using any of these methods, so I'm not endorsing or encouraging them their use. Rather, I'm offering some potential solutions where the ideal situation just isn't possible:
- Cupcake and muffin liners – Always use them, and you’ll help avoid contamination and keep your muffin tins in pristine condition.
- Toaster bags – If possible, it's really best to have a separate toaster for gluten free foods, since crumbs are largely unavoidable in a toasting environment. But if that's simply not possible, like if you're in someone else's home for any reason, thin, reusable toaster bag liners were originally developed to keep crumbs, cheese, and other remnants from dirtying your toaster. If you make sure everyone in your house uses one when toasting bread, you’ll ensure your toaster stays relatively safe for the whole family.
- Baking sheet liners – I don't really care for Silpat baking mats since they tend to speed baking and alter baked goods that are cooked and baked on them. If you use Silpats, I recommend using them only for one purpose: gluten free or gluten baking, since they would be impossible to keep straight. As an alternative, I make liberal use of parchment paper whenever I'm baking something, as a means of easy cleanup and creating a nonstick surface—and they can help keep your baking sheets clean from cross-contamination.
Look for essentials that are easy to wash
Not everything in your kitchen can be covered or shielded, so now it’s time to make decisions about what you can safely use for both gluten and gluten free cooking, what you can’t, and how to make those decisions.
Let’s start with cookware, like pots and pans. Storing two sets can be tricky, so if you can avoid having doubles, you’ll save yourself a headache.
When shopping for a new cookware set, look for a strong material that can easily stand up to repeated washings in the dishwasher — very hot water and a strong detergent are a must for destroying remnants of gluten.
Things you can't wash
Speaking of things that are easy to wash, let’s take a moment to focus on a couple that aren't. The first is your colander. Even if you have a metal one that can stand up to the high heat of the dishwasher, I recommend buying a second one for your gluten free cooking.
This is because colanders — as well as strainers and other items with a mesh surface — are notoriously difficult to clean, no matter how you do it. Each of those tiny holes is a potential hiding place for gluten, and honestly, I could never trust myself to clean a colander well enough to use it for both gluten and gluten free food preparation.
The next tool I recommend you purchase twice is the food processor. Like colanders, blenders and food processors have lots of nooks and crannies where dust and food remnants can hide.
If you're worried about space, I highly recommend a personal blender like the Magic Bullet. You can buy a set with color-coded cups — make some cups all purpose, and make others gluten free only.
Buy doubles of commonly used tools
Try as you might to cut down on duplicates in the kitchen, there will be instances that you simply cannot avoid — it’s just not safe to use some items for both gluten and gluten free cooking.
The first to come to mind is the cutting board. Sure, you could use a thin, flexible cutting mat over your more robust board, but chopping, dicing, and slicing can be messy business, so the risk of cross contamination is high. Because cutting boards are relatively inexpensive and easy to store, it’s better for all to simply buy two separate ones for gluten and gluten free cooking.
The next group of kitchen essentials that you should consider buying doubles of are silverware, cooking utensils, and knives. Sure, you could pop most into the dishwasher and run it on high heat for a deep clean, but I don’t think that’s enough.
Case in point: When’s the last time you pulled a “clean” spoon from the dishwasher to find mystery goop still stubbornly attached? If that goop turned out to be dried gravy or cream of wheat, you’d have a problem on your hands.
Mixing bowls, measuring cups, and storage containers are the last class of kitchen essentials you should buy doubles of. My reasoning is pretty simple: The more you use an item for particular ingredients, the harder it is to remove every trace of those ingredients. It's even worse when you're dealing with liquids or fine ingredients.
For this reason, I would always recommend that you buy separate containers for pantry staples like gluten free flours and gluten free soy sauce — there's too much risk otherwise.
Color coordinate to avoid confusion
So you’ve decided you’re going to buy separate mixing spoons, plates, and other items to be absolutely certain that you won’t cause cross contamination with gluten. Here’s the next thing to consider: How will you tell them apart?
I think the easiest way by far is by color. These days, you can buy just about anything in any color you desire. Red, blue, pink, purple? No matter which you like, you’ll find pots, pans, utensils, toasters, microwaves, even refrigerators and dishwashers (though I don’t think you need to go that far!)
If you have young children, let them decide what color their gluten free “safe” items will be; they’ll be more excited to use them when they’ve had a chance to help with the decision-making process.
If you live in a house with older kids and adults, my advice is to go bright and bold. Believe me, no one will mistake the firetruck red mixing spoon for anything other than the gluten free spoon!
Use the label maker and sticky notes
In some cases, you may purchase gluten free kitchen tools that are not visually distinguishable from those that will be used in regular cooking. Take gluten free food storage containers, for example. They’re available in different colors, but depending on the size or style you need, you may not have many options.
Combine that with a pantry that's got almond flour, brown rice flour, white rice flour, coconut flour, wheat flour, Expandex, tapioca starch, cornstarch, xanthan gum and other ingredients that aren't easy to tell apart by sight, and you have a real problem on your hands.
This is where a label maker, stickers, sticky notes, and other labeling tools can be extremely helpful. With just a few clicks or swipes of your pen, you can quickly and effectively label items throughout your kitchen, so there is no mistaking gluten free pantry items and everything else.
Better yet, labels made with many label makers are waterproof, so even after you've washed a container, the label will stay put. When you get back from the local grocery store with your gluten free foods, just reach for the labeled ones.
These are the small appliances that have earned a spot on my kitchen countertop and in my cabinets. They make it possible for me to weigh accurately to build gf flour blends and get consistent results in all baking recipes, mix, process and blend gluten free bread and other dough and batters smoothly, and even deep fry at a consistent temperature.
Homemade Gluten Free Pasta Recipe
Learn how to make fresh homemade gluten free pasta with the simplest gf pantry ingredients, without a pasta maker or any special equipment (unless you want to use it!). Serve it with all your favorite pasta dishes!
Making gluten free homemade pasta is a labor of love. But it's a simple process. All it takes is the right recipe—and a little time. Find out exactly how to do it! I promise you it's worth the effort.
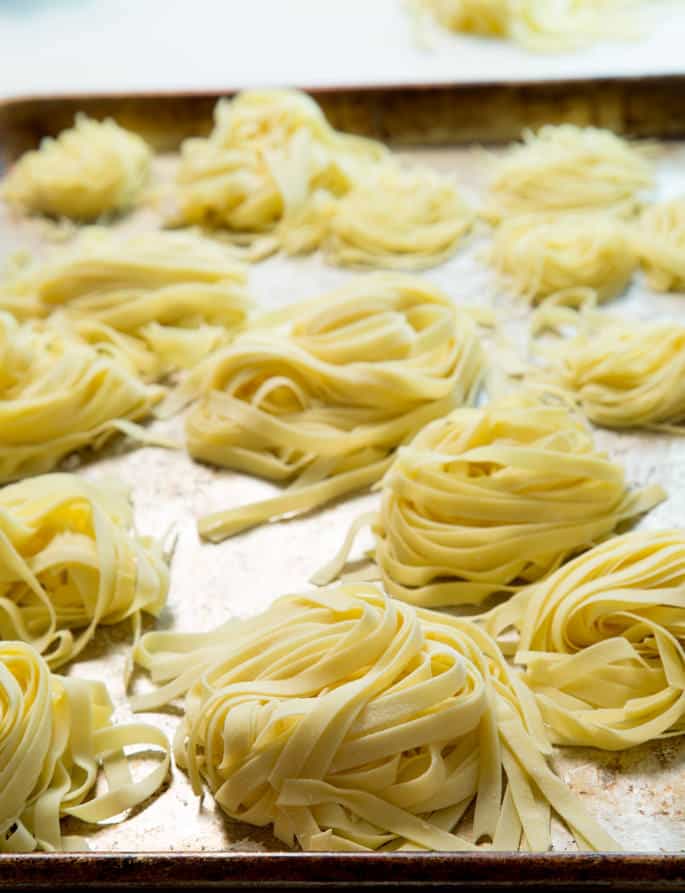
Why bother making gluten free pasta? What makes it so special?
It is, indeed, a fair question. Why would anyone make fresh pasta when dried pasta can be had at every grocery store—even when you're gluten free?
Fresh pasta is just really, really special. There are a couple varieties of fresh gluten free pasta that you can buy, mostly at Whole Foods. I admit, I'm sometimes tempted to try just one package.
But at over $15 for 9 ounces, it just isn't happening.
The first time I shared a recipe for homemade gluten free pasta here on the blog was in 2009. I was concerned that I was creating unrealistic expectations for my children.
It was one of the first times that my son made the connection between scratch cooking and, well, cooking not-from-scratch. He was 5 at the time.
My kids see me boiling store-bought dried pasta all the time. No biggie. But when they first saw me make fresh pasta, my son started thinking. When he finished his dinner of homemade ravioli, he asked, “Hey, Mom, wouldn't it be cool if you made your own water?”
My son, now full grown, doesn't wonder if I'll be making my own water next. Or water into wine.
Instead, he asks, “why would you do that, when you can just buy it?” Ah, the blessings of having children… Oh, and if you love the idea of making fresh pasta but just can't swing it right now, here are 8 excellent brands of gluten free dried pasta to try.
What's the best gluten free flour for pasta?
For this recipe you need a high quality all purpose gluten free flour blend. My choice of gluten free flour is Better Batter for this particular recipe, as it has the right blend of finely ground rice flour and starches. Cup4Cup is another good alternative. Or you can make your own all purpose gf flour mix with my easy guide.
Do you need a pasta machine to make gluten free pasta?
You don't need a pasta machine to make this gluten free pasta recipe, although I do have one.
Sometimes, I use it, and sometimes I don't. But with the holidays approaching, if you're feeling ambitious, you should know how to make it.
You don't need any sort of crank pasta machine to make this fresh gf pasta. You can run it through a hand crank machine, and I can show you how in our recipe for gluten free egg noodles pasta.
It's super easy, if you have the machine, but please don't run out and get one just because you think you must have it to make fresh pasta.
Oh, in case you've ever wondered how to take that pasta and shape it into fresh gluten free tortellini…
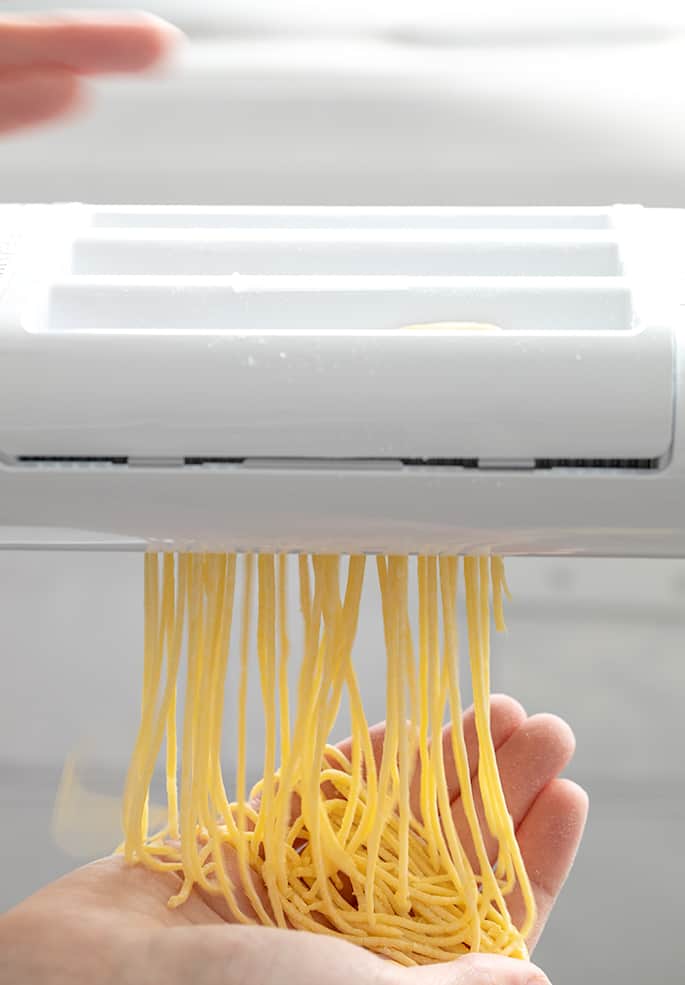
Tips for the making homemade gluten free pasta
Gluten free pasta recipes don't have to be daunting or difficult. You can whip up a batch of gluten free pasta dough in no time. It's not difficult. But I do have few tips for you that'll help make your own pasta better than regular pasta every time.
What if gluten free dough is too wet?
If you've followed the recipe closely, the pasta dough shouldn't be too wet. But if it is, you need to work in a little more gluten free flour, just a sprinkle at a time, until the dough is firm enough to work.
Can you make gluten free pasta vegan?
To get the real, authentic gluten free pasta taste and texture, I really do think you need eggs. Having said that, I've seen folks have success with a flax egg or a chia egg, but the pasta won't look quite so pretty, and I think the texture may change a little, too. Other egg substitutes for vegan gluten free fresh pasta include aquafaba and non-dairy yogurt.
How do you store fresh gluten free pasta?
You can store the dough, wrapped tightly, in the refrigerator for up to three days before you roll and cook it. You can also freeze it for up to three months.
It's also possible to dry the raw pasta by running it through your pasta roller or rolling and cutting it into fairly thin noodles, forming it into loose “nests”, and setting it in your dehydrator on a low temperature for 12 to 24 hours. Then store the dried nests in an airtight container.
Do I have to use xanthan gum?
Yes, for this recipe, you do need to use xanthan gum in your gluten free pasta dough. Xanthan gum helps with binding and texture. It mimics gluten without causing sensitivity in most people. However, if you need to avoid it, you can try using an equal amount of konjac powder instead, like I did in this recipe for gluten free biscuits without xanthan gum.
I can't guarantee it'll work here, though, as I've only used xanthan gum. So if you try it, let me know if it works!
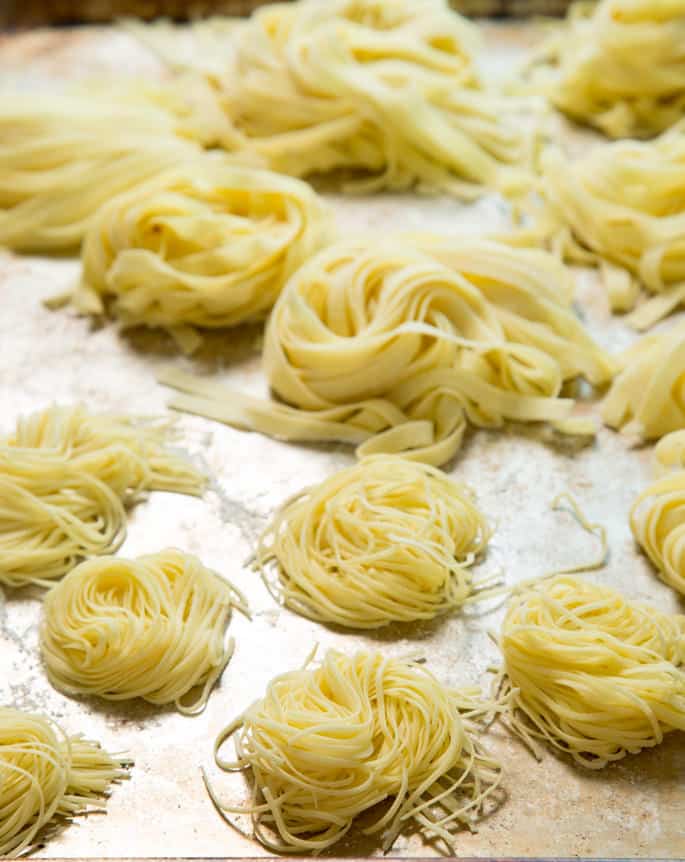
FAQs
Can you freeze gluten free pasta?
Yes, you can freeze raw pasta dough, even if you're on a gluten free diet. Wrap the unshaped dough tightly in a freezer-safe wrap like Glad Press n Seal, and freeze for up to three months. Let it thaw fully before you try to roll it.
Can you add flavor to gluten free pasta?
Yes, absolutely! This recipe already has a little salt in the dough, and you can add other flavorings if you want, but the easiest and best way to create flavorful pasta is to make beautiful, colorful pasta dishes.
Why did my pasta break?
When you're making pasta, whether you're using gf flour or conventional flour, and the dough forms but breaks, it could be for a few different reasons.
The most likely is that you haven't conditioned your dough enough. Pasta dough needs to be kneaded, rolled, and folded multiple times before it's ready to be rolled thin and cut.
It can also happen if the dough isn't hydrated enough. Perhaps the eggs you used were a little smaller than normal, for example (hence I recommend weighing the eggs out of their shells).
How long does gluten free pasta stay fresh?
Once cooked and refrigerated, gluten free pasta lasts up to three days. The dough, if tightly wrapped, can also last three to five days in the fridge.
What happens if you overcook gluten free pasta?
Don't! You'll ruin all your hard work! Cooking time is crucial for gluten free pasta. If you overcook it, even by a minute or two, it'll go gummy, sticky, or mushy. You cook this pasta for only a couple of minutes, until it's al dente.
How to make homemade fresh gluten free pasta, step by step
Homemade Gluten Free Pasta Recipe
Make delicious fresh gluten free pasta with our easy homemade gluten free pasta recipe. All you need is simple ingredients and a little time.
Yield: 1.5 pounds fresh pasta
Equipment
- Food processor, fitted with the steel blade
Ingredients
- 2 cups (280 g) all purpose gluten free flour blend (I like Better Batter here; click through for details) plus more for dusting
- 1 teaspoon xanthan gum omit if your blend already contains it
- 5 tablespoons (45 g) Expandex modified tapioca starch (or replace with an equal amount of tapioca starch/flour) (See Recipe Notes)
- ½ teaspoon kosher salt
- 2 (100 g (weighed out of shell)) eggs at room temperature, beaten
- 2 (50 g) egg yolks at room temperature, beaten
- 1 tablespoon (14 g) extra virgin olive oil
- ⅓ cup (2.67 fluid ounces) warm water plus more, as necessary
Instructions
- In the bowl of a food processor fitted with the steel blade, or a large bowl, place the flour, xanthan gum, Expandex (or tapioca starch/flour), salt, olive oil, eggs and egg yolks, and pulse until combined.
- If not using a food processor, whisk together the dry ingredients before adding the oil, eggs and egg yolks, and mix to combine well. Add 1/3 cup water, and process (or mix) until moistened.
- With the food processor on, remove the hopper and add more water very slowly until the dough clumps to one side of the food processor.
- In a bowl, add water about 1 teaspoonful at a time, mixing constantly until the dough holds together well. If the dough feels stiff, add more water until pliable.
- Transfer the dough to a lightly floured surface and divide it into 4 parts. Work with one part at a time and cover the others with plastic wrap to maintain moisture.
- Knead the dough until smooth and roll into a rectangle. Divide the dough in half, and roll each half into a rectangle about 1/4-inch thick.
- Trim the edges, dust the rolled-out dough lightly, and feed each piece through a pasta machine if using.
- I don’t like to roll the dough any thinner than the “5” setting on my machine, or it begins to tear. Otherwise, simply roll each piece as close to 1/8-inch thick as possible, as evenly as possible.
- Cut into shapes using the pasta machine or a sharp knife.
- Bring a large pot of salted water to a rolling boil. Place the fresh pasta in the water and cook, stirring to prevent the dough from clumping, for about 2 minutes or until it reaches an al-dente texture.
- Toss with sauce and serve immediately.
Notes
About Expandex modified tapioca starch.
For information on where to find Expandex, please see the Resources page.
For information on how to replace Expandex with Ultratex 3, readily available in most countries outside the United States, in the gluten free bread recipes in GFOAS Bakes Bread, scroll to #6 in Resources.
I have not yet tested Ultratex 3 in this recipe, but I would recommend trying 15 grams Ultratex 3 in place of Expandex, and adding another 30 grams of Better Batter to the recipe. Ultratex 3 is at least 3 times as strong as Expandex.
This recipe was originally posted on the blog in 2009. In 2016, recipe tweaked, photos and video all new. In 2022, text resources added.
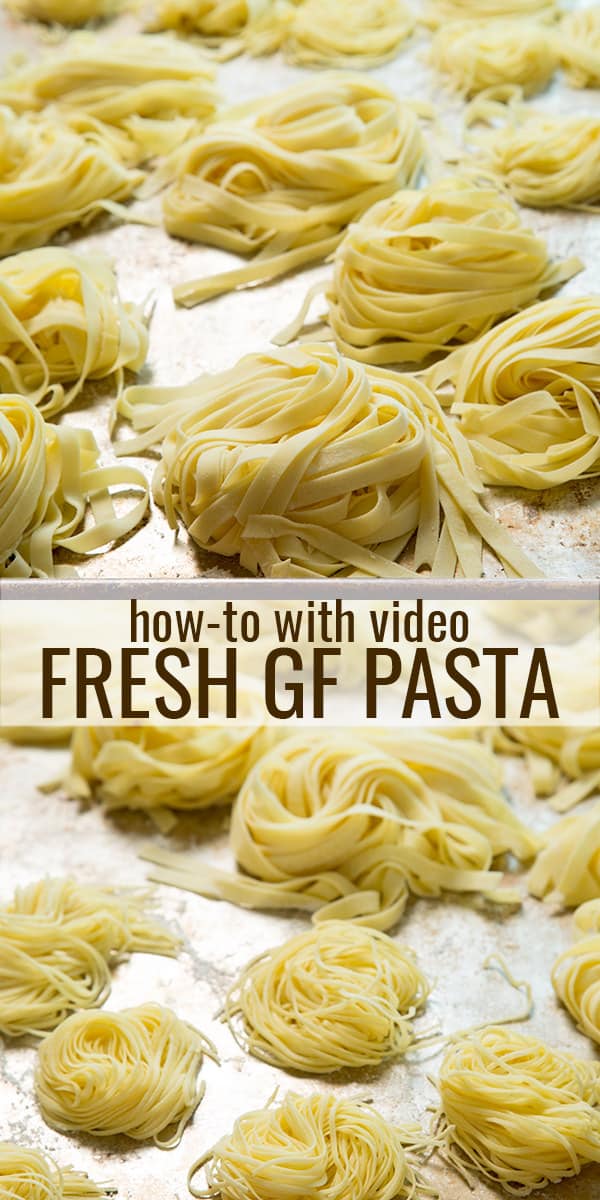
Easy Gluten Free Pita Bread | Ready in Under 30 Minutes w/ No Yeast
This soft and tender gluten free pita bread is also yeast free, so there’s no rising time. Store-bought gluten free flatbreads simply can’t compare.
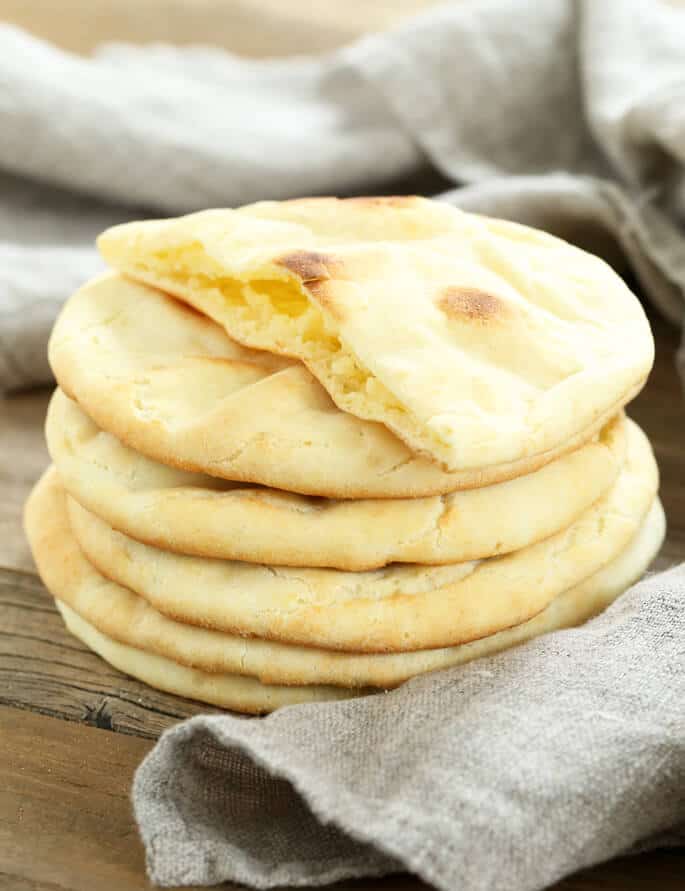
The best gluten free pita bread recipe
Adding this gluten free pita bread to nearly any meal will turn your ingredients turn into a hearty and satisfying meal. This recipe is one of the most valuable ones I've ever created for that reason alone!
Here are some of the other attributes of this special gf bead recipe:
- It's super fast to prepare. No yeast means no rising time!
- It's cheaper than buying store-bought gf flatbread, which always seems to taste like mashed potatoes (no one knows why).
- These pitas have no dubious additives and preservatives, and no freezer burn from something that's been sitting in your grocer's freezer until someone was willing to overpay for it.
- The pita pockets are fluffy, tender, and buttery (all without any butter added).
Why make your own gluten free pita bread?
Without a really good recipe for gluten free pita bread, if you're gluten free, you'll never again know the beauty of, falafel stuffed into a pita. Or homemade pita chips.
I believe that there is even a value to knowing that you can make your own pita bread even if you do it once and never again. Or even if you never actually make this bread.
Sometimes, just knowing that you can make something gluten free can create a feeling of encouragement and hopefulness. It can help you resist “cheating” on a gluten free diet, too.
Yeast free bread
This recipe for gluten free pita bread is even a bit more special, since it's yeast free. If you're hesitant to try baking yeast bread, or you simply have to eat that way, this recipe is going to be quite a relief.
If you feel like making bread but you find that you're suddenly all out of yeast, or you find that the store shelves are empty, you can make plenty of gluten free bread without yeast.
Gluten free pita bread ingredient notes
- Gluten free flour blend – I highly recommend making this recipe using Better Batter gluten free flour's classic blend, or my mock Better Batter blend. This is a relatively simple recipe, and Better Batter simply has the best formula for making gluten free bread.
- Expandex modified tapioca starch – This is the chemically modified, not genetically modified, form of tapioca starch that plays a central role in our gluten free bread flour blend. Adding a touch of it to this recipe helps strengthen the dough, making it easier to shape raw (as it requires less liquid), and making a more stable gf pita. If you don't have Expandex or don't want to use it, you can replace it with more Better Batter, and increase the liquid by ⅓ as directed in the Recipe Notes below.
- Baking powder – Since we aren't using any yeast in this bread, baking powder provides nearly all the rise. Make sure yours is fresh or your bread will be rock hard!
- Salt – Salt adds brightness and complexity to the pita. Bread without salt has no taste at all!
- Oil – A single tablespoon of a neutral oil (like grapeseed, canola, or vegetable oil) adds some richness and tenderness to the bread without adding any competing flavor.
- Eggs – One egg and one egg white help add structure, a bit of richness, and help your pita bread rise.
- Milk – Milk adds liquid, and some richness, and helps tenderize the dough. Make sure you use milk with some fat, as skim milk will add essentially nothing more than water would.
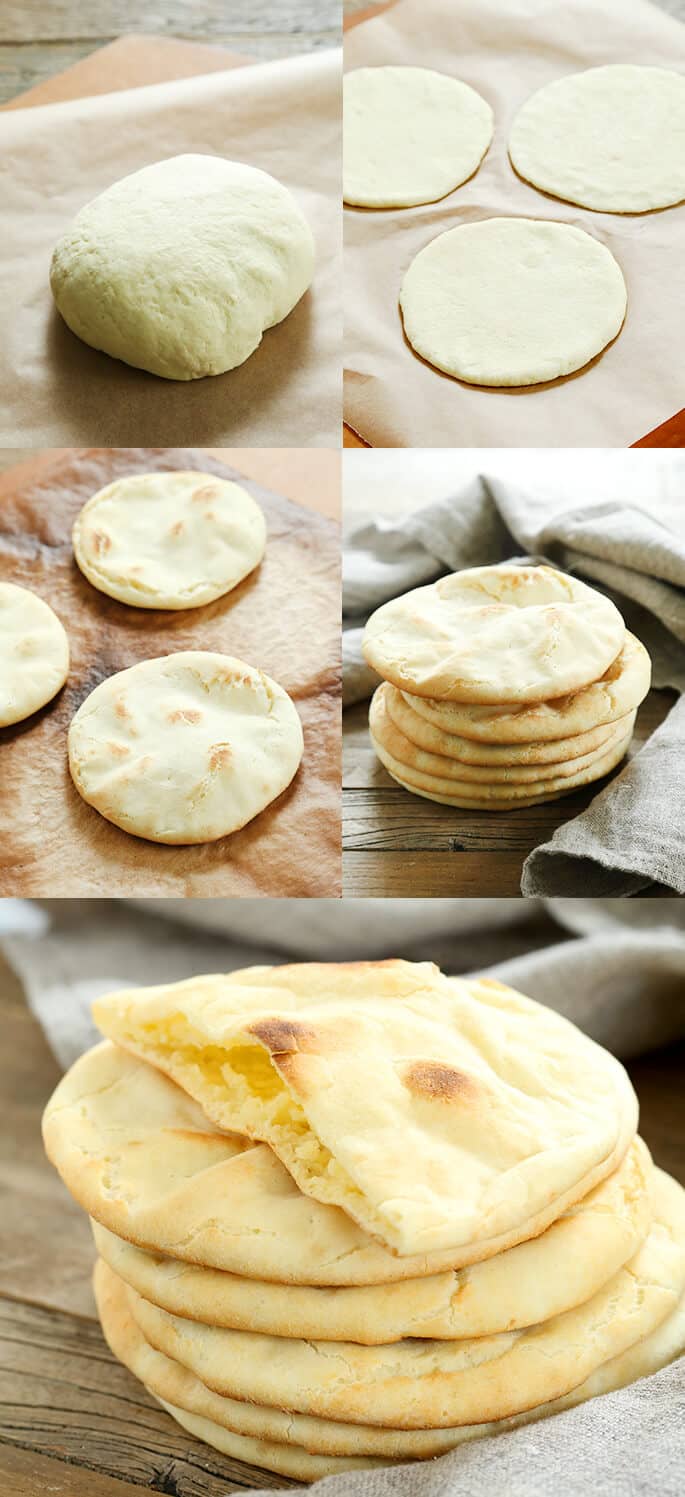
The tools you'll need for this gluten free pita recipe
To make a smooth dough, you'll need either a stand mixer fitted with a paddle attachment, or a food processor fitted with the steel blade. This isn't a dough that you can make with a dough hook, or with the regular beaters on a handheld mixer as they'll simply shred the dough without combining it properly.
If you have a pizza stone, it's really useful to use one in your oven. It will retain enough heat to brown and blister your pitas a bit in the few minutes they're in the oven without having to bake them so long that they end up stiff and tough. If not, at least use an overturned baking sheet to allow the oven's heat to circulate on all sides as much as possible.
Pitas with a pocket but don't pop
Since it's not made the traditional way, and we aren't using my recipe for gluten free bread flour from my Gluten Free Bread Book (there's a recipe for traditional pita bread in there), these pitas don't “pop” to create a perfect pocket.
They do, however, puff up quite a bit, enough that we can coax open a gluten free pita pocket with a sharp knife. They're soft and tender, and almost buttery tasting—even without any butter.
Expect them to crack a bit along the edges as they puff, since only our gluten free bread flour will give you an even enough rise and a strong enough shell to prevent that cracking. It doesn't hurt them one bit, though.
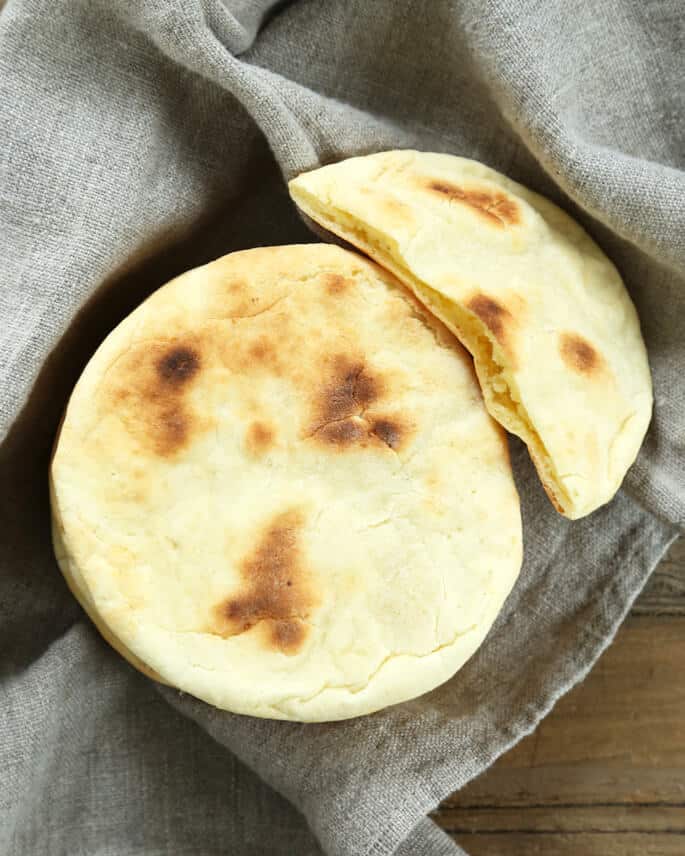
Tips for making the best homemade gluten free pita bread
Roll thinly and evenly for puffy gf pita bread
If you roll the dough thicker than ¼-inch, they'll be too thick and are much less likely to puff up at all. You'll have to bake them too long to get any browning at all, and they'll be a bit stiff. If they're not rolled rather evenly, they are likely to burn in very thin spots and make a pocket impossible.
Don't sweat the details too much
Your pita bread won't be perfectly round, but you only need it to be of even thickness so it bakes evenly. Roundness is not essential. Ovals work just as well!
Keep an eye out for the puffing
Be sure to flip your pitas relatively quickly, so both sides make proper contact with the hot baking surface, and then watch them carefully to remove them when they've puffed as much as they are going to. Overbaking your pitas will cook them too much in the center, which will make them less tender.
Making gluten free pita pockets in advance
Place the warm pitas in a tortilla warmer or seal them, along with a moistened paper towel, in a zip-top bag on the counter for a few hours and they'll stay that way.
For longer storage, cool them completely, wrap tightly and freeze. Defrost at room temperature and refresh in a hot, cast iron skillet or in the microwave wrapped in a moistened paper towel.
But they're so quick and easy, just make them fresh each time. I promise it doesn't take more than 20 minutes, start to finish!
How to store leftover gf pita bread
I don't like to refrigerate bread, even yeast free bread, since the refrigerator tends to dry out baked goods. You can store leftovers in a tightly sealed container (plastic works well here, to retain moisture) for up to 2 days, as long as you've created that pocket soon after baking.
For longer storage, cool them completely, wrap tightly, and freeze. Defrost at room temperature and refresh in a hot, cast iron skillet or in the microwave wrapped in a moistened paper towel.
But they’re so quick and easy, just make them fresh each time. I promise it doesn’t take more than 20 minutes, start to finish!
How to serve gluten free pita bread
- Try stuffing your pita pockets gluten free falafel or chicken salad.
- If you have any pitas that are no longer fresh and weren't stored properly, they're a great candidate for making gluten free pita chips! Just slice into triangles, toss very lightly with some extra virgin olive oil and kosher salt, and bake in a very hot oven, about 425°F until lightly golden all over (about 7 minutes, depending on the thickness of your pita pieces).
- Do you have any pitas that simply wouldn't allow you to create a pocket? Try using them as gf flatbread, add toppings, and place in the toaster oven until melted for a flatbread pizza!
- Try them as a yeast free alternative to gf hamburger buns.
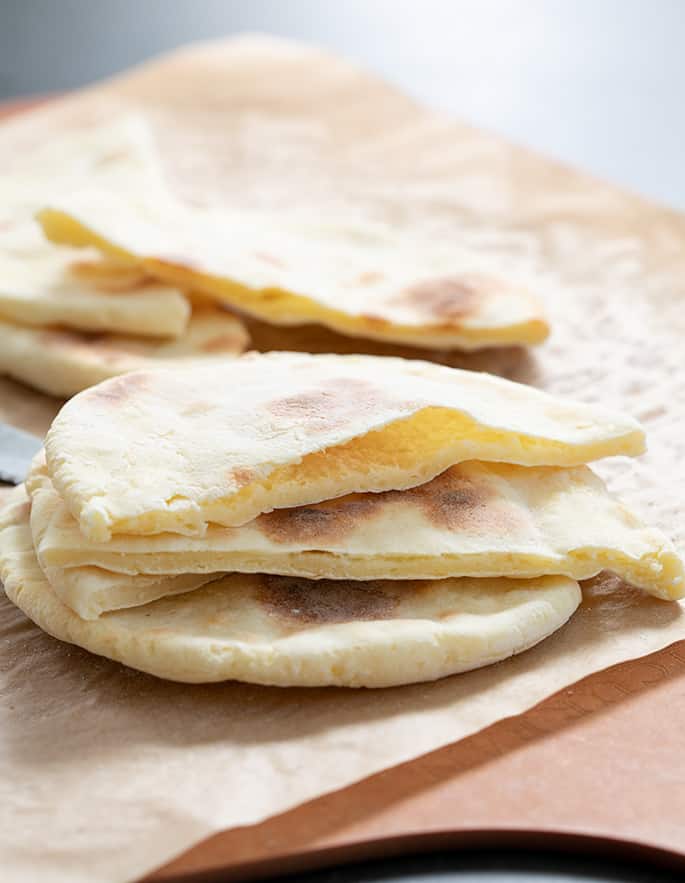
Gluten free pita bread: substitutions
Gluten free, dairy free pita bread
The only dairy in this recipe is in cow’s milk. It can easily be replaced with an unsweetened nondairy milk. My favorite is almond milk, since it still has richness. Avoid anything without fat.
Gluten free, egg free pita bread
There is one egg and one egg white in this recipe. The egg yolk adds richness, and the egg whites help balance the moisture and help the bread rise.
You may be able to replace the whole egg in this recipe with a “chia egg” (1 tablespoon ground white chia seeds + 1 tablespoon lukewarm water, mixed and allowed to gel).
For the egg white, try aquafaba (the liquid from a can of chickpeas).
Gluten free, vegan pita bread
To make this recipe vegan, you only need to replace the dairy and the eggs as described above with the dairy free and egg free alternatives recommended.
Expandex modified tapioca starch
Expandex modified tapioca starch is a chemically-modified form of tapioca starch (not genetically modified!) It is not interchangeable with regular tapioca starch/flour.
It’s an amazing addition to this recipe as it provides stability and pliability. If you don’t have Expandex or just don’t want to use it, you can replace it with more all purpose gluten free flour and increase the liquid amount to 1 cup.
Note that if you go this route, the dough will be much wetter and less formed. Handle this dough with wet hands, divide it into 8 portions, and roll each into an approximate ball with wet hands.
Place the dough on a piece of parchment paper, and spread it into a round about 1/4-inch thick by pressing wet fingers down in a circular motion on the dough, and then continue with the recipe instructions as written.
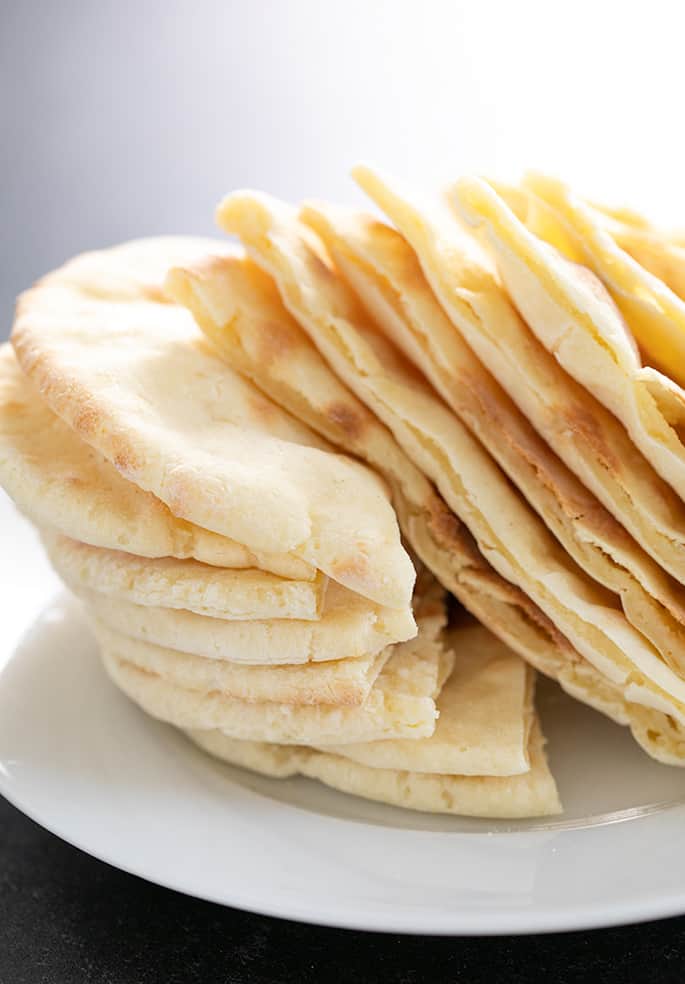
FAQs
What is pita bread?
Pita is a simple, leavened flatbread common in the Mediterranean and the Middle East. It often has a center pocket where the dough has separated from itself in the center as it rises.
Is pita bread gluten free?
Pita bread is generally made with conventional wheat flour, so it is only gluten free when you use gluten free ingredients and a gf pita recipe, like this one.
Is gf pita bread healthier than regular bread?
Gluten free breads and other baked goods aren't necessarily healthier than their conventional counterparts, unless eating gluten or wheat is bad for your individual health.
Is gluten free pita the same as naan bread?
No, pita bread is different from naan. Naan bread is more tender and richer, made with yogurt, and generally isn't made to separate from itself to create a pocket, like this type of pita.
Is pita bread the same as gluten free gyro bread?
No, gyro bread typically doesn't have a pocket, and is more like naan bread. But you can absolutely use pita bread with or without a pocket to serve chicken gyros!
Can I use a cast iron skillet for this gluten free flatbread recipe?
No, I don't recommend making this bread in a skillet. I've tried making this recipe on the stovetop instead of in the oven, and it just doesn't work well. Even when the skillet is covered, the air in the pan just doesn't get hot enough.
What's the best flour for this gluten free pita bread recipe?
The gluten free flour blend that I highly recommend using to make pita bread is Better Batter's classic blend, which is a blend of brown rice flour, white rice flour, potato starch, potato flour, tapioca flour, xanthan gum, and pure powdered pectin.
Why aren't my gluten free pitas puffing up?
Pitas that don't swell at all may have been too dry (did you overmeasure your flour? use a different blend?), your oven may not have been hot enough (do you use a standalone analog oven thermometer to check the temperature?), or you may not have rolled them thin enough or evenly enough. Be sure not to work too much extra flour into them as you shape them, either!
How to make gluten free pita bread, step by step
Easy Gluten Free Pita Bread | Ready in Under 30 Minutes w/ No Yeast
Make this gluten free pita bread to use for sandwiches, dipping, and more. This gf pita bread recipe takes less than 30 minutes to prepare with no yeast.
Yield: 8 pitas
Equipment
- Stand mixer (or food processor)
Ingredients
- 1 ¾ cups (245 g) all purpose gluten free flour blend (I used Better Batter; click thru for info on appropriate blends), plus more for sprinkling
- 1 teaspoon xanthan gum omit if your blend already contains it
- ¼ cup (35 g) Expandex modified tapioca starch (See Recipe Notes)
- 1 ½ teaspoons baking powder
- 1 teaspoon kosher salt
- 1 tablespoon (14 g) neutral oil (like vegetable, canola or grapeseed)
- 1 (50 g (weighed out of shell)) egg at room temperature
- 1 (25 g) egg white at room temperature
- ¾ cup (6 fluid ounces) milk at room temperature
Instructions
- Preheat your oven to 400°F. If you have a pizza stone, place it in the oven while the oven preheats. If not, use an overturned rimmed baking sheet
- In the bowl of your stand mixer fitted with the paddle attachment (or the bowl of your food processor fitted with the steel blade), place the flour, xanthan gum, Expandex, baking powder and salt. Mix (or pulse) to combine.
- To the dry ingredients, add the oil and then the eggs and milk and beat (or process) the dough until it is very well-combined and parts begin to pull away from the sides of the bowl (about 2 minutes). The dough should be thick and tacky to the touch.
- Turn the dough out onto a very lightly floured surface, and sprinkle it very lightly with more flour. Using a bench scraper or sharp knife, divide the dough into 8 equal parts.
- Roll each into a ball by rotating it in a circular motion on a very lightly floured flat surface. Pat each ball into a disk and then, using a rolling pin and flouring the round very lightly to prevent sticking, roll it out into a round a bit less than 1/4-inch thick.
- Place the disks about 1-inch apart on a piece of unbleached parchment paper. Place the disks on the parchment in the oven (on top of the baking stone or overturned baking sheet) and allow to bake for 2 minutes.
- Working quickly, open the oven and invert the pitas. Allow them to bake for 1 minute and then re-invert and bake until puffed and very pale golden on top (another minute).
- Remove the pitas from the oven, and allow to cool for about 3 minutes, or until they can be handled. Slice each round in half through the center. With a very sharp knife, gently coax open the center of each pita half. Serve warm or at room temperature.
Notes
For information on where to find Expandex, please see the Resources page.
In this particular instance, if you don’t have Expandex, you can replace it with more all purpose gluten free flour, and increase the liquid amount by ⅓ to 1 cup. This will work particularly well if your all purpose gluten free flour blend is my favorite for this recipe, Better Batter's classic blend.
The dough will be much more wet, and less formed. Handle this dough with wet hands, divide it into 8 portions, roll each into an approximate ball with wet hands.
Place the dough on a piece of parchment paper and spread it into a round about 1/4-inch thick by pressing wet fingers down in a circular motion on the dough. Continue with the recipe as written.
This recipe was originally published on the blog in 2011, and a version of it is in my second book, Gluten Free on a Shoestring Quick & Easy. It was updated in 2016 with more photos and a video, and in 2022, more text resources were added.
Nutrition
Calories: 141kcal | Carbohydrates: 26g | Protein: 2g | Fat: 2g | Saturated Fat: 1g | Polyunsaturated Fat: 1g | Monounsaturated Fat: 1g | Trans Fat: 0.01g | Cholesterol: 3mg | Sodium: 408mg | Potassium: 37mg | Fiber: 1g | Sugar: 1g | Vitamin A: 37IU | Vitamin C: 0.001mg | Calcium: 73mg | Iron: 0.1mg

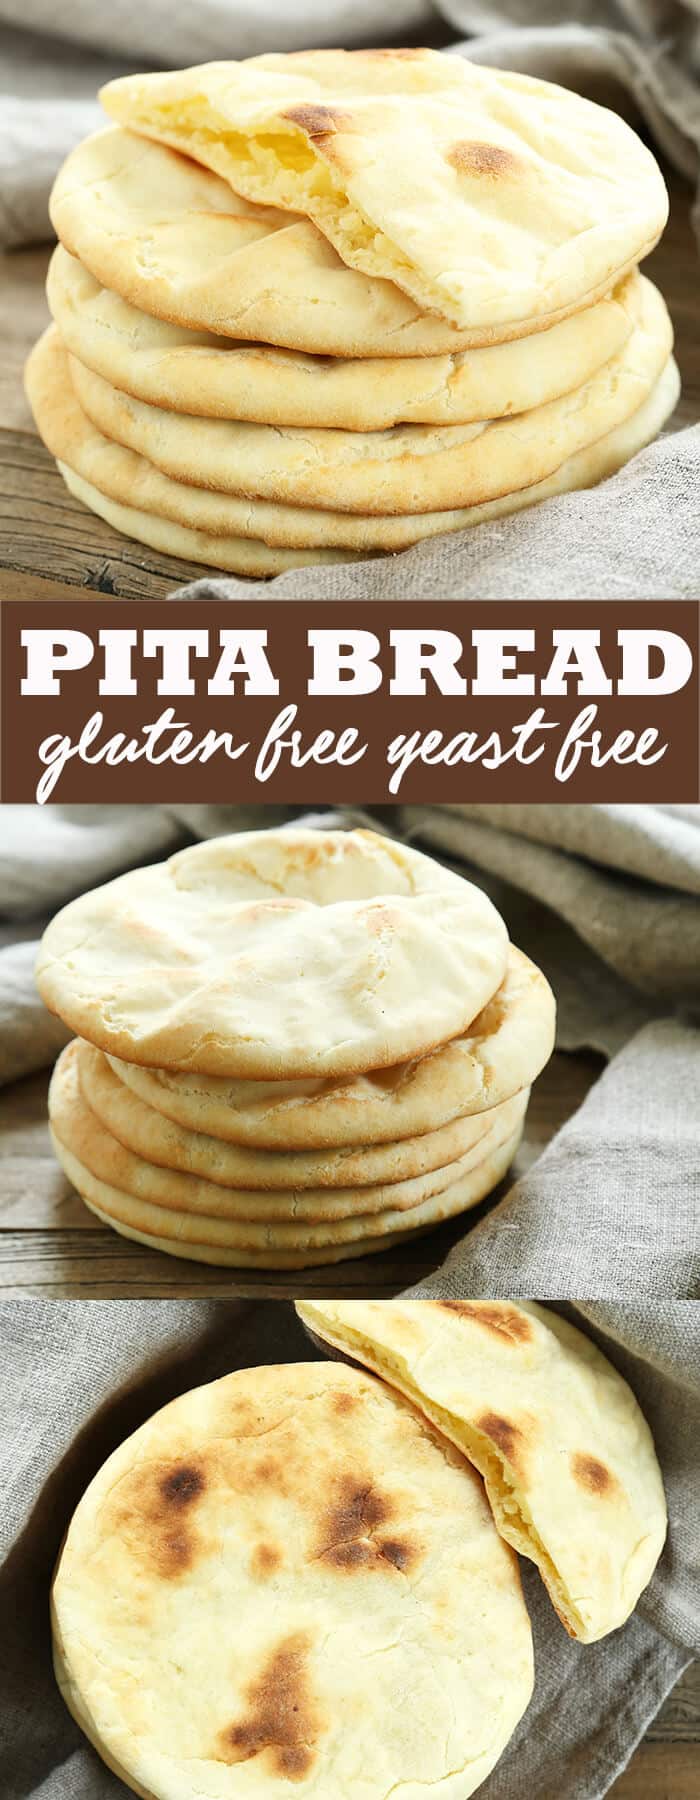
Gluten Free Hamburger Buns
This recipe for gluten free buns is for everyone who has ever eaten a burger on a lettuce wrap and pretended it was “fine.” I love lettuce as much as the next person, but it's not a hamburger bun.
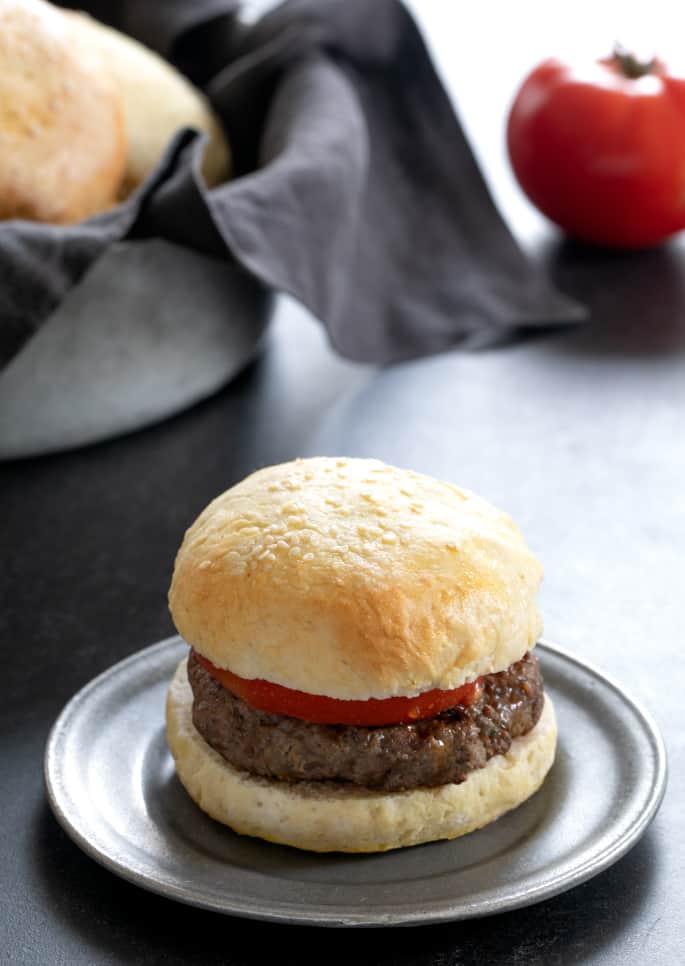
The no bun burger should be a choice
Whether there's a gluten free bun available or not, I usually go for a lettuce wrap. If that makes no sense to you considering how I've been complaining about the bun-less gluten free burger since 2011, allow me to explain.
If I'm eating a burger, whether it's vegetarian or meat, I just don't care for it with any sort of bread in every bite. I've been like that for as long as I can remember, long before I even knew what gluten was. But that is my choice.
My gluten free son likes a bun, and he should have one. There are more and more fast-casual hamburger restaurants that can accommodate gluten free eaters, which is great. But many of them can only offer you a lettuce wrap. I love lettuce wraps, but I prefer to choose among alternatives.
What makes this the best gluten free buns recipe
This gluten free bun recipe is very simple, and accommodates other dietary restrictions quite easily. The dough can be made up to 3 days ahead of time, and the baked rolls freeze really well.
And when I say that these are the best gluten free hamburger buns, I mean it! But not just for hamburgers. Depending on how you shape the dough, you can make smaller sliders, fatter rolls, or flatter sandwich buns.
When it comes to taste and texture, you really won't be disappointed. This isn't a fragile, crumbly roll that's going to fall apart when you bite into a big, juicy gluten free hamburger or pile it high with lunch meat, lettuce, and all the fixings.
This gluten free bread is soft and squishy and everything you've ever wanted in gf hamburger buns.
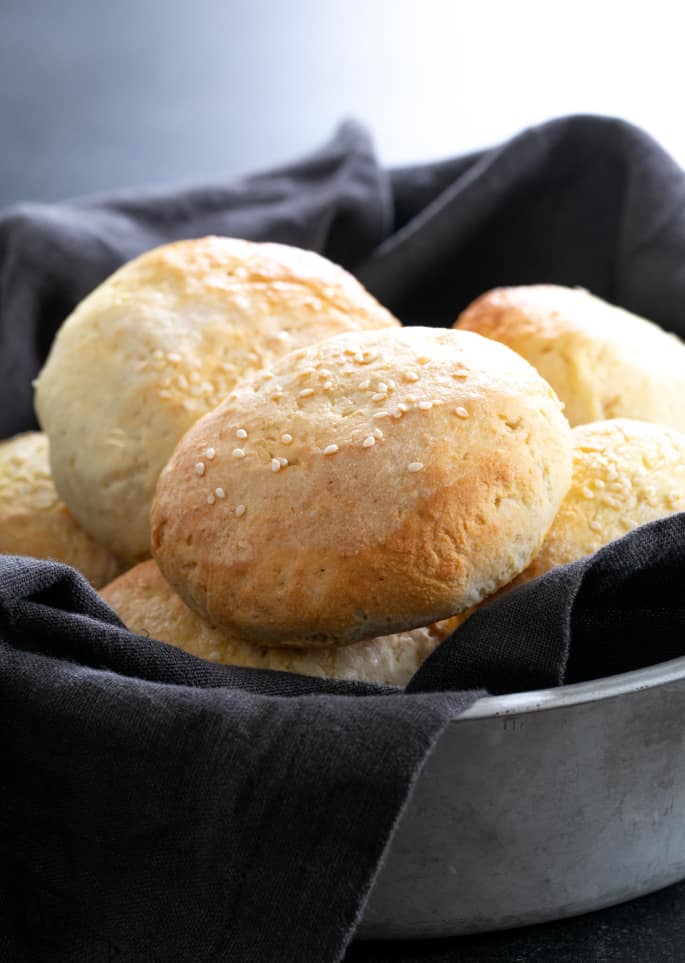
Gluten free buns ingredient notes
- All purpose gluten free flour blend – I highly recommend Better Batter for these hamburger buns, as it's by far the best all purpose gluten free flour to use as a base in yeast bread. You can also combine an all purpose blend + Expandex (see recipe notes for more info).
- Xanthan gum – only include it if your gf flour blend doesn't already contain it (Better Batter, for example, already has xanthan gum)
- Buttermilk blend powder – helps produce a tender bread, all while adding some flavor; see the substitutions list for a dairy free option. Do not use liquid buttermilk in its place, as your dough will be soupy.
- Yeast – you can use active dry yeast if you want, but instant yeast is easier. If you decide to use active dry yeast, you'll need 25% more yeast, by weight, and you'll have to hydrate it first in some of the water from the recipe.
- Apple cider vinegar – helps with lift, tenderizes the bread dough, and adds subtle flavor
- Cream of tartar, and baking soda – also helps with lift for an airy bread, and neutralize the acidic ingredients
- Light brown sugar – will feed your yeast, and add some depth of flavor
- Salt – Salt adds flavor to your bread; bread without salt is inedible!
- Butter – you want room temperature, not melted butter; otherwise the dough won't set up properly
- Eggs – an egg white helps bind the bread and make it fluffy, and while a whole egg gets beaten to use as an egg wash
- Warm water – temperature is important here; if the water's too hot, you'll kill your yeast
- Sesame seeds – poppy seeds, onion flakes, dried herbs — you've got options for topping your bread, if you wish to
Tips for making gluten free hamburger buns
Similar to our recipe for gluten free Japanese milk bread, the dough for these buns is made mostly by dumping all of the ingredients (first dry, then wet) in a large bowl, and then mixing until fluffy.
Other than having the right recipe, of course, and the right, quality gluten free ingredients, there are some keys to the success of this recipe. Let's talk about them.
Bring your gluten free hamburger bun ingredients to room temp
Mixing some ingredients, like butter, just goes easier when they're softer.
But more than that, you need to create the ideal environment to activate your yeast for this burger buns recipe.
As yeast needs warmth to get going (which you'll kick start with the warm water), you'll only put the brakes on if you toss in cold butter and eggs.
Don't be afraid of a wet dough
If you want any yeasted dough to rise, you must have a proper wet to dry ingredient ratio. When the ratio of wet to dry ingredients is too low, the dry ingredients (most the flour) are overwhelming the wet ingredients (mostly the water), and the yeast will not rise. That's just the way it works.
Yeast isn't active at very, very high temperatures or very, very low temperatures, but it's rare that temperature will prevent your dough from rising. Those toxic temperatures are very extreme.
If your dough isn't rising, it's usually because your dough is too dry—or you didn't wait long enough.
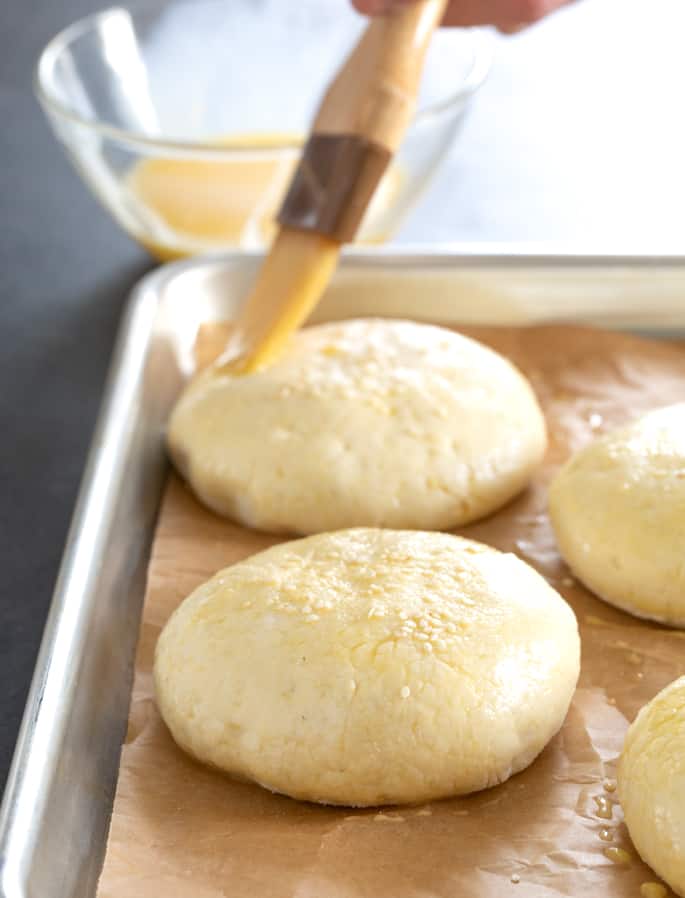
Shape with a light touch
In this sort of recipe, I prefer to start with a wet dough. It's more difficult to shape and handle, but you can flour the dough generously during shaping without drying it out too much.
Just handle the dough with a light touch, and even a bit of extra flour won't incorporate into the center of the dough where it will stifle the yeast.
Be patient but don't let it rise too much
If your dough hasn't risen enough after shaping, your kitchen might be rather dry or a bit on the chilly side. Don't worry—if you've measured your ingredients properly (including weighing the water so you didn't undermeasure it) and you've covered the baking sheet properly, the dough will rise.
If the environment isn't quite right, it will just slow the yeast's activity. Be patient with the rise.
Since this recipe is made in the batter-style (like our beloved white sandwich bread), it doesn't rise as smoothly as the recipes made with gluten free bread flour. When conventional bread rises, the gluten creates an invisible netting that traps the rise and keeps the top of the bread taut, like when you pull plastic wrap tightly over a bowl.
Without the gluten or even a super close replacement, in a recipe like this, the top of the dough will become pitted and cratered at the very end of a proper rise. When the craters begin to form, the dough has risen fully and it's ready for the egg wash and a spin in a hot oven.
Storing gluten free burger buns
You can keep your gf buns at room temperature on the kitchen counter for about three days. Just keep them in an airtight container or zip-top bag so that they don't dry out.
If you're making a big batch of gluten free hamburger buns to store for later, give them time to cool completely, slice them, and then wrap them individually. For extra protection from freezer burn, throw a few wrapped buns into a zip-top bag, and then pop them in the freezer.
Burger buns stay good on ice for about two months. To defrost, remove what you need and leave them in the refrigerator overnight. You can also drop them into a toaster oven while frozen, on the light setting.
The texture of the bread will change a bit from being frozen, but you can improve it by toasting the bread with a little bit of butter in a skillet. You can also wrap a bun in a damp paper towel and microwave for 20 seconds.
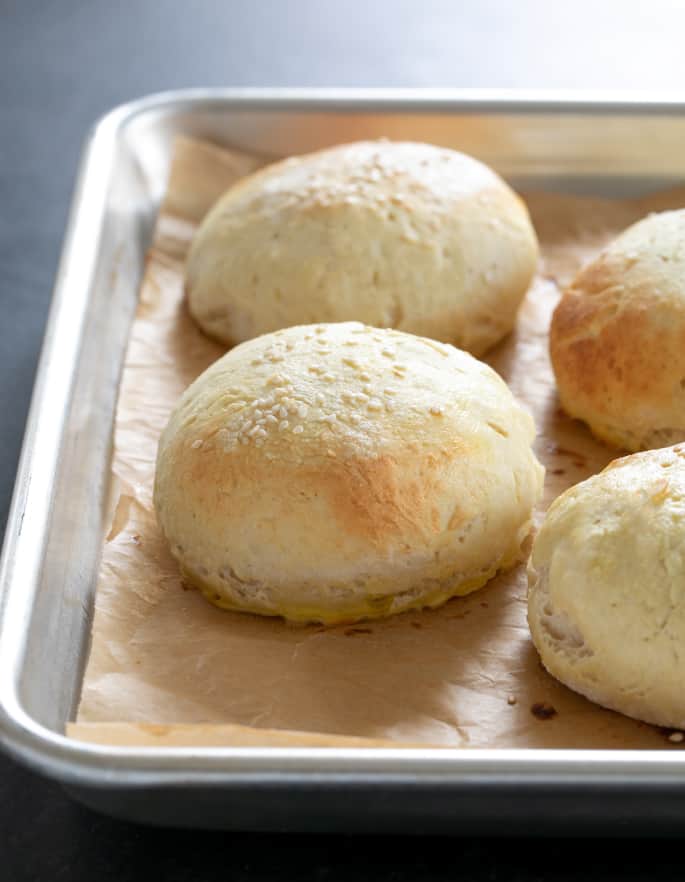
Gluten free buns: ingredients and substitution suggestions
Gluten free dairy free hamburger buns
In place of nonfat dry milk or buttermilk powder, you can use powdered coconut milk by weight (about 40 grams). In place of butter, Melt or Miyoko's Kitchen vegan butter should work great.
Gluten free egg free hamburger buns
There is one egg white in the bread dough, which helps them rise.
You can try replacing it with aquafaba (the brine from a can of chickpeas), but I'm afraid I haven't heard about great results from using that in baking.
The egg wash on top of the rolls can be replaced with melted butter or even some olive oil. It helps the rolls brown lightly in the oven, and take on a slightly shiny appearance.
Vegan, gluten free hamburger buns
You can make this easy gluten free hamburger bun recipe vegan by following my suggestions above for replacing the dairy and eggs. Just be sure your brown sugar is made without bone char.
Apple cider vinegar or cream of tartar replacements
Both apple cider vinegar and cream of tartar help add lightness and lift to these rolls. If you'd like to try eliminating one or both, you can try lemon juice in their place, but you'll have to experiment with amounts.
Expandex replacement
You absolutely do not have to use Expandex modified tapioca starch (which is not the same as regular tapioca starch) in place of some of the flour in this recipe.
It does help to make the dough easier to handle, and the rolls chewier. They also tend to have a longer shelf life. You can also try, in this individual instance, replacing the Expandex with regular tapioca starch/flour.
For a more complete discussion of what Expandex can add to a gluten free bread recipe like this, please see our recipe for basic gluten free pizza dough.
FAQs
Are gluten free buns also wheat free?
If you buy gf burger buns at the store, they may or may not be wheat free. For example, gluten free bread made with Caputo Fioreglut gluten free flour is not wheat free, since that flour uses wheat starch as an ingredient.
Alternately, make your own wheat free bread when you follow my homemade gluten free hamburger buns recipe. Better Batter gluten free flour, the classic blend all purpose gluten free flour I recommend, is free of the top 8 allergens, including wheat.
Can I use any gf free flour to make these gluten free hamburger buns?
No, this gluten free burger bun recipe won't work if you just grab a random gluten free flour from your pantry.
Making these buns with almond flour or coconut flour, for example, just won't produce the right taste or consistency — unless you're a fan of dense, crumbly, and oddly flavored hamburger buns?
Why didn't my raw shaped buns rise?
When yeast bread dough doesn't rise, there are many possible causes. Did you use one of my recommended gluten free flour blends? Did you measure by weight, not volume? If not, you probably overmeasured your flour which will make the dough dry. Dry dough won't rise. Did you incorporate too much flour into the buns during shaping? That will also dry out the dough.
Can I use this dough to make gluten free hot dog buns?
You could shape this recipe's dough into a hot dog bun, but I've got a better recipe you can try instead.
My gluten free hot dog buns recipe produces a more pliable dough that's better for the unique shape of hot dogs and sausages.
How do you know when gluten free hamburger buns are done baking?
The best way to tell if your gluten free hamburger rolls are done baking is to use an instant read thermometer. A finished bun will read 190°F in the center when done.
How do you shape hamburger buns?
Shaping a homemade gluten free hamburger bun by hand is really simple: Just roll a piece of dough in your hand until it's round, and then flatten it into a disk by pressing it against a floured surface.
If you want to make gluten free sandwich buns, just flatten the disk a little more so that the dough is flatter. For gluten free slider buns, use less dough to make bite-sized buns.
Can I replace instant yeast with active dry yeast?
Yes, you can use active dry yeast instead of instant yeast, but you'll need to use 25% more yeast, by weight (here, that would mean just over 11 grams active dry yeast), and you'll have to dissolve the yeast in some of the water in the recipe before adding it to the rest of the bread dough ingredients.

Gluten Free Hamburger Buns
These gluten free hamburger buns are tender and squishy, and hold their shape perfectly. Enjoy a hamburger like you used to!
Yield: 8 buns
Equipment
Ingredients
- 3 ¼ cups (455 g) all purpose gluten free flour blend plus more for sprinkling (I used Better Batter; click thru for details) (See Recipe Notes)
- 1 ½ teaspoons xanthan gum omit if your brand already contains it
- ½ cup (43 g) cultured buttermilk blend powder (or 1/2 cup + 2 tablespoons (40 g) milk powder)
- 1 tablespoon (9 g) instant yeast (or 1 1/2 tablespoons active dry yeast) (See Recipe Notes)
- ¼ teaspoon cream of tartar
- ¼ teaspoon baking soda
- 1 tablespoon (13 g) packed light brown sugar
- 1 teaspoon (6 g) kosher salt
- 1 teaspoon apple cider vinegar
- 2 tablespoons (28 g) unsalted butter at room temperature
- 1 (25 g) egg white at room temperature
- 1 ½ cups (12 fluid ounces) warm water (about 95°F) (See Recipe Notes)
- Egg wash: 1 egg of any size at room temperature, beaten with 1 tablespoon milk or water
- Sesame seeds for sprinkling optional
Instructions
Make the bread dough.
- In the bowl of your stand mixer fitted with the paddle attachment, place the flour, xanthan gum, buttermilk powder, yeast, cream of tartar, baking soda, and brown sugar and whisk to combine well with a separate, handheld whisk. Add the salt, and whisk again.
- Add the cider vinegar, butter, egg white, and warm water, and mix on medium speed in your stand mixer until the dough begins to come together.
- Turn the mixer to high speed and beat until the dough is no longer a ball but has begun to appear whipped.
- Transfer the dough to an oiled container with a tight-fitting lid or a greased bowl, spray lightly with cooking oil spray, and cover tightly.
- Place in a warm, draft-free area to rise until it’s about 150% of its original volume (about an hour), or refrigerate the dough for up to 3 days.
Shape the buns.
- When you’re ready to make the rolls, line rimmed baking sheets with unbleached parchment paper.
- If you’ve refrigerated the dough, work with it straight from the refrigerator. If you haven’t, place the tightly sealed dough in the refrigerator to chill for at least 15 minutes before working with it, as the dough is easiest to handle when it’s chilled.
- Turn the dough out onto a flat, lightly floured surface, and sprinkle the top with additional flour. Work the dough, squeezing and kneading it, turning it over frequently, until it has begun to appear smoother.
- Using a bench scraper or large knife, divide the dough in two parts and set one half aside (cover to prevent its drying out). Working with the second half of dough, divide it again into 4 equal portions.
- Working with one piece of dough at a time, sprinkle it with more flour, form it into a ball by pinching the ends underneath, then rolling it with the side of your palm pressed against the surface and guiding it with your fingertips into a round.
- Sprinkle the dough with more flour and press it into a disk about 3/4-inch thick with your fingers and palm. Place the disk on one of the prepared baking sheets.
- Repeat with the remaining pieces of dough, and then eventually the other half. You’ll have 8 disks of dough.
Let the shaped buns rise.
- Cover the baking sheets with oiled plastic wrap and place in a warm, draft-free location until each piece of shaped dough is at least 150% of its original volume (about an hour).
- After about 45 minutes, preheat your oven to 400°F. Don’t allow the dough to rise any longer once the tops of the dough begin to take on a pock-marked appearance.
Bake the buns.
- Brush the tops and sides of the risen buns generously with the egg wash, and sprinkle with the optional sesame seeds.
- Place in the center of the preheated oven and bake until the rolls are puffed and the tops are very pale golden brown (about 18 minutes). The center of each roll should be about 190°F when tested with an instant-read thermometer.
- Remove the rolls from the oven and allow to cool on the baking sheet until no longer hot to the touch before slicing and serving.
- Any leftover rolls can be sliced, cooled completely, then wrapped tightly in a freezer-safe bag (remove as much air from the bag as possible).
- Freeze for up to 2 months. Defrost in a toaster set to light toasting.
Notes
About the all purpose gluten free flour blend.
Your gf flour blend matters tremendously, especially in yeast bread applications. Please click through to the page linked in the recipe to learn all about the only gluten free flour blends I can recommend, and those I recommend against.
Optional gf flour and water variation:
Instead of 3 1/4 cups (455 g) all purpose gluten free flour, use 3 cups (420 g) all purpose gluten free flour and add 1/4 cup (36 g) Expandex modified tapioca starch and increase the water by 2 tablespoons (1 ounce) to 13 ounces (1 1/2 cups + 2 tablespoons) water.
About using active dry yeast.
If you use active dry yeast in place of instant yeast, you will need to soak it in some liquid from the recipe to activate it. Then, add it with the remaining liquid ingredients and proceed with the recipe otherwise as written.
Originally published on the blog in 2019. In 2022, resources and information added to the text.

Gluten Free Hawaiian Rolls
This recipe for soft and tender gluten free Hawaiian rolls makes the perfect gluten free bread for any occasion—for everything from dinner rolls to burger buns!
")
Why you'll love these gluten free Hawaiian rolls
The recipe for gluten free Hawaiian rolls from page 181 of Gluten-Free on a Shoestring Bakes Bread is just too good not to share. I've included everything you need to know about baking the best gluten free bread you've ever had, including how to make our gluten free bread flour.
This includes general shaping instructions for all the gluten free bread in the Bakes Bread book. It also includes specific instructions for shaping small, round rolls like these. Rolls like these are going to change the way you think about gluten free bread forever.
The instructions in the book for these Hawaiian Rolls are to make 12 dinner rolls, but these days I find myself making them into 8 full-size buns instead. They make the most delightful sandwiches!
I simply love the soft, tender crumb of the bread, and the way the outside browns just right. The dough can be handled more like “regular” bread dough. You might just think you'd reached for wheat flour!
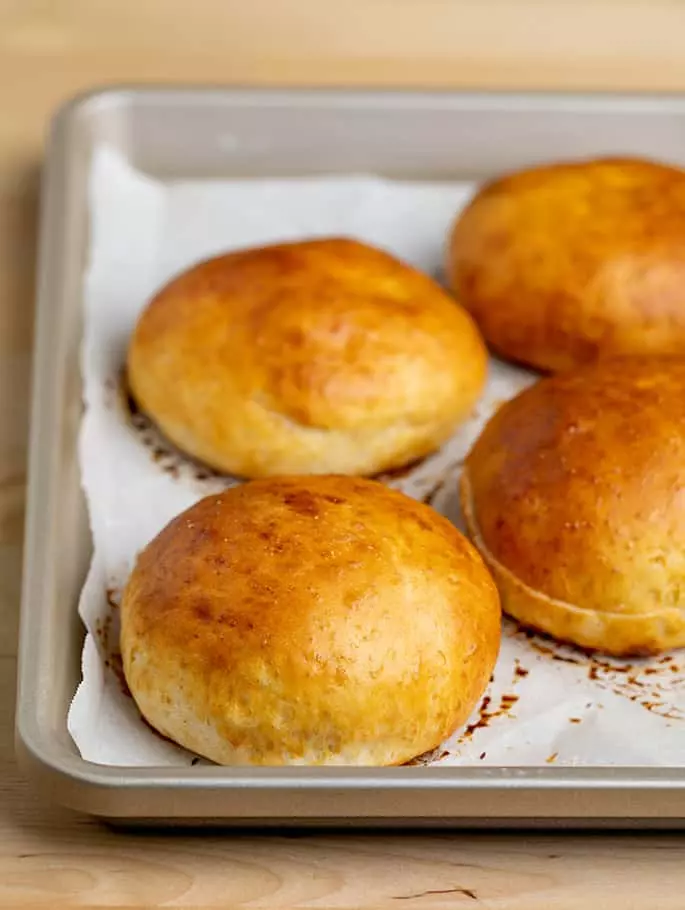
Gluten free Hawaiian rolls ingredients
I'm sharing two variations of this recipe: one made with our gluten free bread flour, and the other made with a combination of Better Batter (or our mock Better Batter blend) and additional tapioca starch/flour.
Gluten free bread flour blend
The recipe variation that uses our gluten free bread flour blend (a combination of Better Batter classic blend all purpose gluten free flour, Expandex modified tapioca starch, and whey protein isolate) is somewhat simpler, requires less liquid, less butter, and calls for a bit more yeast.
It necessarily involves dairy, though. That's just something to keep in mind as you choose the variation that best suits your needs.
Gluten free all purpose flour blend
The other gf Hawaiian rolls recipe variation relies on the addition of tapioca starch/flour, which helps add structure and chew to the rolls in a way that is usually unavailable without the use of gluten free bread flour. The best all purpose gluten free flour blend to use is Better Batter's classic blend, which already contains tapioca starch, but you must add the additional tapioca starch for the recipe to work properly.
Instant yeast
I like baking with instant yeast, which is also called “breadmaker's yeast” or “rapid rise yeast.” It's just like active dry yeast, but has less of a protective shell around the single-strain commercial yeast so it doesn't have to be soaked before adding it to the remaining bread dough ingredients.
If you'd like to replace the instant yeast with active dry yeast, you'll need 25% more yeast, by weight, and you must soak the yeast first in some liquid from the recipe, until it becomes foamy. Here, where the recipe calls for 6 grams of instant yeast, you'd need 7.5 grams active dry yeast (for 7 grams instant yeast, it would be 8.75 grams active dry yeast).
Sugar
The 1/4 cup of granulated sugar in this roll recipe aids in browning of the rolls, and adds tenderness, too. It's essential to the proper texture here.
Salt
Salt does a lot of important things in a yeast bread recipe! It helps retard the activity of the yeast, so it doesn't overproduce; it also adds flavor and balances the sweetness.
Kosher salt is the most common salt used in baking, as it is much more difficult to overmeasure than table salt, which is much more concentrated, by volume. You can also use lightly flaked sea salt.
Butter
Butter adds richness and aids in browning of your Hawaiian rolls. Don't skip it! For a dairy-free alternative, please scroll down to the ingredients and substitution section.
Pineapple juice
Hawaiian rolls get their telltale sweetness and flavor from pineapple juice in place of milk or water. You can buy pineapple juice in a can, or do what I usually do and drain the liquid from a can of pineapple slices in their own juice (not syrup!).
Vanilla extract
Since this is such a robust-flavored bread that is a bit on the sweet side, we add vanilla extract to enhance all of those lovely qualities.
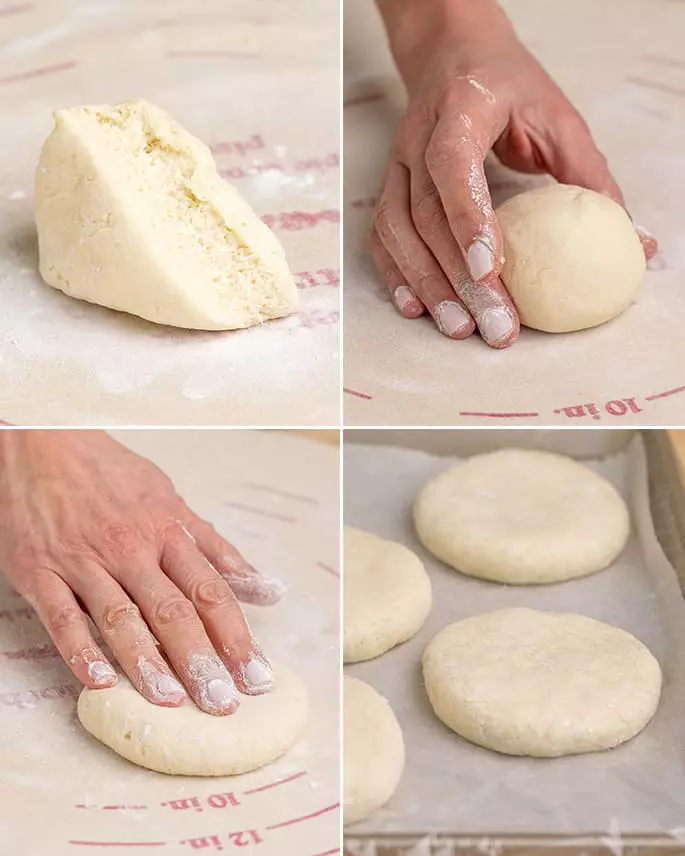
The tools you'll need for making gluten free Hawaiian bread
Food scale
For reliable baking reasults, always measure your ingredients (especially dry ingredients) by weight, not volume, whenever possible. The size of dry measuring cups is not standardized, and there is unavoidable human error that often causes overmeasuring of flour, no matter how experienced the baker.
You don't need a fancy digital food scale. Escali is a great brand that makes a scale that should cost around $15 U.S.
Stand mixer with dough hook (GF bread flour blend) or paddle attachment (AP GF flour blend)
For this recipe, you simply can't effectively mix your bread dough by hand, like you can with our gluten free artisan bread recipe. The raw dough isn't wet enough to allow that sort of margin of error.
For the gf bread flour recipe, you'll need an electric mixer with a dough hook (many handheld mixers also have dough hook attachments). For the all purpose gluten free flour blend variation, a paddle attachment is what you need. You might be able to use a food processor instead, but be very careful not to overprocess.
Bench scraper
One of the most useful tools in a baker's kitchen is a bench scraper, which is one of the many kitchen tools stolen from the carpenter's workbench. I simple metal bench scraper is ideal for folding the raw dough over on itself to smooth it out, and for dividing the dough into portions.
Proofing bucket
I use 2 liter Cambro brand proofing buckets for all of my bread dough. Whether I'm just letting the unshaped dough rest and absorb some of its moisture, and chill a bit for easier shaping, or giving the dough the time for a true first proofing, Cambro buckets seal tight like a drum.
Whenever you're letting yeast bread dough rise in the refrigerator, keep in mind that it must be sealed very, very well. Otherwise, the moisture in the dough that you've worked so hard to incorporate will evaporate into the dry air of the refrigerator, and it will struggle to rise.
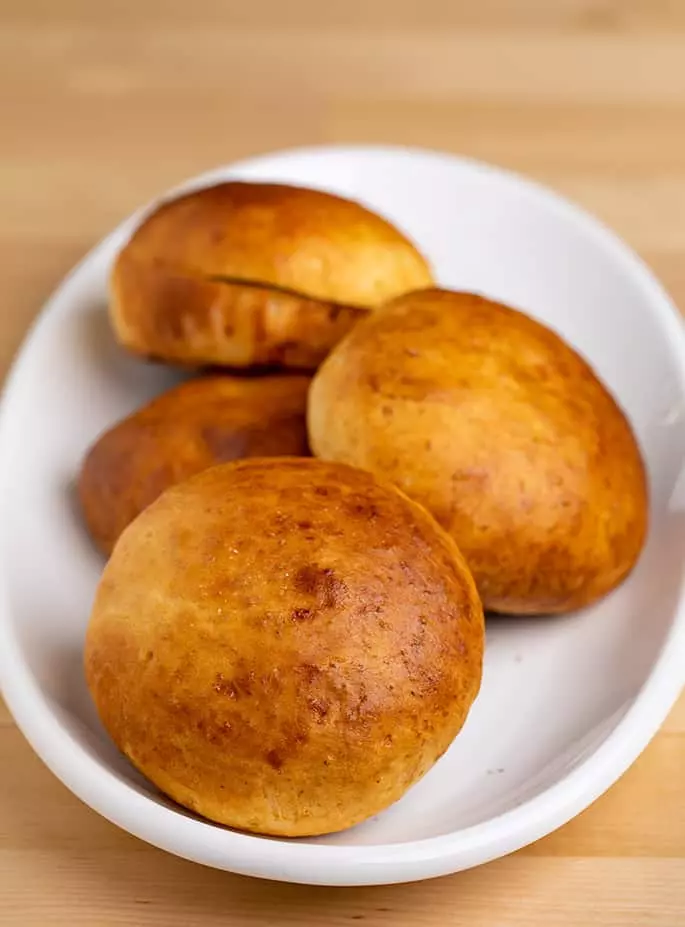
The best ways to serve gluten free Hawaiian rolls
I make these sweet gf Hawaiian rolls quite often for sandwiches (they make the best gf ham sandwich you've ever had!). To ensure that they rise evenly and not too high for stuffing with fillings, press each piece of raw dough into a flat disk.
You can also make these rolls into 10 or 12 portions, instead of 8, and roll them as we do our gluten free dinner rolls. Bake them crowded into a cast iron skillet or on a quarter sheet baking pan.
")
How to shape gluten free round rolls
The short video below shows the “scrape and fold” technique that I recommend using to shape my new style of gluten free bread dough. I can describe it with words, and I do in the recipe below. But there's nothing like seeing it for yourself.
General gf bread flour bread shaping tips
Always begin on a well-floured surface with floured hands. With the help of an oiled bench scraper, keep moving the dough as you shape it, particularly if it begins to stick to the surface or your hands.
The process of kneading the dough in this book will be done using the scrape-and-fold method. Scrape the dough off the floured surface with the bench scraper, then fold the dough over itself. Sprinkle the dough lightly with flour, scrape the dough up again, and fold it over itself again.
Repeat scraping and folding in this manner until the dough has become smoother. Keep the outside of the dough and the surface covered in a light coating of flour as you shape the dough. Handle the dough with a light touch to avoid kneading the flour into the dough, which might dry it out and result in a tight, unpleasant crumb.
A light touch is the key. Repeat that to yourself as a mantra as you first learn to shape this bread dough. It’s the most important rule in shaping. More technique, less muscle.
You’ll notice that the recipes do not include instructions to allow dough that has been rising in the refrigerator to come to room temperature before shaping. Always begin with cold dough when shaping the dough in this book. It is much easier to shape.
Shaping small round gluten free bread flour rolls
If you have previous experience shaping conventional yeast bread dough, all of that will come in quite handy here. This dough is not at all like the batter-style gluten free yeast bread dough. That dough can be shaped into rounds, but you must work with wet mounds of dough that looked more like cookie dough than bread dough.
On a well-floured surface, flatten the dough into a disk, then pull the edges toward the center of the disk and secure the edges together by pressing them between your thumb and forefinger. Turn the dough over so that the gathered edges are on the bottom and cup your whole hands around the dough, to coax it into a round shape.
Place the round of dough on a lightly floured surface and cup only one palm around the dough with the side of your hand resting on the counter (the side of your hand nearest your pinkie). Maintaining contact between the side of your hand and the surface, begin to move your hand in a circular motion while gently coaxing the edges of the dough upward (toward the top of the round) with the tips of your fingers.
To shape the dough made with our gluten free bread flour into rounds, be sure to work quickly, and use a light touch. If you have previous experience shaping conventional yeast bread dough, all of that will come in quite handy here.
")
Tips for proofing rise of gluten free Hawaiian roll dough
Whether you're using the bread flour recipe or the all purpose gluten free flour recipe, this is an enriched dough, meaning it has butter and milk in it. For that reason, you don't want too much yeast development which will flavor the bread and cause a more unpredictable, less controlled oven rise.
An extended first cold rise will result in rolls that have absorbed much of the moisture in the recipe, and are easier to handle and shape.
If the dough begins to “dimple,” it's beginning to overproof, or rise too much. Be sure you get it right into the oven, then. You want a nice, smooth rise.
These rolls you see above weren't topped with an egg wash before baking. The tops will still brown, but won't shine. If you prefer a shininess to the top, add the egg wash!
Remember that good yeast bread takes time. This is not because it's gluten free. It's just the nature of yeast development.
")
More tips for making gluten free Hawaiian rolls
Weigh your GF Hawaiian rolls for consistent baking
For the most beautiful presentation, make rolls that are precisely the same size as one another. Simply weigh your dough after its first refrigerator rise, before dividing and shaping it, and divide the total number of grams by the number of rolls you're making.
So if your dough weighs 950 grams total, if you're planning to make 10 rolls, they'd be 95 grams each. You can pull off pieces of dough and weigh them individually before shaping, or divide by sight, and weigh each piece and correct as necessary.
")
Gluten free Hawaiian rolls substitutions
Dairy free, gluten free Hawaiian rolls
The butter in these rolls can easily be replaced with vegan butter. The real issue is the whey protein isolate in the gluten free bread flour. That absolutely requires dairy for the dough to behave as you see here.
The only dairy in the all purpose gluten free flour/tapioca starch flour recipe is the butter, though. So if you can't have dairy, use our vegan butter replacement for dairy butter, and your gf Hawaiian rolls will be safely dairy free!
You can also try our gluten free hamburger buns with the dairy-free substitution instructions included right above the recipe card.
Egg free, gluten free Hawaiian rolls
These rolls contain only one egg in the dough, and one egg in an optional egg wash. If you can't have eggs, eliminate the egg wash entirely, or replace it with some cream.
In place of the egg in the bread dough, you can try using a “chia egg.” Just place 1 tablespoon ground white chia seeds in a small bowl, add 1 tablespoon lukewarm water, mix and allow to gel.
Vegan gluten free Hawaiian rolls
If you use the dairy free and egg free ingredient suggestions above, and are mindful about how the sugar you use is refined, you will have made vegan gluten free Hawaiian rolls!
")
FAQs
If you'd like a more general education on how to make gluten free bread, please have a look at that post. Here are some frequently asked questions about Hawaiian rolls in particular:
Are Hawaiian rolls gluten free?
No! Unless you're using a gluten free recipe, Hawaiian rolls are made with conventional wheat flour and are not gluten free. That's why you need our recipe. :)
Are King's Hawaiian rolls gluten free?
Sadly, no. King's brand does not make gluten free Hawaiian rolls. Again, we've got you covered here!
What do gluten free Hawaiian rolls taste like?
Hawaiian rolls taste incredibly tender, with a dense but pillow-soft crumb. Don't forget about that beautiful, deep brown but super soft crust!
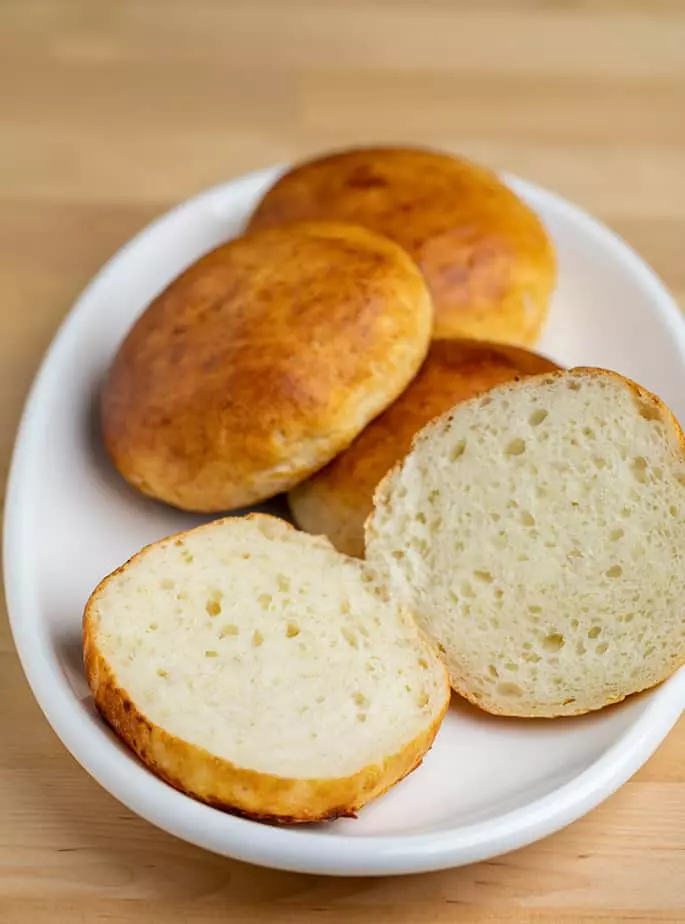
What's the best gf flour for this gluten free Hawaiian bread recipe?
I enjoy both variations of this gluten free Hawaiian roll recipe, so it's hard for me to choose between the gluten free bread flour one and the one made with Better Batter and tapioca starch/flour. Make them both and you decide!
Why did my Hawaiian gluten free bread come out so dense?
If your rolls came out dense, there are a few possible reasons. As yourself:
- Did you make any ingredient substitutions, particularly the gf flour blend and did you measure your ingredients by weight?
- Was your instant yeast active? Were your ingredients at the temperature specified in the ingredients list?
- Did you allow your rolls enough time time rise, and then bake them in a hot oven, as directed?
- Did you add more gf flour for shaping than is truly necessary? Incorporating too much flour during shaping is a very common mistake, and it lowers the hydration ratio which inhibits yeast production.
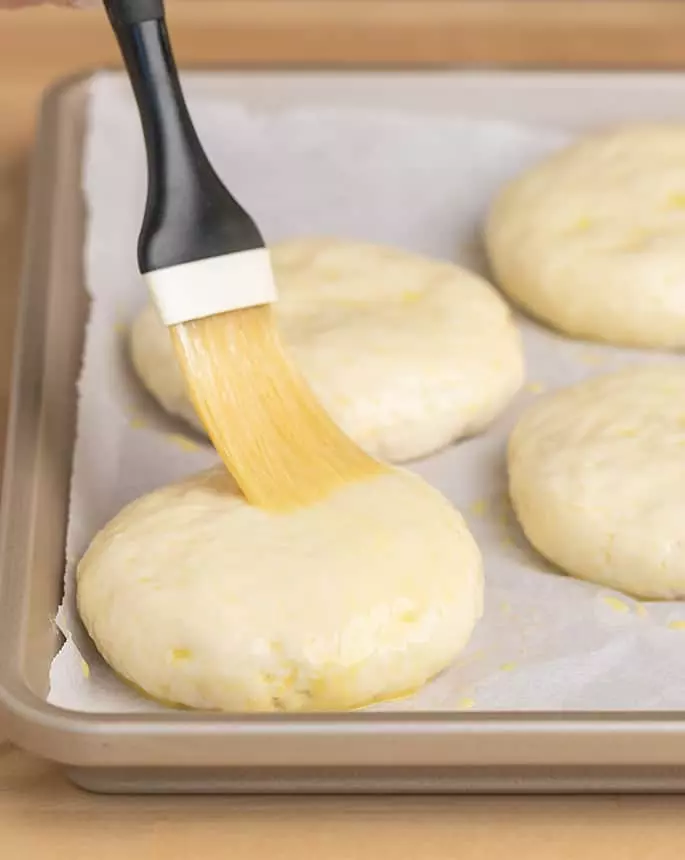
Can I freeze this gluten free sweet bread?
Yes! These rolls freeze so well. Just let them cool completely, then slice them in half horizontally, wrap them tightly in a freezer safe bag or wrap, and freeze.
To refresh previously frozen rolls, let them thaw at room temperature or in the microwave at low power, sprinkle with some water, and refresh in a 300°F oven or toaster oven. Good as new!
How to make delicious gluten free Hawaiian rolls, step by step
Gluten Free Hawaiian Rolls | with bread shaping videos
Super soft, lightly sweet gluten free Hawaiian rolls are highly enriched, impossibly tender rolls with the most tender crumb. Use them as sandwich rolls, or just enjoy a toasted roll with butter.
Yield: 8 bun-size rolls
Equipment
- Stand mixer with dough hook (gf bread flour) or paddle attachment (all purpose gf flour)
Ingredients
For Hawaiian rolls with gf bread flour
- 3 cups (420 g) Gluten Free Bread Flour blend (please click through for full details; you must use this blend)
- 2 teaspoons (6 g) instant yeast
- ¼ cup (50 g) granulated sugar
- 1 teaspoon (6 g) kosher salt
- 4 tablespoons (56 g) unsalted butter at room temperature
- 1 (50 g (weighed out of shell)) egg at room temperature, beaten
- 17 tablespoons (8.5 fluid ounces) pineapple juice at room temperature (1 cup + 1 tablespoon)
- 1 teaspoon vanilla extract
- Egg wash 1 large egg, at room temperature, beaten with 1 tablespoon water
For Hawaiian rolls with AP gf flour
- 2.5 cups (350 g) all purpose gluten free flour blend I used and highly recommend Better Batter here
- 1 teaspoon xanthan gum omit if your blend already contains it
- ½ cup (60 g) tapioca starch/flour plus more for sprinkling
- 2 ⅓ teaspoons (7 g) instant yeast
- ¼ cup (50 g) granulated sugar
- 1 teaspoon kosher salt
- 5 tablespoons (70 g) unsalted butter softened
- 1 egg (50 g (weighed out of shell)) at room temperature
- 1 ¼ cups (10 fluid ounces) pineapple juice at room temperature
- 1 teaspoon vanilla extract
- Egg wash 1 large egg, at room temperature, beaten with 1 tablespoon water
Instructions
Make the bread dough.
- Place the flours (gf bread flour OR all purpose gluten free flour blend, xanthan gum, and tapioca starch/flour), yeast, and sugar in the bowl of your stand mixer, and use a handheld whisk to combine well. Add the salt, and whisk to combine.
- Add the butter, egg, pineapple juice, and vanilla, and mix on low speed (with the dough hook for the bread flour blend or the paddle attachment otherwise) until combined. Raise the mixer speed to medium and knead (or beat) for about 5 minutes.
- The dough will be quite sticky, but should be smooth and stretchy. For the all purpose gluten free flour blend variation, continue to beat the batter with the paddle attachment until it begins to take on a whipped appearance.
- Spray a silicone spatula lightly with cooking oil spray, and scrape down the sides of the bowl.
- Transfer the dough to a lightly oiled bowl or proofing bucket large enough for the dough to rise to double its size, and cover with an oiled piece of plastic wrap (or the oiled top of your proofing bucket).
- Place the dough in the refrigerator for at least 12 hours and up to 3 days.
Shape the rolls.
- On baking day, line a rimmed baking sheet and set it aside. Remove the dough from the refrigerator and turn it out onto a lightly floured surface. Knead until smoother as described in the General Shaping Tips below (See Recipe Notes).
- With a floured bench scraper, divide the dough into 8 pieces of equal size. Shape one piece into a round by following the Directions for Shaping Small, Round Rolls below (See Recipe Notes).
- Place the first roll in the prepared baking pan. Repeat with the remaining pieces of dough, placing the rolls less than an inch apart from one another.
Let the shaped rolls rise.
- Cover the baking pan with oiled plastic wrap and set it aside in a warm, draft-free location to rise for 30 minutes.
- Uncover the pan and brush the rolls generously with the egg wash. Allow the rolls to finish rising, uncovered, until nearly doubled in size, about 20 minutes more. If the rolls begin to take on a dimpled appearance, they have begun to overproof.
To bake the rolls.
- About 20 minutes before the rolls have completed their final rise, preheat your oven (to 350°F for the bread flour dough and 375°F for the all purpose gf flour dough).
- Place the baking pan on the lower rack of the preheated oven and bake until lightly golden brown, and the inside of the rolls registers about 185°F on an instant-read thermometer (about 20 minutes for bread flour; 25 minutes for the other variation).
- To maintain the softest rolls, cover the hot rolls, just out of the oven, loosely with a tea towel. Allow the rolls to cool briefly before slicing and serving.
- Once completely cool, leftover rolls can be wrapped tightly in freezer-safe wrap and frozen for up to 4 months. Defrost at room temperature, sprinkle lightly with water, and refresh in the microwave or a toaster oven.
Notes
General gluten free bread flour bread shaping tips.
Unless otherwise noted, always begin on a well-floured surface with floured hands. With the help of an oiled bench scraper, keep moving the dough as you shape it, particularly if it begins to stick to the surface or your hands. The process of kneading the dough in this book will be done using the scrape-and-fold method.
Scrape the dough off the floured surface with the bench scraper, then fold the dough over itself. Sprinkle the dough lightly with flour, scrape the dough up again, and fold it over itself again. Repeat scraping and folding in this manner until the dough has become smoother.
Keep the outside of the dough and the surface covered in a light coating of flour as you shape the dough. Handle the dough with a light touch to avoid kneading the flour into the dough, which might dry it out and result in a tight, unpleasant crumb.
A light touch is the key. Repeat that to yourself as a mantra as you first learn to shape this bread dough. It’s the most important rule in shaping. More technique, less muscle.
You’ll notice that the recipes do not include instructions to allow dough that has been rising in the refrigerator to come to room temperature before shaping. Always begin with cold dough when shaping the dough in this book. It is much easier to shape.
How to shape small gluten free round rolls.
On a well-floured surface, flatten the dough into a disk, then pull the edges toward the center of the disk and secure the edges together by pressing them between your thumb and forefinger.
Turn the dough over so that the gathered edges are on the bottom and cup your whole hands around the dough, to coax it into a round shape.
Place the round of dough on a lightly floured surface and cup only one palm around the dough with the side of your hand resting on the counter (the side of your hand nearest your pinkie).
Maintaining contact between the side of your hand and the surface, begin to move your hand in a circular motion while gently coaxing the edges of the dough upward (toward the top of the round) with the tips of your fingers.
GF Hawaiian rolls bread flour blend recipe from the book Gluten-Free on a Shoestring Bakes Bread: Biscuits, Bagels, Buns, and More by Nicole Hunn. Excerpted by arrangement with Da Capo Lifelong, a member of the Perseus Books Group. Copyright © 2013.
Blog recipe revised in 2019, and again in 2022 (added variation without gluten free bread flour, including photos and video).
Nutrition information is approximate and for the all purpose gluten free flour blend version only, not the bread flour blend version.
Nutrition
Calories: 344kcal | Carbohydrates: 54g | Protein: 7g | Fat: 10g | Saturated Fat: 5g | Polyunsaturated Fat: 1g | Monounsaturated Fat: 3g | Trans Fat: 0.3g | Cholesterol: 132mg | Sodium: 361mg | Potassium: 128mg | Fiber: 3g | Sugar: 10g | Vitamin A: 385IU | Vitamin C: 4mg | Calcium: 25mg | Iron: 1mg